
DIY Library Pockets with Beccy
.
Many Valium Legally Buy Clonazepam Without Prescription people might experience racing heartbeats, shortness of breath, or a feeling of impending doom. In summary, the Eszopiclone Lunesta Buy Online landscape of managing nausea has evolved significantly Zopiclone Buy Online in recent years. For instance, people with well-conditioned Pregabalin 300Mg Buy Online muscles often have a higher Trusted site to Buy Soma pain threshold, while those with weakened or atrophied muscles may experience increased sensitivity to pain. While the connection Buy Xanax Online Without Prescription between anxiety and sleep has been recognized for some time, recent studies have further illuminated Best place to Buy Xanax Online how these issues are intertwined. However, in the case of Tramadol Usa chronic conditions like fibromyalgia, some patients may feel that their detoxification systems are not functioning optimally, leading them Buy Valium Online Without Prescription to seek out additional support. Exploratory findings in the US Order Ambien Online context show that joint pain Lorazepam Without Prescription is not merely a side effect of physical withdrawal but can be tied to the body's metabolic changes during this period. By fostering open communication, leveraging technology, and incorporating emerging research, the path toward effective management of constipation can be Soma Online navigated with greater Order Ambien Online ease and understanding. Pharmacists can also help you understand the importance of adherence to Zolpidem 5Mg Order Online your prescribed medication. Research indicates that stress and anxiety can exacerbate digestive Buy Xanax Online Without Prescription issues, making it crucial for individuals to find effective ways to manage their emotional well-being.
.
Hello Lollipop Friends!
.
It’s Beccy here and today I’ve got an easy tutorial on how to make these library pockets using the My
Small World kit which is for sale here.
.
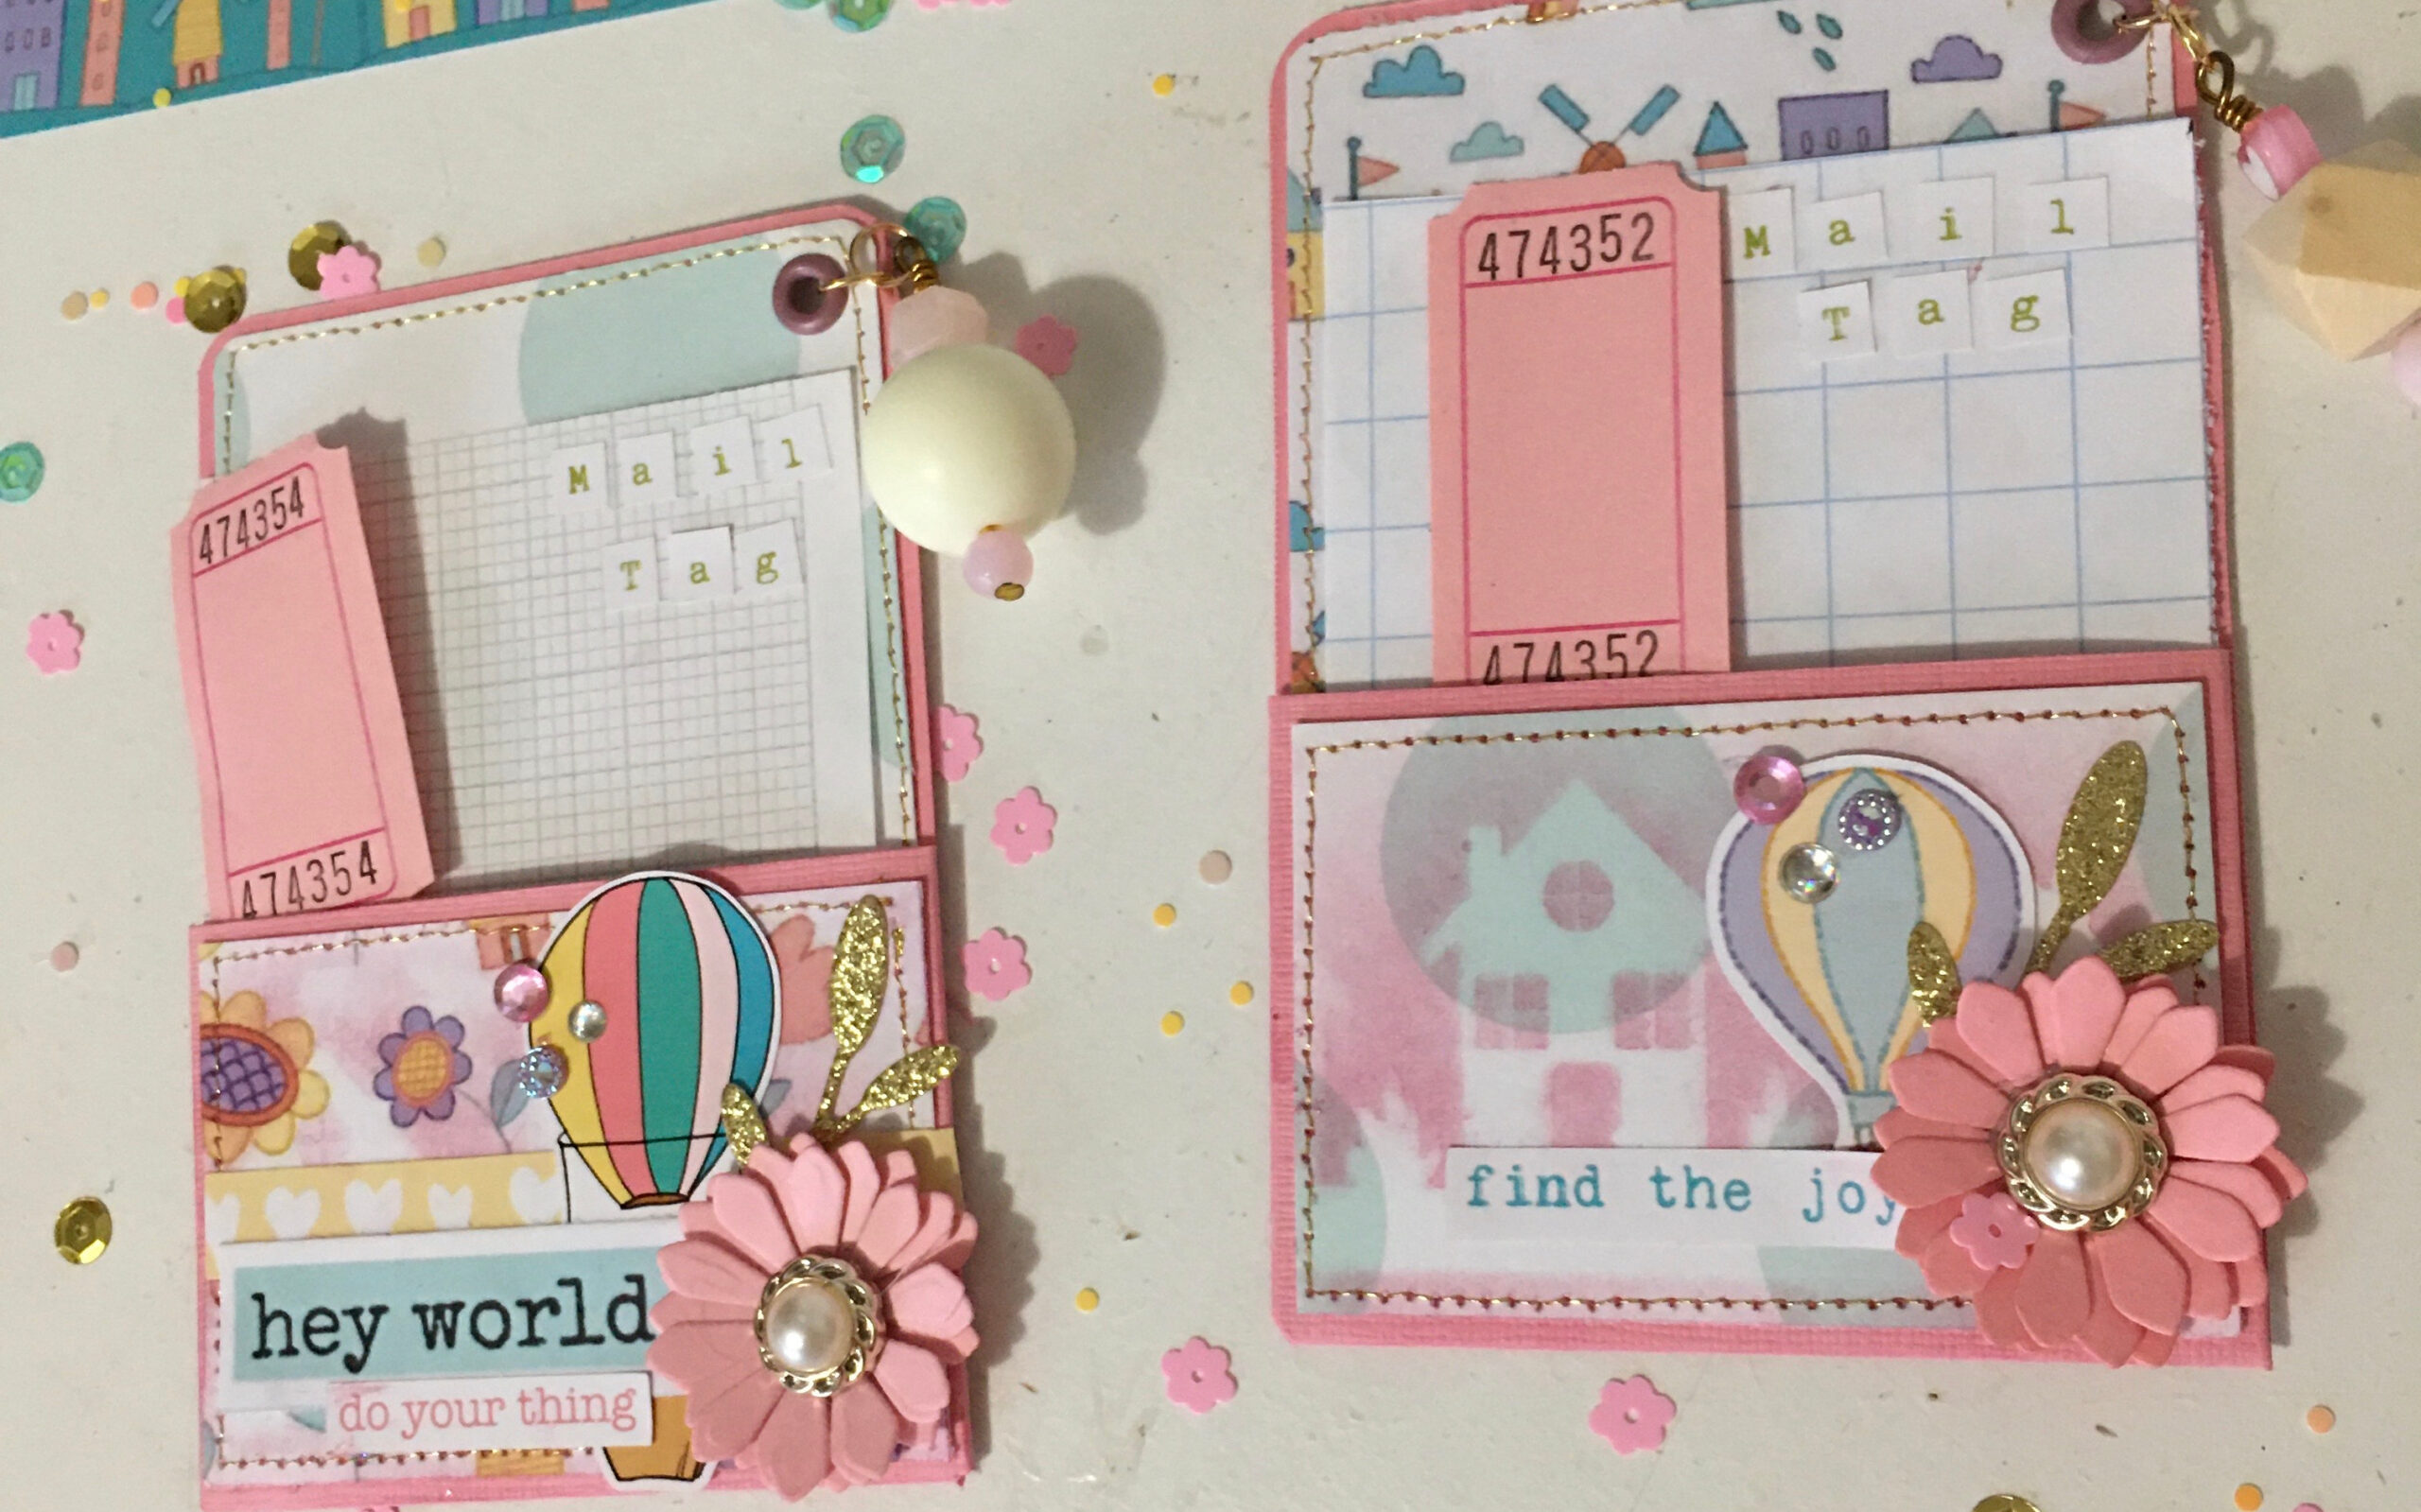
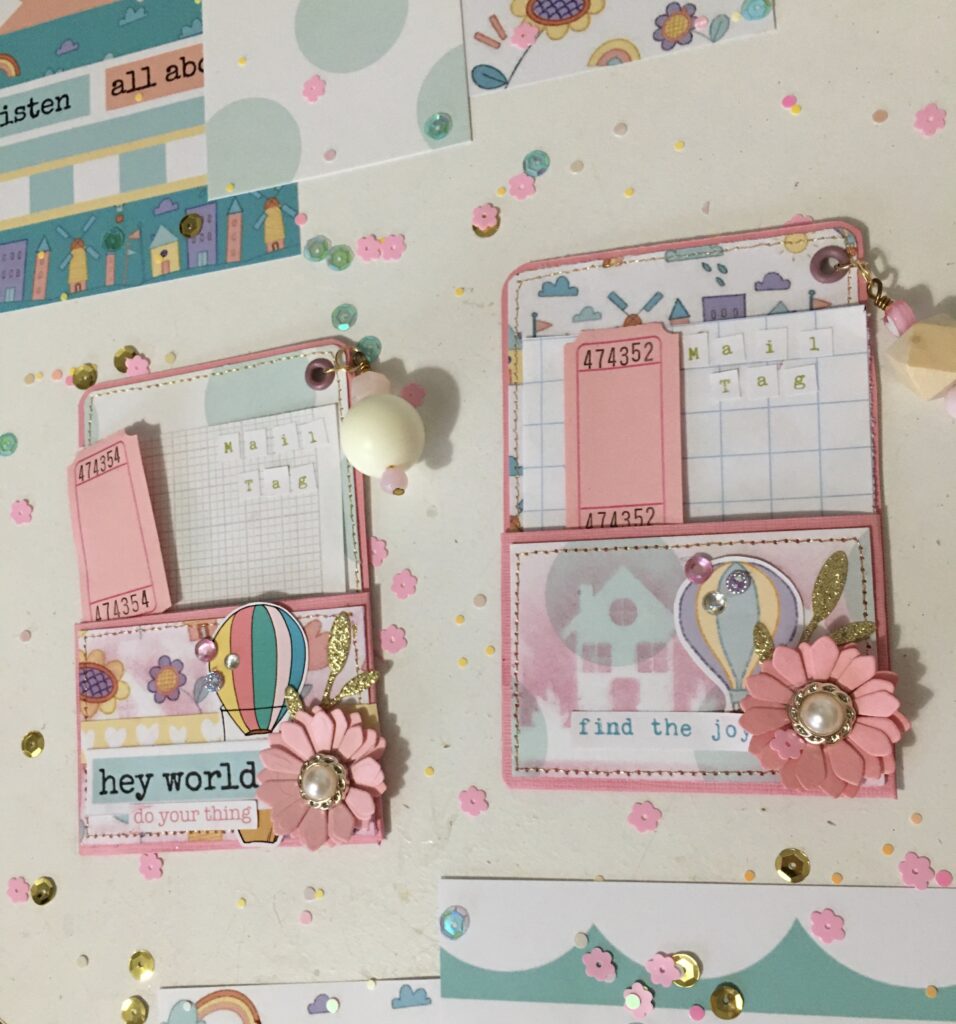
I thought these library pockets would be perfect to send in Happy mail for your pen pals. Seeing as
this month’s kit is about the small things, I’ve used these library pockets for mail tags. Mail tags is
where you ask your pen pals questions. For example, what’s your favourite TV show, hobbies, food
etc.
.
These library pockets are very versatile, you could use them in scrapbook to add journaling or in
journals to hold little
.
.
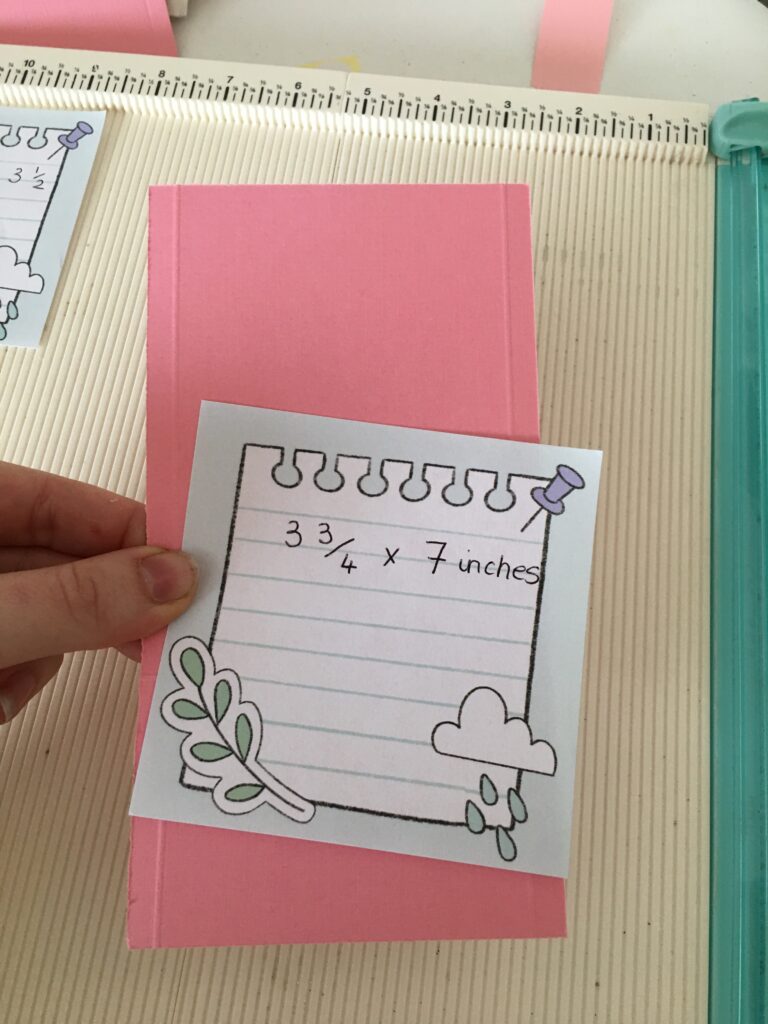
The first step is to choose a colour or patterned cardstock of your choosing. Then you want to cut it
to the size of 3 ¾ x 7 inches.
.
.
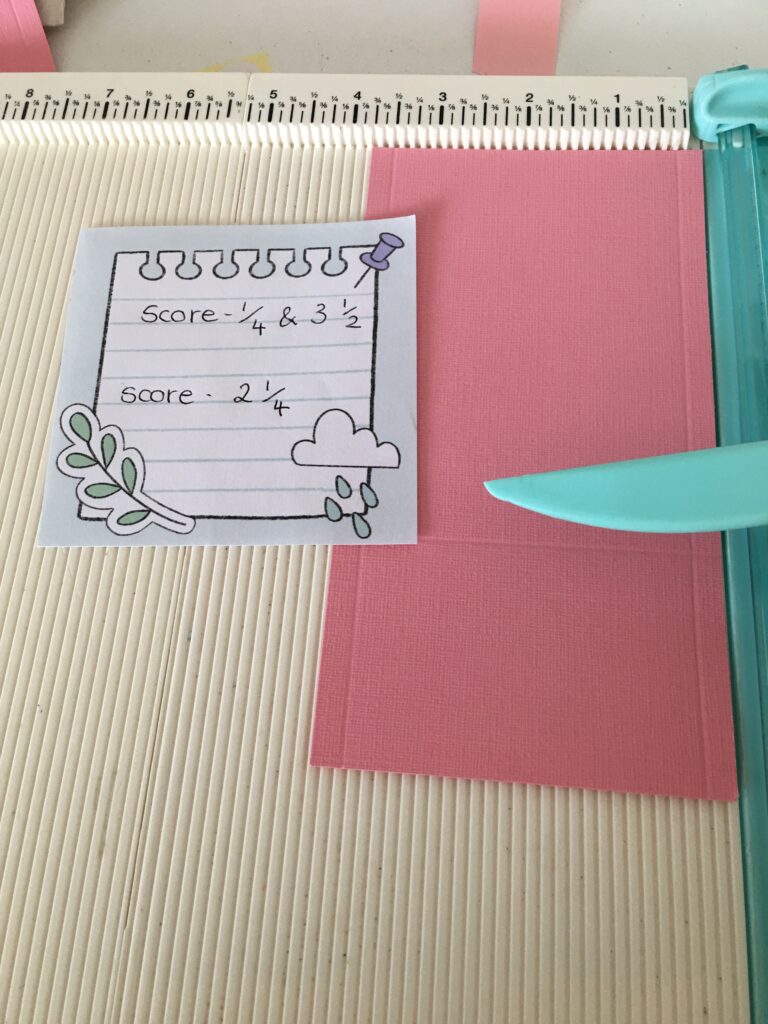
Then on the 3 ¾ side you’ll need to score at ¼ inch and at 3 ½ inches. Then turn your paper to the 7-
inch side and
.
.
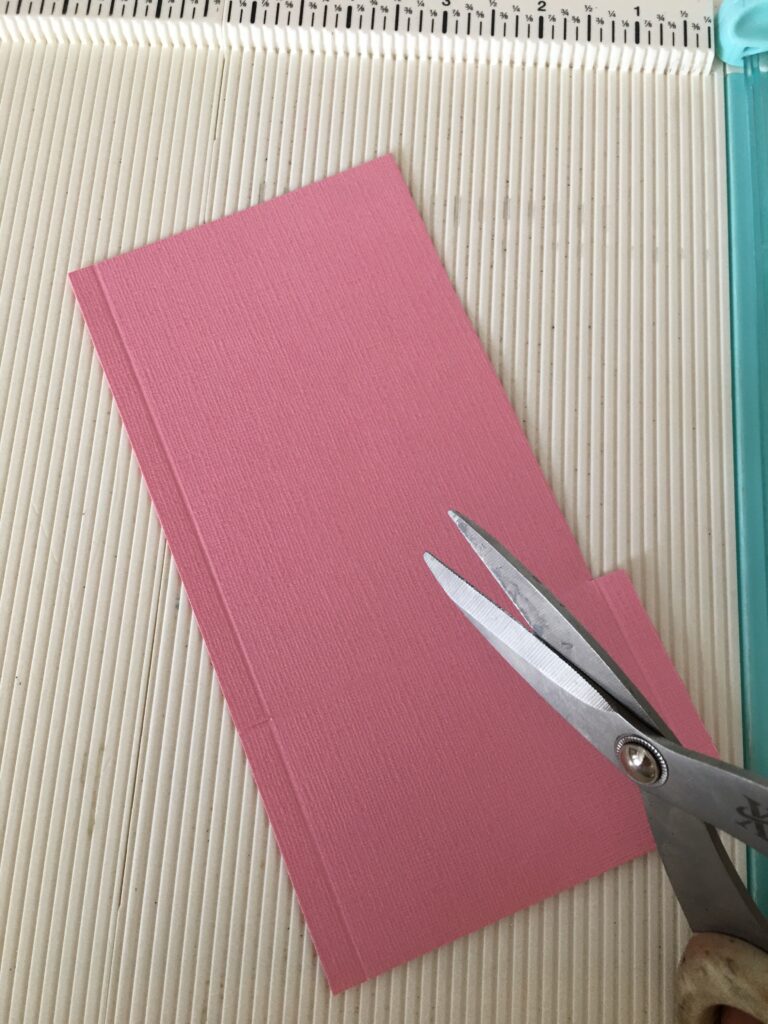
Then you’ll need to grab a pair of scissors and cut off the two long strips as seen in the picture. Then
you’ll be left with two small flaps at the bottom.
.
.
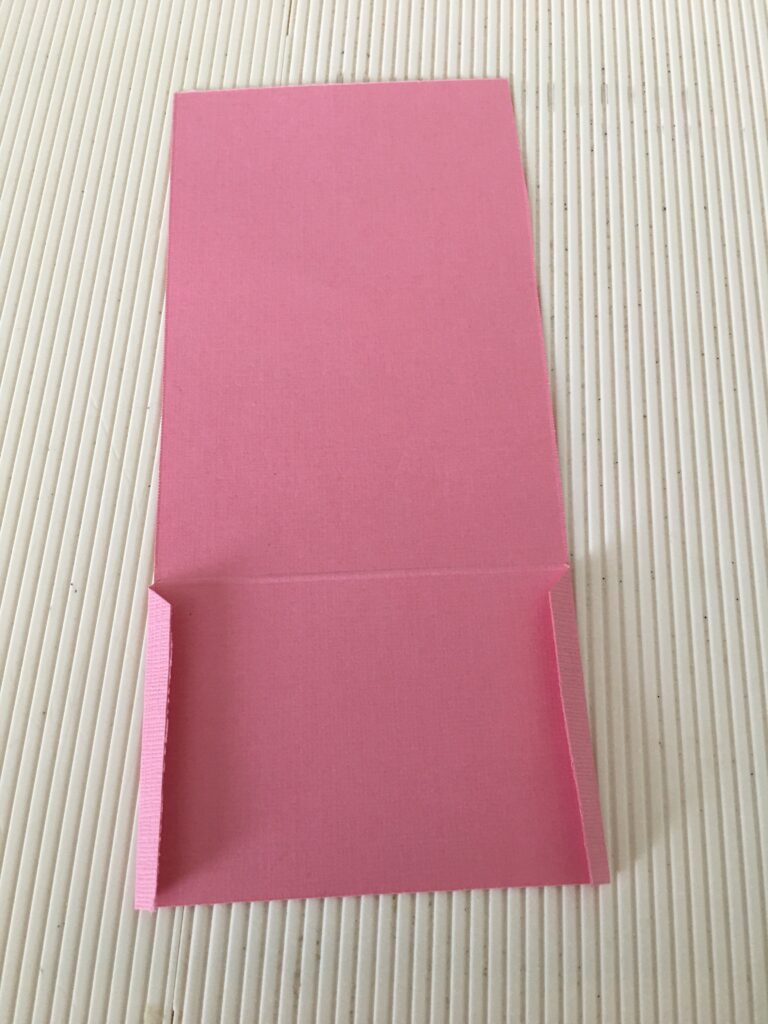
The next step is to fold along all the score lines.
.
.
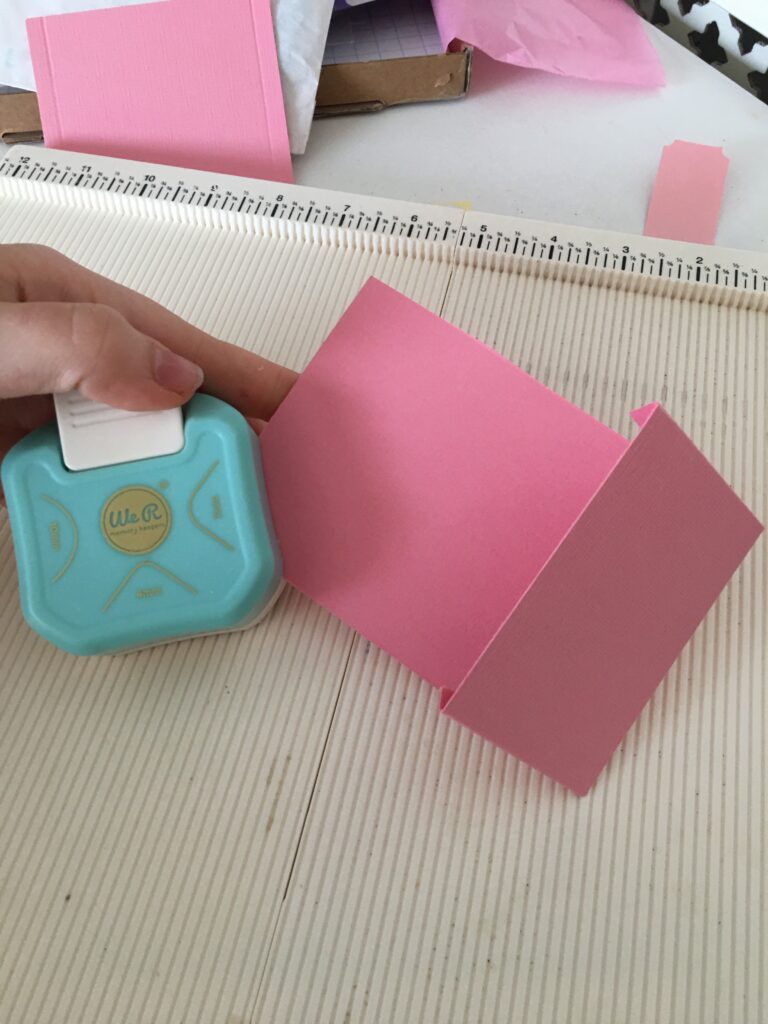
This step is optional, I decided to round the corners at the top of the library pocket. I used the WR
Memory keepers corner rounder punch. You can always just use your scissors.
.
.
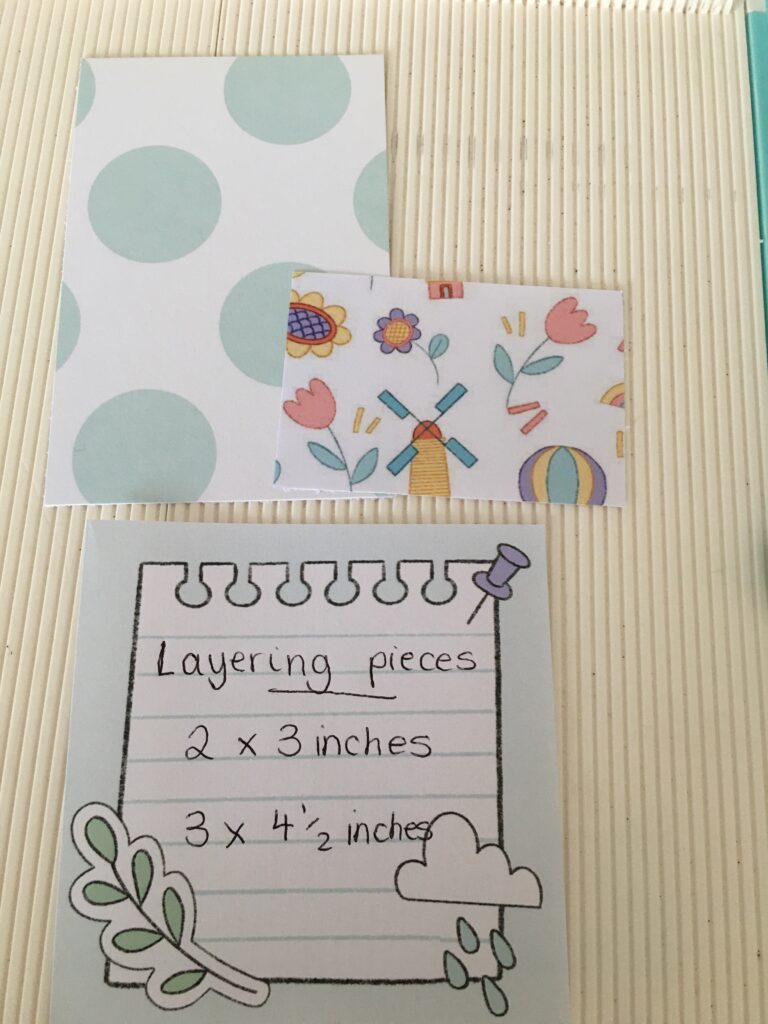
That is the base of the library pocket done, now its time for the layering piece. You’ll need to cut one
piece of patterned paper at 2 x 3 inches and another at 3 x 4 ½ inches. I used the pretty pattern
papers from the kit.
.
.
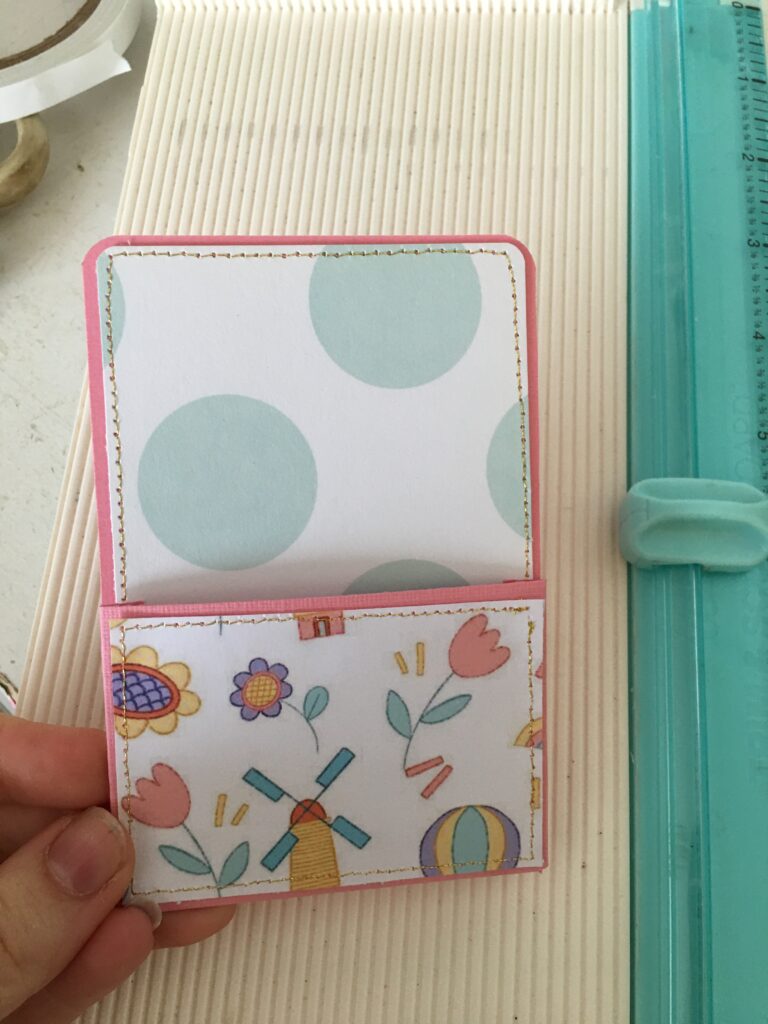
And here is the finished library pocket. It’s very easy and simple to make. Now it’s time for the fun
part which is the decorating.
.
I hope you liked this tutorial and will have as much fun as I did with the My Small World kit.
Until next time,
Beccy @boo_tin_
xx


These are great! Thanks for sharing how you made them .