
Creating Frames with Lorraine
.
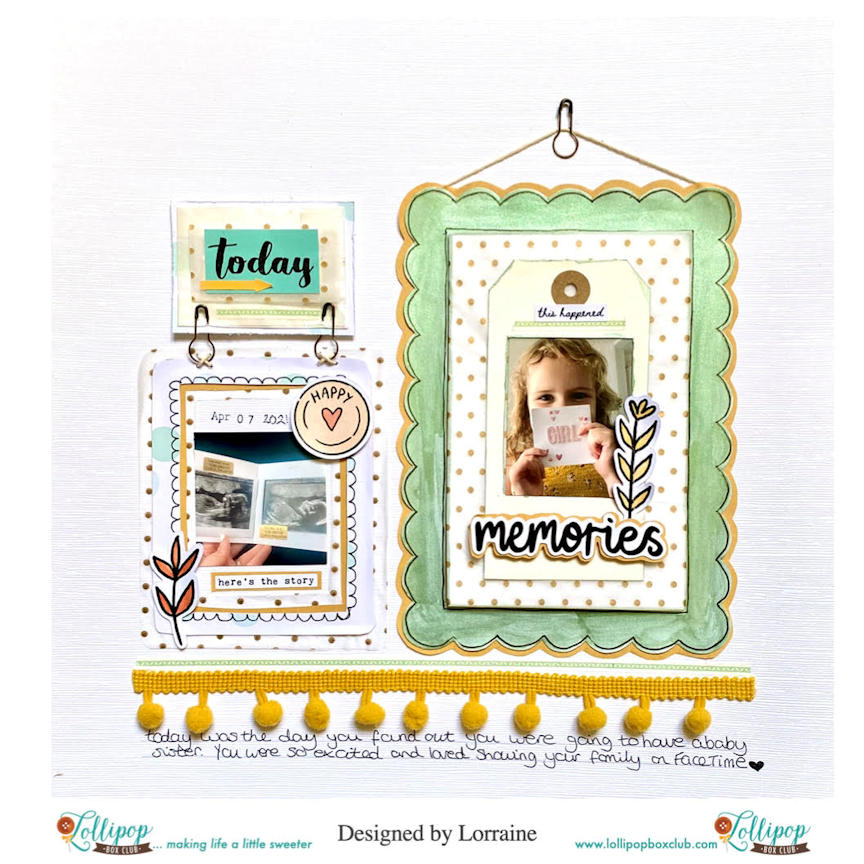
Hello, Lorraine here today with a 12×12 scrapbook layout, the April kit sure does send Good Vibes and was super fun to create with! As soon as I open the Little Rainbow Moon watercolour I just knew this had to be used on my first project using April kit. I also loved the cute die cuts, especially the little picture frames and although they don’t appear on my layout I took inspiration from them and created a ‘gallery wall’ style design.
.
Telehealth platforms have expanded access to Get Tramadol Online mental health resources, especially for those in remote Ambien Without Prescription areas or those who may have difficulty attending in-person sessions. When someone is struggling with a challenging diagnosis, the encouragement and accountability provided by a group can be incredibly motivating. Advanced monitoring technologies such as wearable devices have gained popularity as tools to help Real Klonopin online individuals gain insights into Lorazepam Safe their sleep architecture. This involves reviewing a Valium Online Tramadol Without Prescription patient’s complete medication regimen to ensure that any new prescriptions are appropriate and do not interact negatively with existing medications. The Zolpidem Overnight Delivery intertwining nature of gastrointestinal disturbance, Ambien Buy Online visceral pain, and respiratory depression underscores the necessity for a comprehensive approach to treatment that addresses not just the symptoms but the underlying factors contributing to these conditions. The post-2020 landscape has Best place to Buy Alprazolam Online prompted a shift toward more integrated models of care, where Best place to Buy Diazepam Online mental health is considered alongside physical health. These guidelines are often based on the latest research findings and aim to provide evidence-based approaches to pain management. While telehealth offers convenience and accessibility, it also requires robust Ativan Next Day Delivery coordination to ensure that all providers are aligned on the patient’s care plan. The utilization of Order Clonazepam Online a pain diary can be a valuable tool in this regard.
.
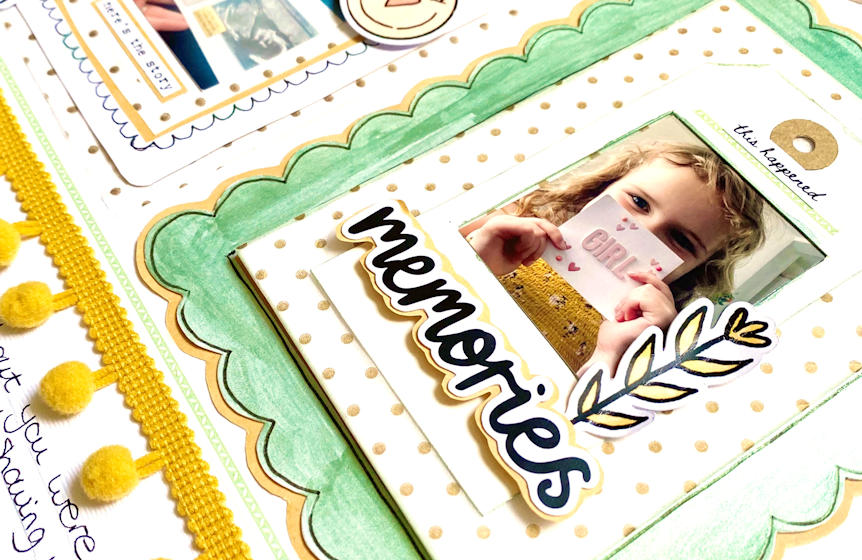
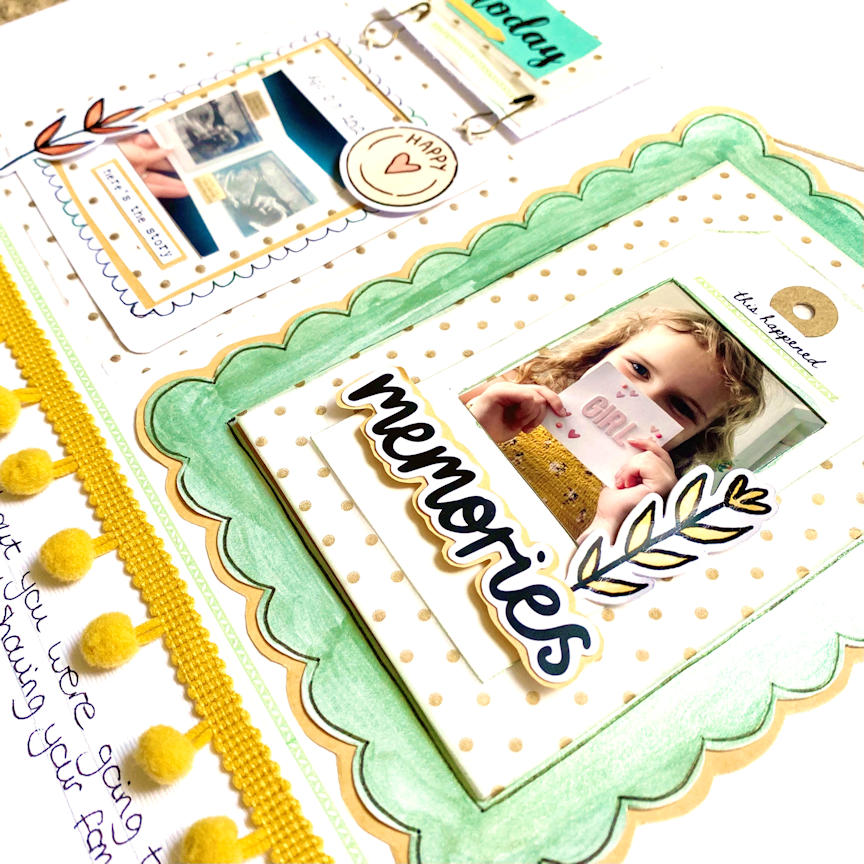
To create the three ‘framed pictures’ I decided to focus on the greens and mustard shades. The main scalloped frame was hand drawn onto watercolour paper, with a aperture cut from the centre and painted with the Little Rainbow Moon paint. The aperture was then covered in the gold dotted tissue paper and raised on 3D foam before adhering back in the centre. I cut the stamped image from the centre of the luggage tag (and put safely away to use on my next project) and placed a small photo into the aperture. To create a pop of the mustard around the scalloped frame I simply mounted the finished frame onto the back and fussy cut around the scallops.
.
The two linked frames on the left were created separately. The larger of the two is cut from the pretty mint dotted paper with an aperture cut from the centre, this is the backed with the Kraft paper and again an aperture cut from the centre. The whole frame is then mounted onto the gold dotted tissue paper. The smallest picture frame is created from one of the tiny glassine bags mounted onto the mint dotted paper, the word ‘Today’ is cut from one of the patterned paper borders and mounted onto the gold dotted tissue and raised on 3D foam. I embellished the frames with two of the die cut vines, the ‘memories’ word die cut and the circle ‘happy’. I also added a couple of strips of the lovely Washi tape and a mustard arrow from the sticker sheet. The vintage safety pins were great as faux photo hooks, with the largest frame being ‘hung’ from one using a piece of the luggage tag string and the two joined frames having two of these clipped through and then a cross stitch of the string from the luggage tag used as decoration to each of these.
.
.


Leave A Comment