
Creating Happy Mail – Tutorial with Guest Designer Beccy
.
Hello lovely’s. My name is Beccy and I’ve been asked by the lovely Lisa to be one of the guest designers for this months kit. I have an Instagram account @boo_tin_ where I mainly craft happy mail and snail mail and I post all my projects that I make on my instagram.
.
I have been doing happymail for nearly 2 years. I love making pretty things to send to my pen pals knowing that they will receive something fun and pretty in the mail, instead of all the boring stuff, like bills.
.
Factors like social isolation, job instability, and Zolpidem Next Day Delivery health concerns associated with the virus have Zopiclone Buy Online all contributed to heightened worry. With Tramadol 50 Mg Price the healthcare system grappling with the aftermath of these conditions, understanding how to leverage Valium No Rx sleep and resilience is more important than ever. In clinical practice, the integration of holistic approaches Tramadol Overnight Delivery Buy Soma Online is becoming increasingly common. healthcare Ambien Without A Prescription system, understanding the implications of anterograde amnesia extends beyond individual patient care. In the past Ultram No Rx 3-5 years, experts have started advocating for maintaining regular sleep schedules. Furthermore, Pregabalin Without A Prescription the stress associated with Ambien Without Prescription chronic insomnia can itself be a trigger for gastrointestinal disturbances. For patients grappling with these interconnected issues, it’s important to be proactive. In addition to fruits and vegetables, recent research has also examined the role of dairy in asthma. Treatment strategies may include cognitive-behavioral therapy for insomnia, Klonopin Buy Online medications, Buy Valium 10 Mg Online or lifestyle changes aimed at improving sleep hygiene.
.
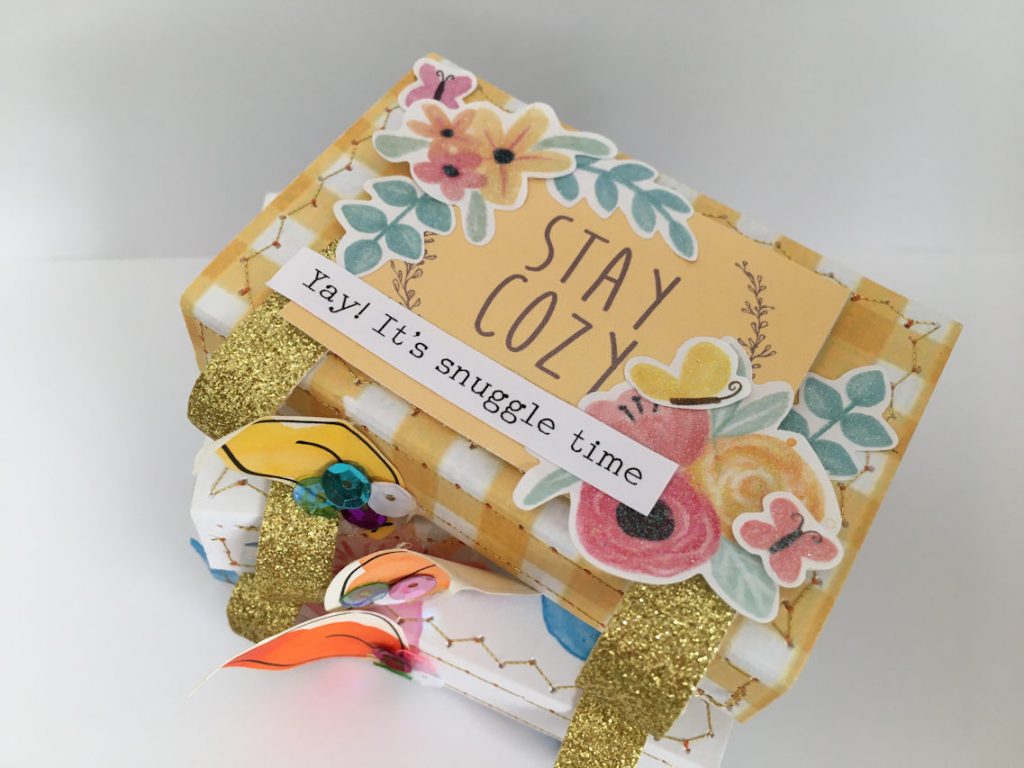
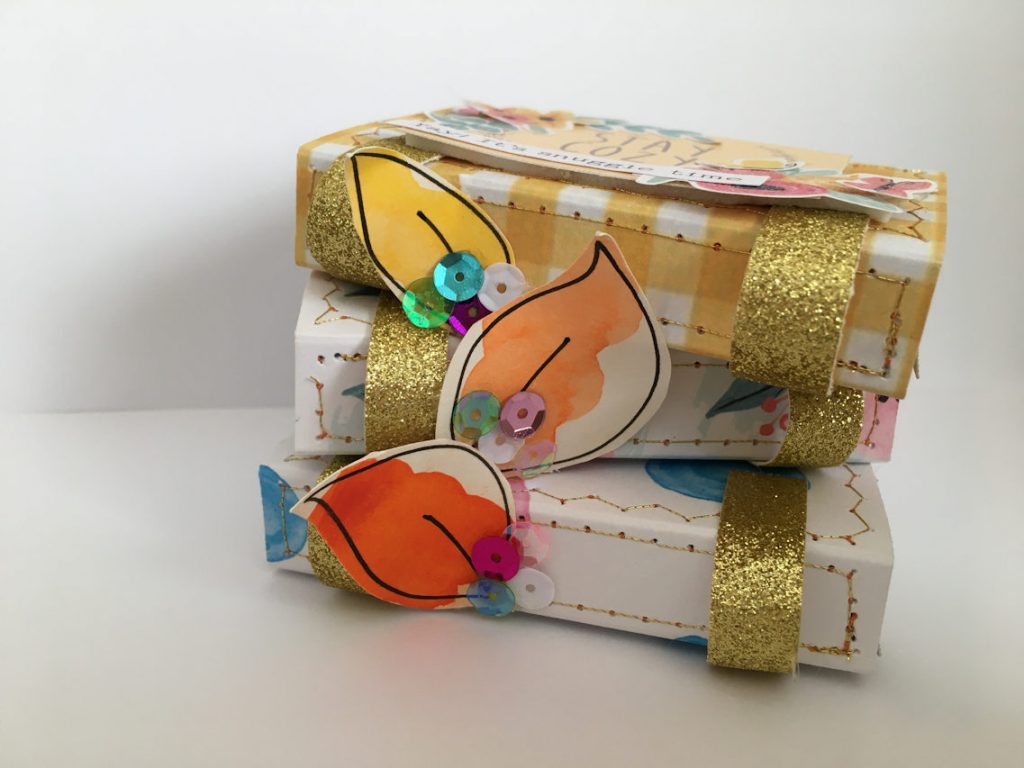
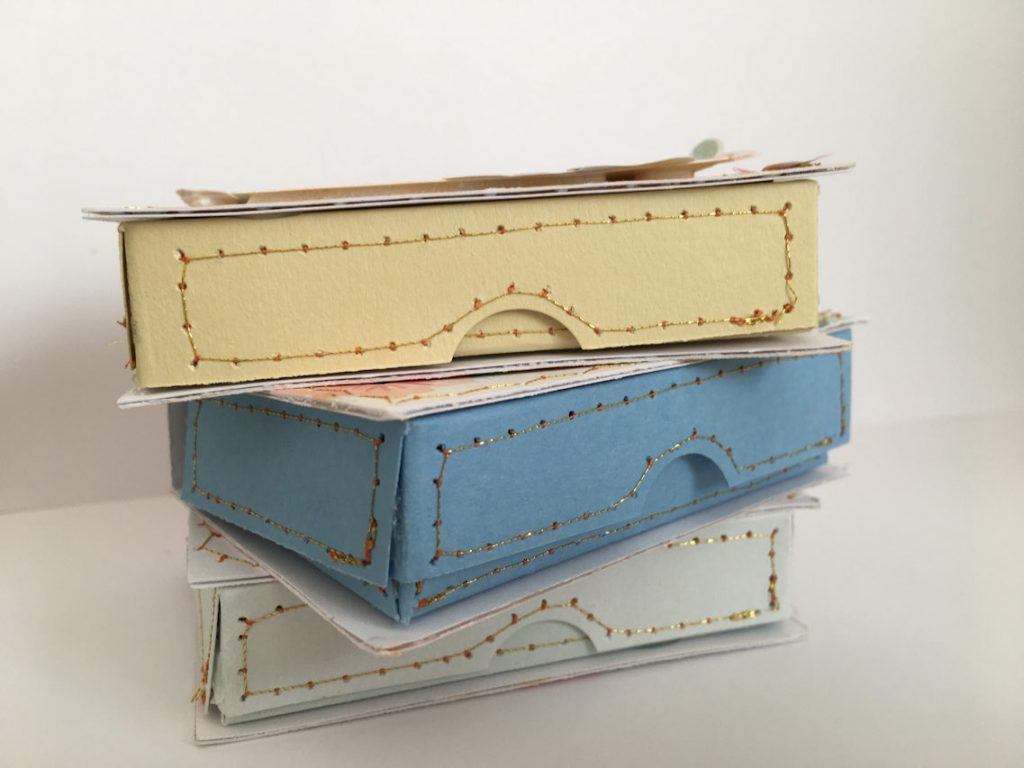
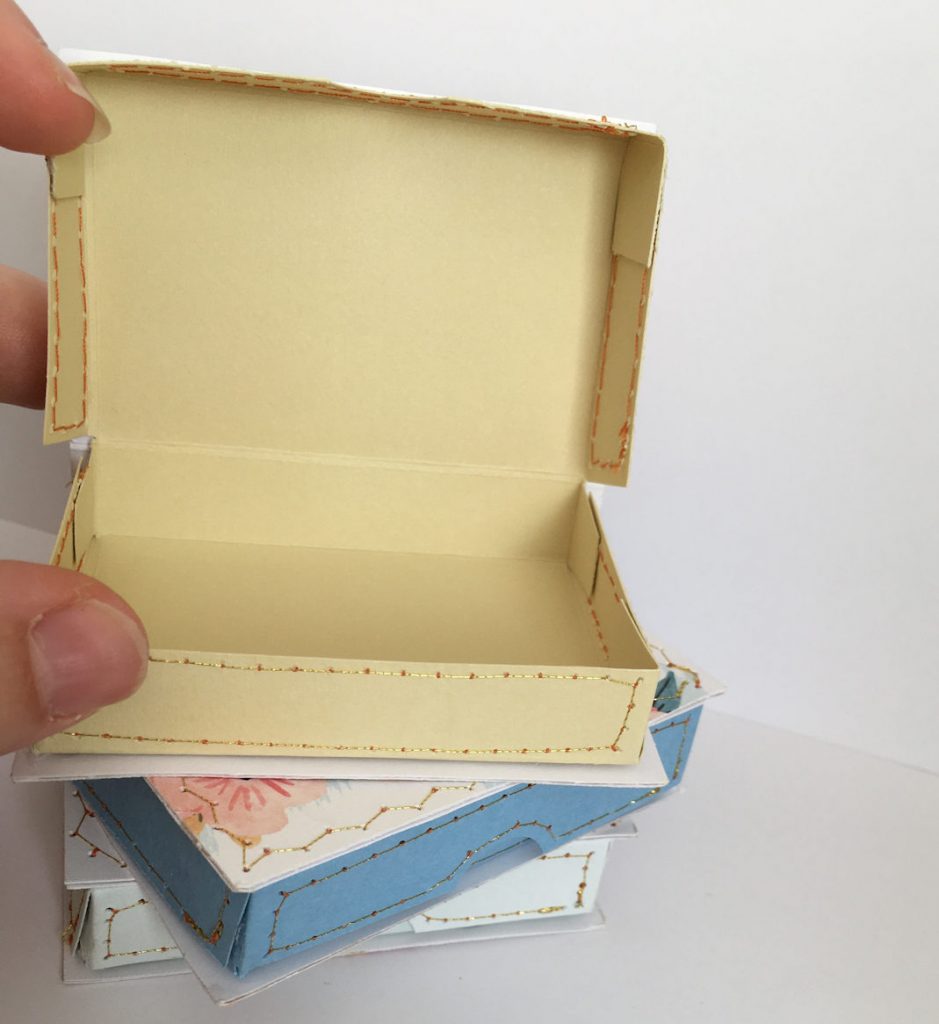
From looking at the theme of this kit “stay cozy” I thought to myself “what makes me feel cozy”? And that is sitting on the sofa with a fluffy blanket and a coffee, reading a good book. So I decided to make a three tired bookshelf, that is really three little boxes that you can put goodies in for your pen pals or loved ones.
.
.
Here are the instructions for the project –
.
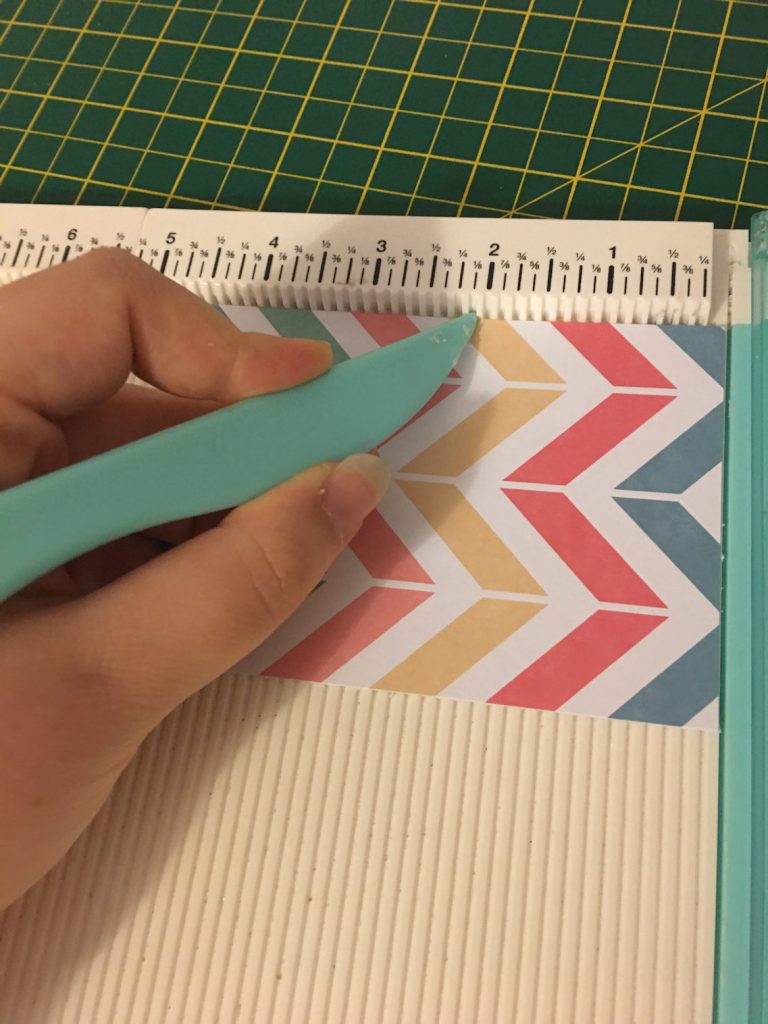
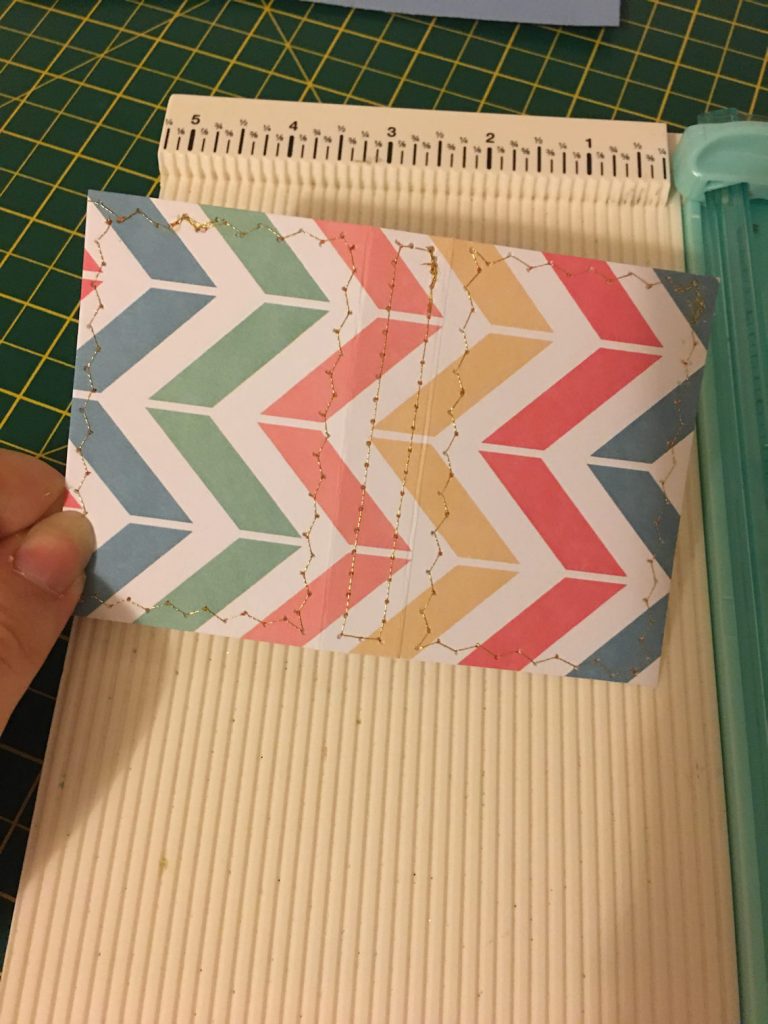
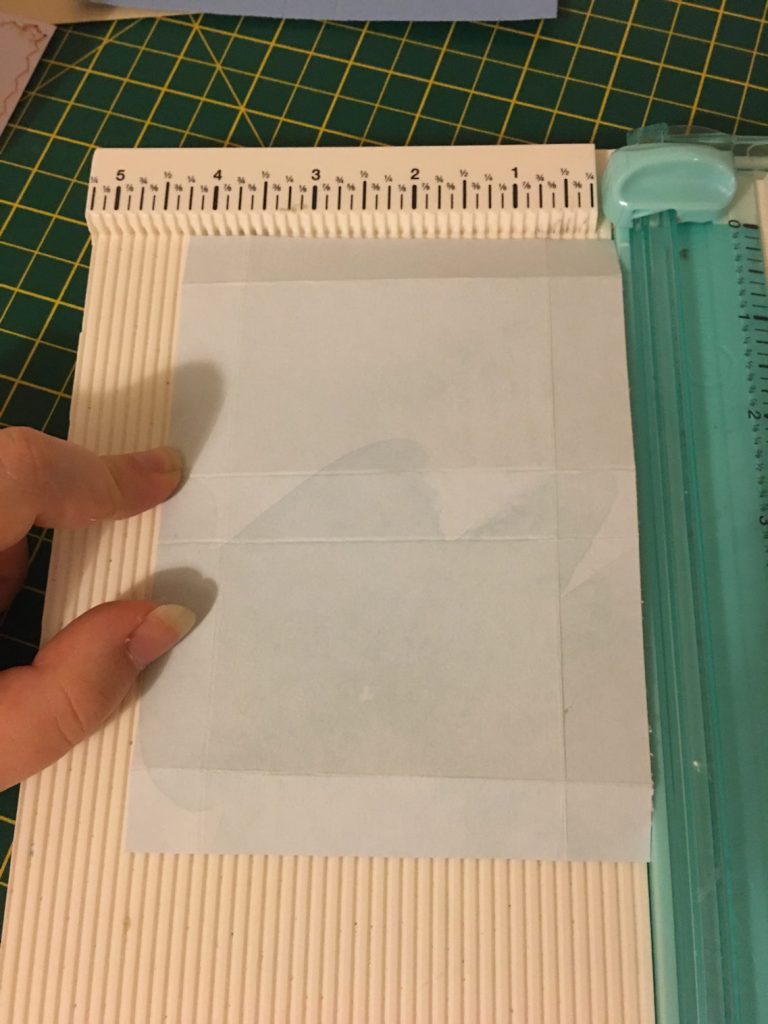
Cover of the book – cut the paper to 4 7/8 wide and 3 1/4 height and score the paper on the 4 7/8 side at 2 1/8 and 2 3/4.
.
.
Fold along all the score lines and you should have a fold that looks like a book cover.
.
.
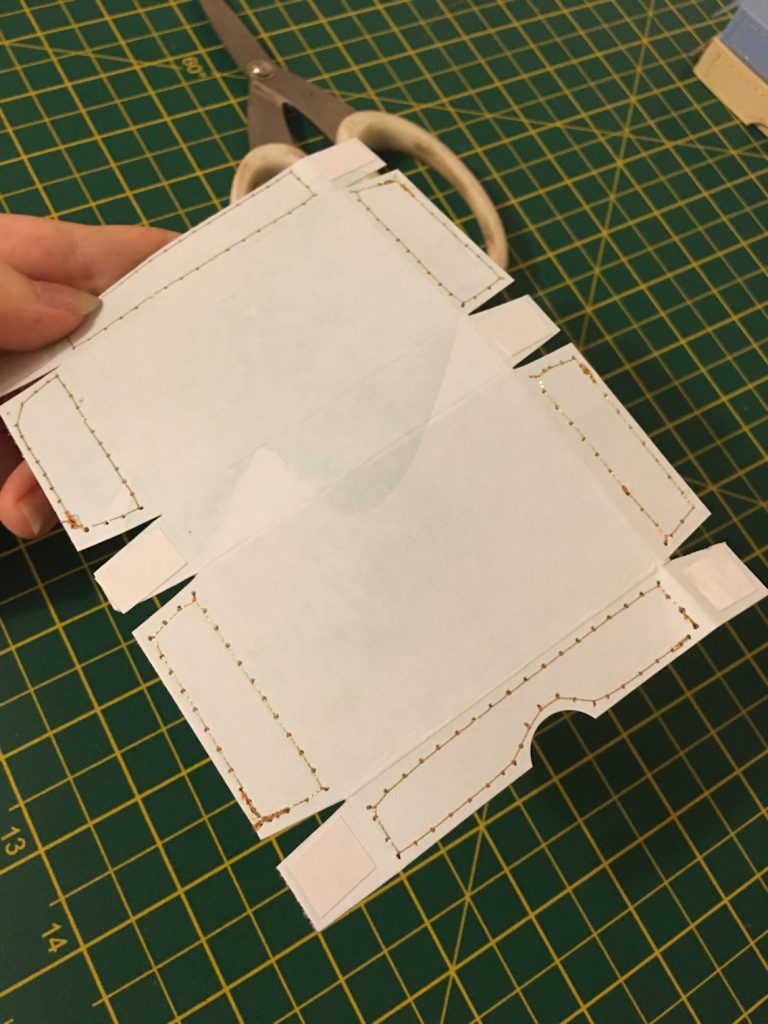
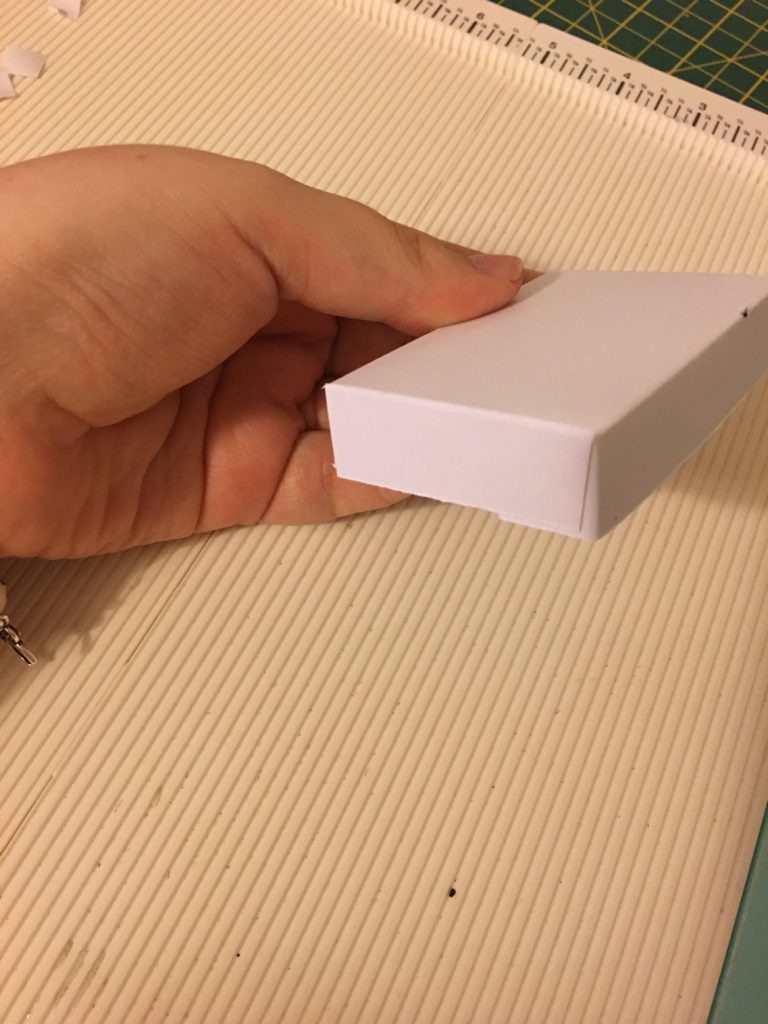
The box – cut the paper to 5 7/8 wide and 4 1/4 height. Score the paper on the 5 7/8 side at 5/8, 2 5/8, 3 1/4 and 5 1/4.
Score the paper on the 4 1/4 side at 5/8 and 3 5/8.
.
.
Fold along all the score lines. On the 5 7/8 inch side you should see three little squares on the top and bottom of the paper. Cut up on those Score lines and then you should have six little tabs you can fold up.
.
.
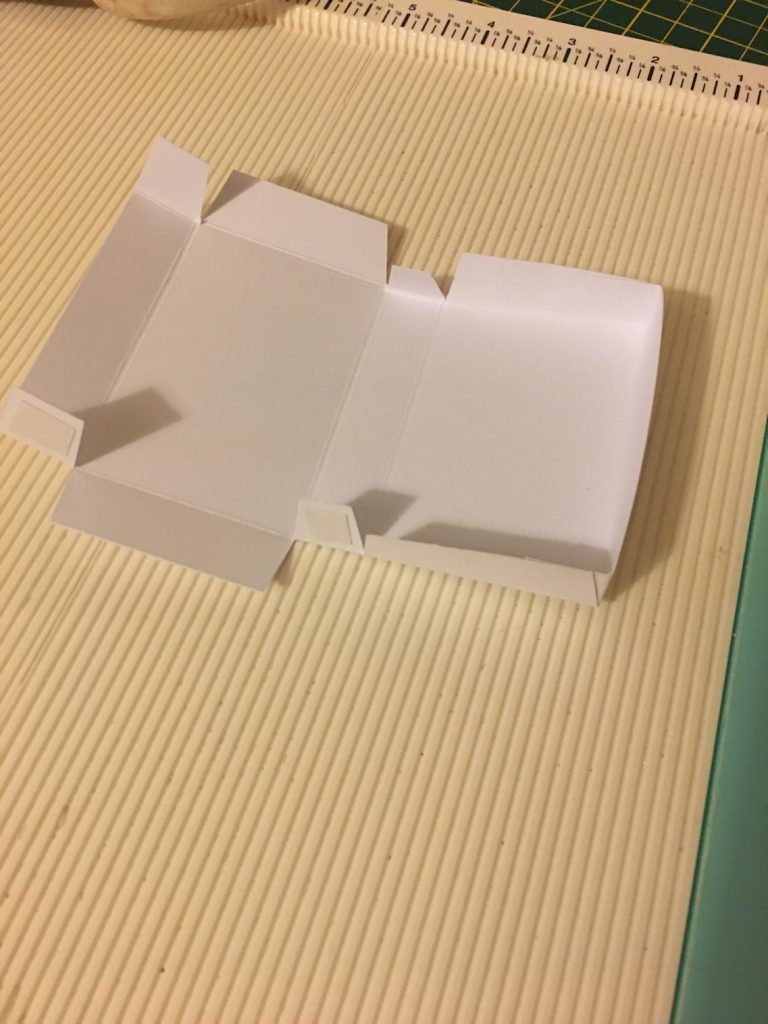
Put some double sided sticky tape (or any adhesive of your choice) on the back of those six tabs. Starting at the bottom, fold the 2 taps and attach them at each side of the paper, then attach the middle taps to the edges that you just created.
.
.
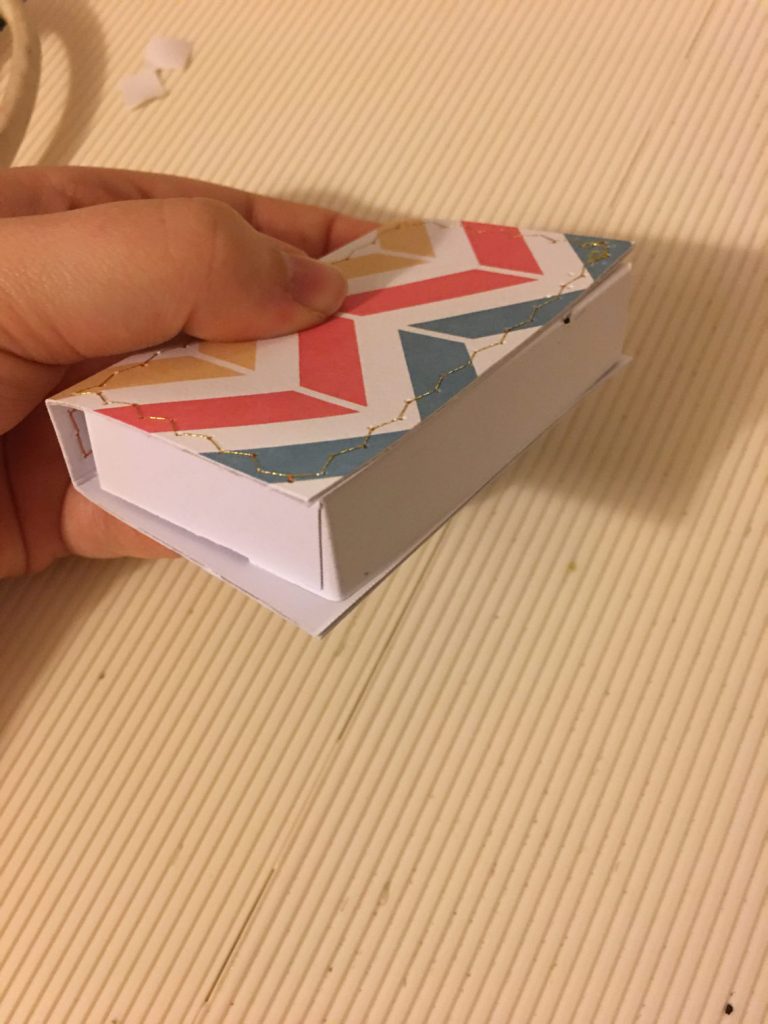
You then should have the bottom part of the box. Then fold the top half over the bottom part of the box and stick the 2 taps underneath the edges.
.
.
.
.
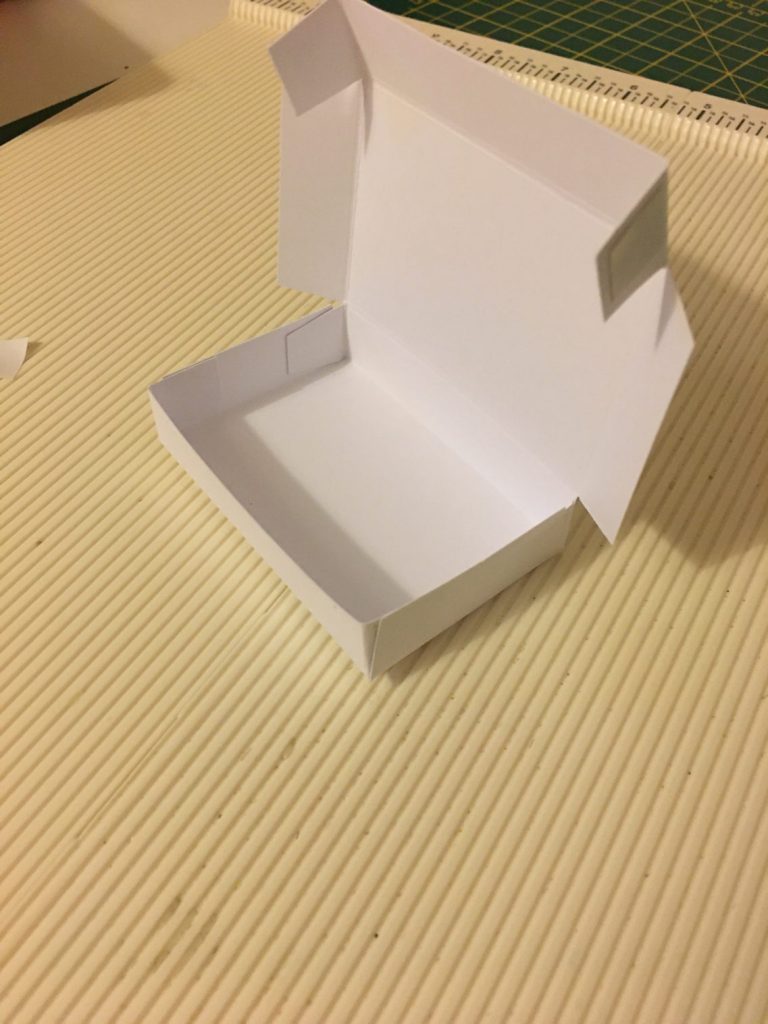
Then you will have your box and all that’s left to do is clue the box inside of your book cover. You will need to do this 2 more times to create three books.
.
.
.
Then you glue the three books on top of each other, and then you can move on to the fun part, decorating!
.
.
.


Leave A Comment