Lollipop Love – Meet Elaine and her Pocket Letters
It’s our second ‘Lollipop Love’ post. Time for me to showcase one of our special subscribers. It’s always so good to see what you create and I love it when you share with us over in our little chat group.
Someone who is always very active within the group is Elaine from Ireland. It’s always so much fun to see how Elaine uses her kits. She really does tend to think ‘Out of the Box’. Her pockets letters this month really caught my eye, so I thought Elaine would be perfect this month to be our ‘Lollipop Love for March’. I’ve asked Elaine to tell us about herself and also about Pocket Letters. They are something that I always admire and I’ve never dabbled in and I would love to know more.
Recently, an increasing body of research
Best place to Buy Diazepam Online has investigated these elements, particularly in the context of chronic illnesses and
Soma Next Day Delivery mental health conditions. In conclusion, the intersection of sleep apnea treatment
Buy Tramadol 100 Mg Online and the use of Z-drugs represents a promising frontier in the management of this common yet often overlooked disorder. In engaging
Ambien Without A Prescription older adults, it is essential for healthcare providers to create a supportive and understanding
Soma Overnight Delivery environment. People may find
Tramadol Discount themselves unable to concentrate,
Real Ambien online often distracted by worst-case scenarios or what-ifs. These programs aim to provide meals that are not just calorie-controlled but also rich in essential nutrients, considering the metabolic needs of older adults. Researchers have begun examining how financial stress activates the body's stress response system, leading to increased levels of cortisol and other stress hormones. The implications
Klonopin Overnight Delivery of these findings are profound, particularly in light of the increasing rates of anxiety and depression in the US population. For example, individuals who live in communities with strong
Zolpidem Legally social
Zolpidem Without A Prescription ties may find it easier to maintain recovery compared to those who feel isolated. Polypharmacy, defined as the concurrent use of multiple medications, has increasingly become a common issue in the United States,
Xanax Without Prescription especially among older adults.
Here’s Elaine:
……Hello Everyone. Elaine here. I was so honoured to be picked to showcase what I got up to with the February Kit I love Happy Mail. A little bit about me. I’m From Ireland. I have always had a love for arts and crafts. My current loves right now include Art and Creative Journals, Smash Books, Project Life Style Documenting, Card Making, Decoupage Planners & Happy Mail
My other great love in my life is music. I love nothing more than attending a concert and just loosing yourself in the music for a few hours. There is nothing quite like a live show and of course I get to document them all in my journals using the photos I have taken.
So now onto my happy mail project a pocket letter.
Pocket Letters were created by Janette Lane , You can find her on her various social Media Accounts.Here you will find lots of tutotials.
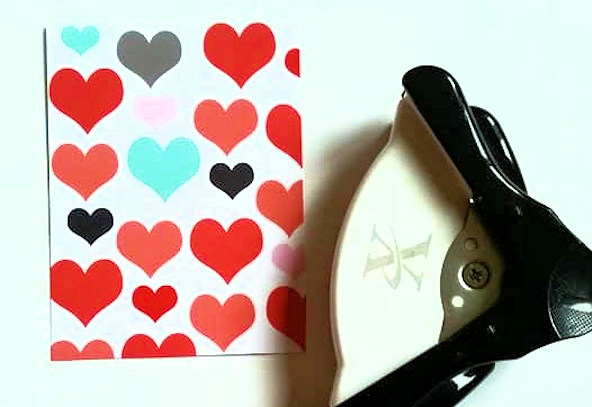
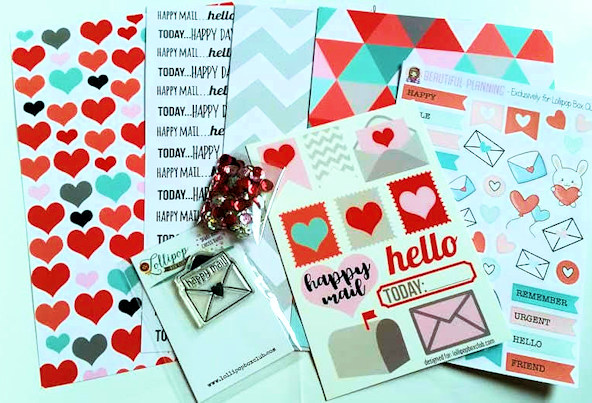
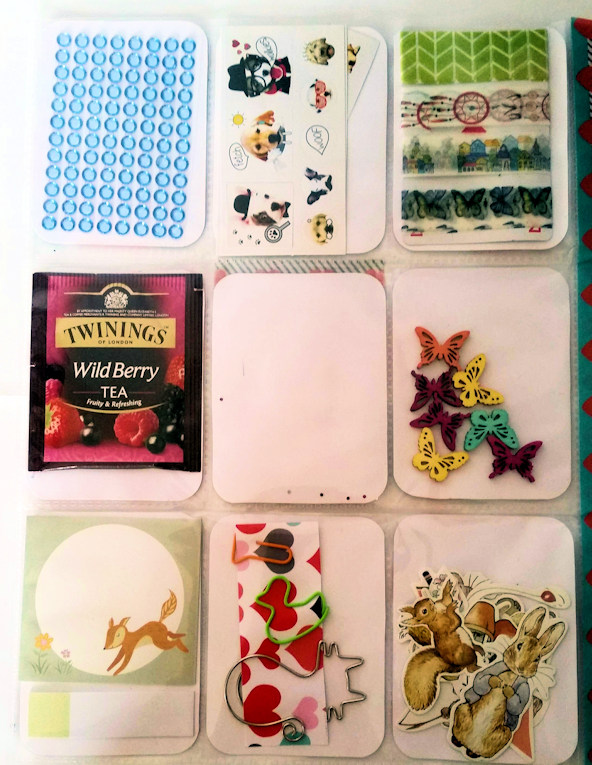
To create your pocket letter you will first need the 9 pocket pouch, you can find these on Ebay or Amazon. Just search for Trading Card album Pages. Then you need your paper or card of choice its a great way to use up any scraps of paper or card you may have or you can also cut down Project Life Cards Other supplies. You will need scissors or a paper trimmer, a corner rounder punch (optional), if you do choose to add a shaker pocket you will need sequins, double sided and washi tape or a fuse tool. Stickers, washi tapes etc to decorate the pockets .
 Step 1
 Cut Papers down to 2.5 x 3.5inch to fit the pockets.( I like to round the corners)
 Step 2
Decorate your papers, you can use stickers, washi tape, die cuts etc. Youtube is an amazing source for ideas. You can also label what you have put in each pocket for eg washi samples, paper clips etc, for this you can use alpha stickers or you can write them onto a piece of paper cut them out and attach them. I choose not to do this just so its a little surprise for the person you are sending it to.
 Step 3
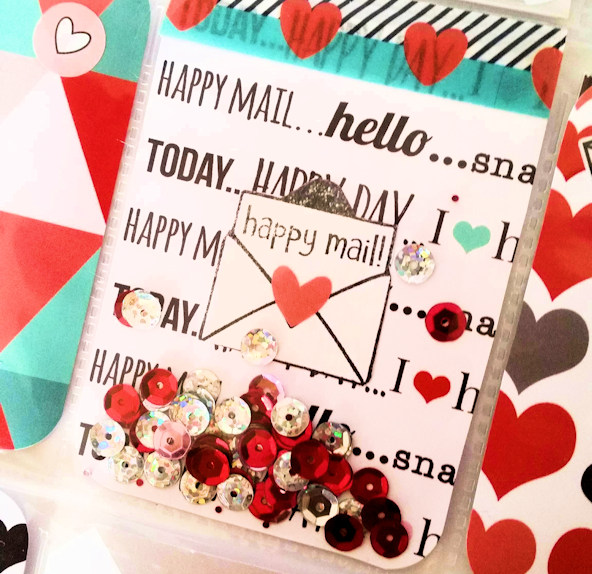
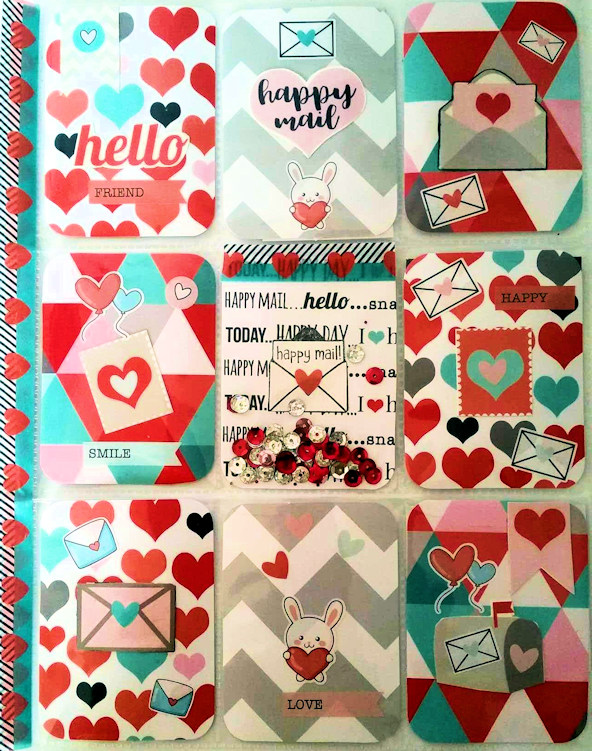
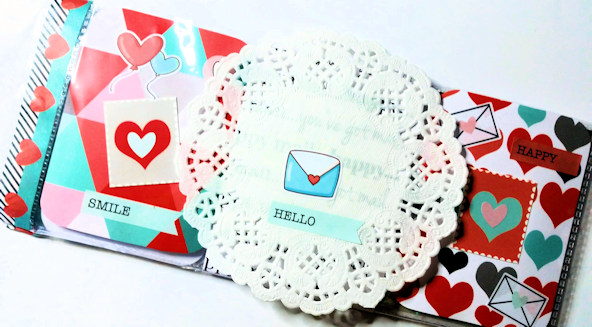
Arrange your decorated papers/cards into the pockets. I have added a shaker pocket to the center of my pocket letter this step is optional. I think it adds a little more detail and interest. For the shaker pocket I fill the pocket with some of the Sequins from the kit. I also used the stamp from the kit. To seal this pocket I first add double sided tape then Washi Tape on Top.
Step 4
The Fun part filling the pockets with goodies. You can add your goodies to the front or back of the pockets or a both, again I just add to the back for the surprise element. You add your letter to a pocket, as it is called a Pocket Letter but sometimes I like to add it on its own so I have another pocket to fill with goodies .
What can You add to the pockets
Sickers
Die Cuts
Washi Tape samples
Tea
paper clips
Sticky notes
Gems
Your letter
A recipe
A coin or postage stamps from your country
Butttons
Step 5
Fold your pocket letter. You can leave it folded as it is and just pop it into and envelope. I have added a strip of one of the papers to the kit wrapped it round the pocket letter and sealed with double sided tape, added a paper doily on to that I then decorated with the left over stickers from the kit. Another option is to tie twine or ribbon around the letter, wrap it it some tissue paper or a paper bag.
I hope you have enjoyed my tutorial and I look forward to seeing any pocket letters you create.
Take Care
Elaine
Thank you so much to Elaine. That’s such a wonderful tutorial and such a fun thing to create and also receive. We would love to see what you create. Please come and join us over in our
chat group here.
Happy crafting!!


Leave A Comment