
Mixed Media Scrapbooking with Carrie
You’ve got Happy Mail – And isn’t that the best kind of mail to get? Hi Lollipops – how are you all? Are you enjoying last month’s wonderful kit? I here today with two pages for you – a 12×12 and a 8.5 x 11. I have recently started scrapping in 8.5×11 size as well as 12×12 to change things up a bit. I store all my layouts together – all sizes and pocket pages in the same album. I really like how it looks with all the different styles together in one place.
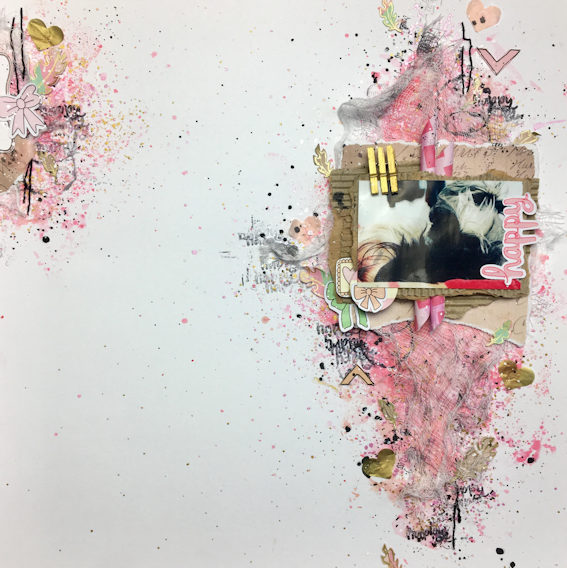
I loved the colours in the papers this month and wanted to pull those into the backgrounds of my pages. For these layouts I didn’t gesso the paper first – I wanted the mediums to stay fairly still on the page once I had added them. I used distress ink refills to create my background. I only ever stamp with black, grey or brown inks, so instead of buying the ink pads and refills in all the lovely colours, I just by the refills. I use these for all sorts of things, making backgrounds or using them as paints. The refills tend to be less expensive, take up less room and last longer!
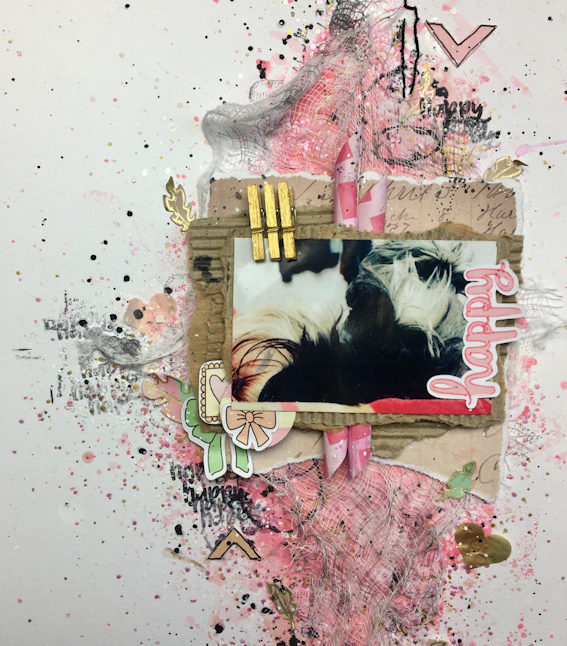
I used distress inks and oxides to create the background, smooshing the colour on some packaging, adding water and then spreading onto the card-stock. This is called the packaging technique and there are lots of videos on YouTube that show you how to do it. I then added lots of splatters and stamping. I decided to have a large background piece down the right hand side of the page and a tiny one at the top left hand to help balance things out.

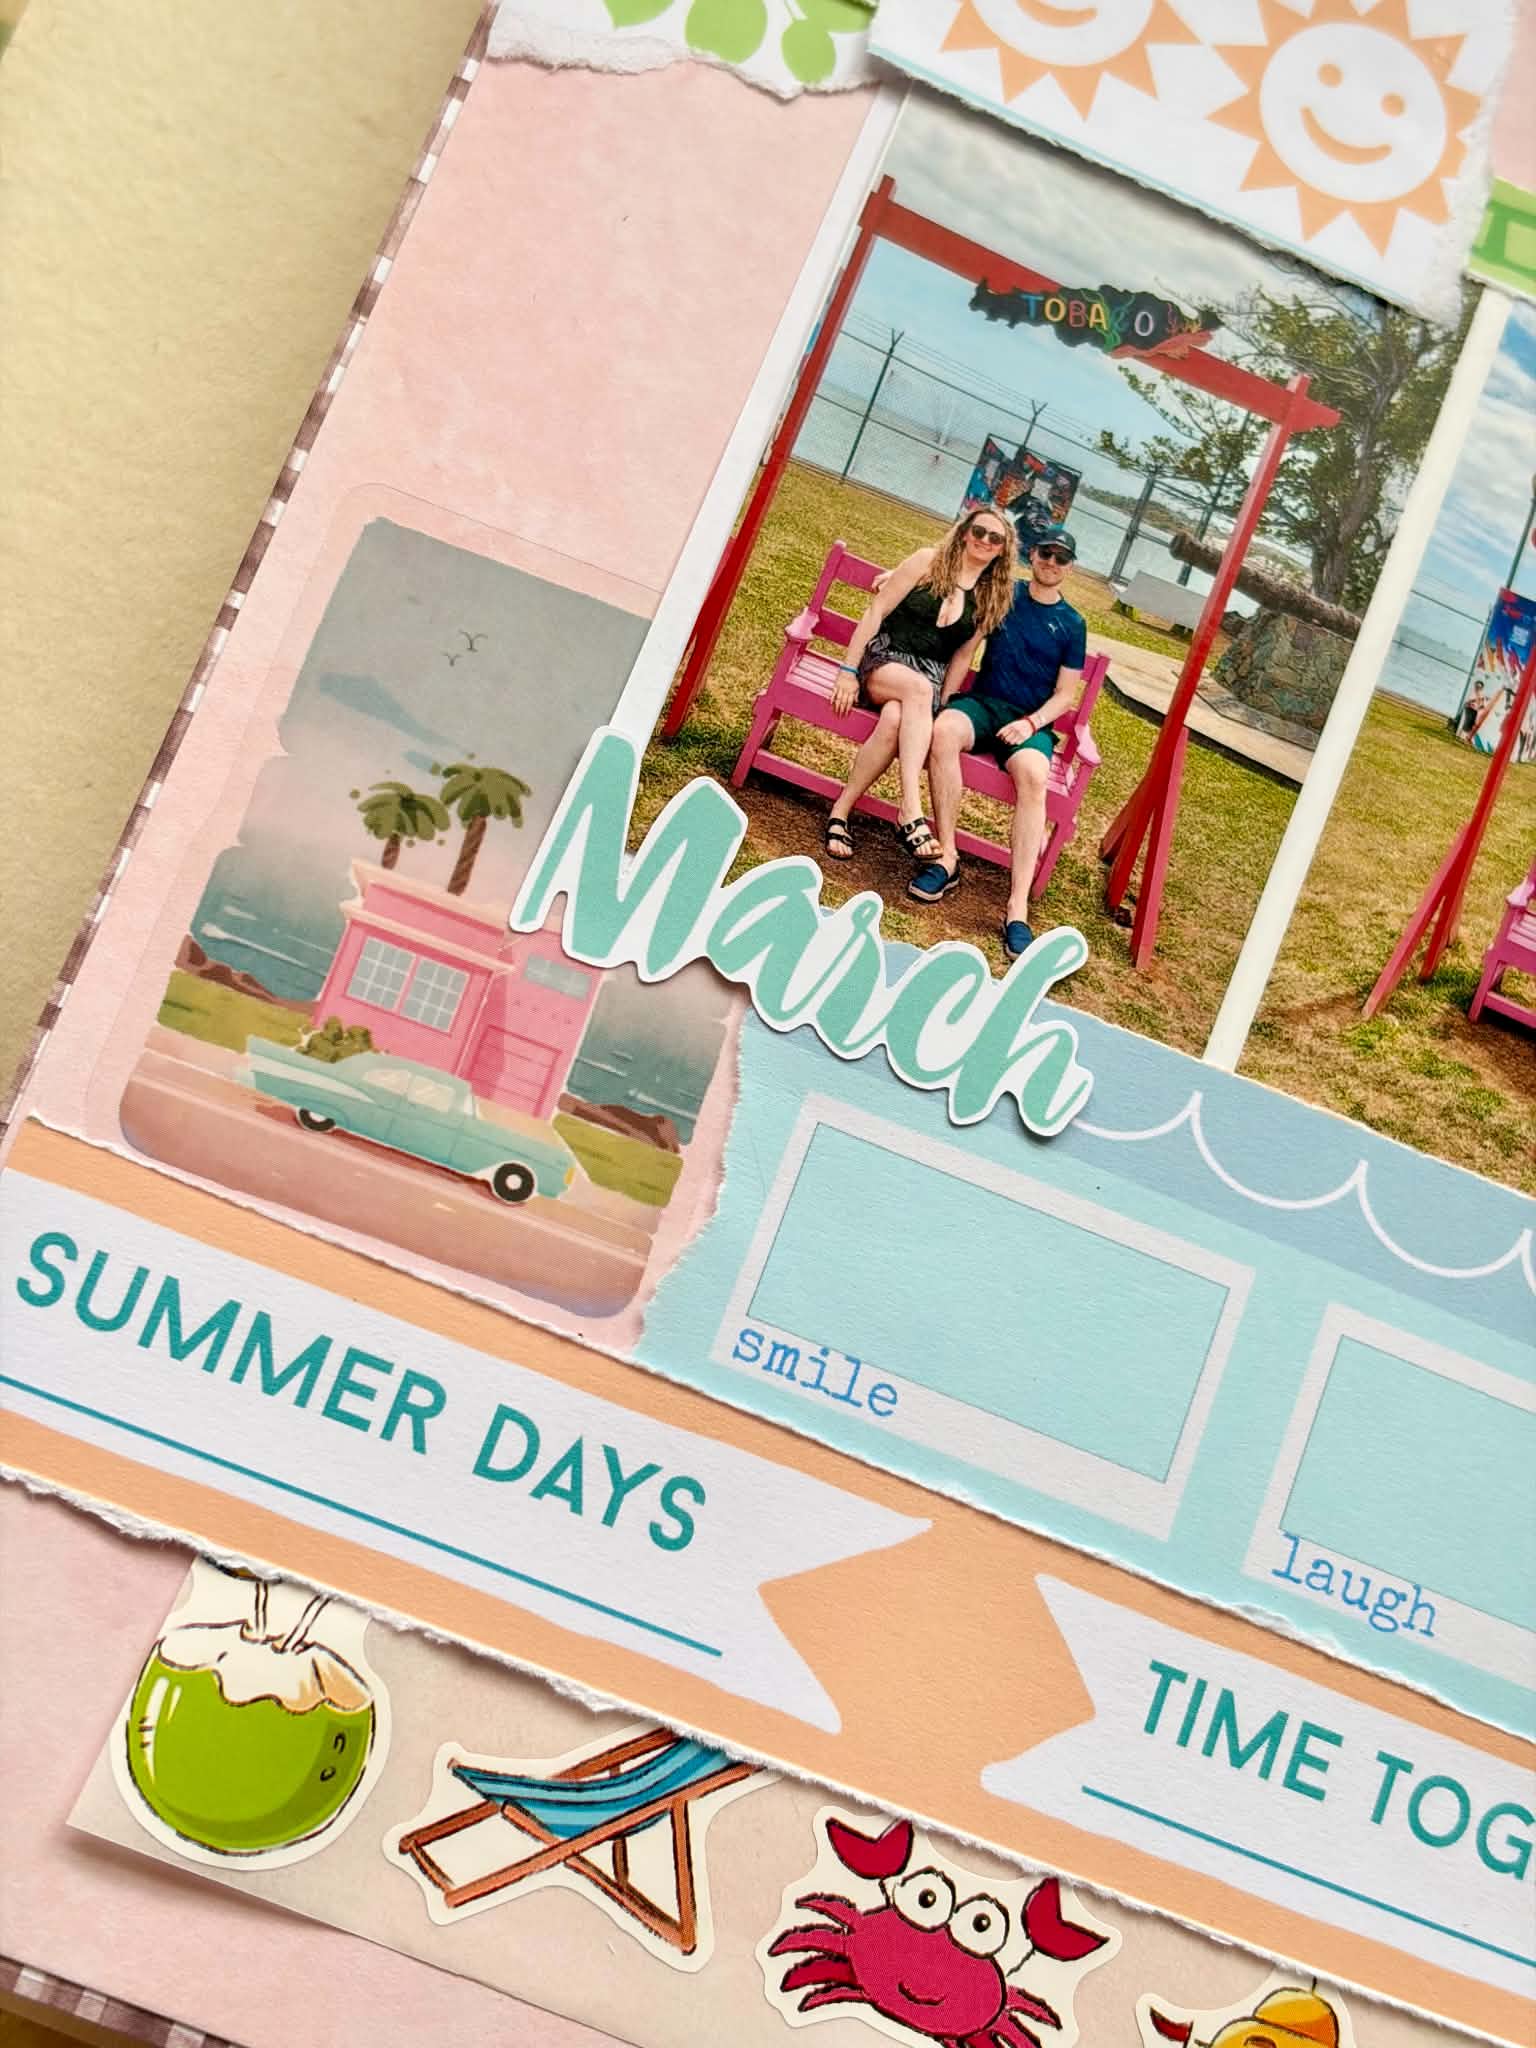
I backed my picture on layers of the lovely paper. I also used the box that the kit came in. If you very carefully take the top and bottom layers of card off the box, you are left with the lovely corrugated inside, which is really good for adding texture to your page. To add some more interest, I made some paper straws from the yummy pink paper. This is really easy to do, you just spray the paper with some water and then roll it round a pencil to get the straw shape. Make sure you only dampen the paper – otherwise you will just end up with a mess 🙂 One dry I re-roll the straws more tightly and then secure with some double sided tape. I added the straws between the paper and cardboard layers and embellished with some of the ephemera and three of the clips that I painted gold. I also added some cheese cloth to the background and some stitching in black thread. I just hand stitched this – I do have a sewing machine, but if I am honest it scares me a little bit and we aren’t on the best of terms – its pretty lazy and usually refuses to work for me…..
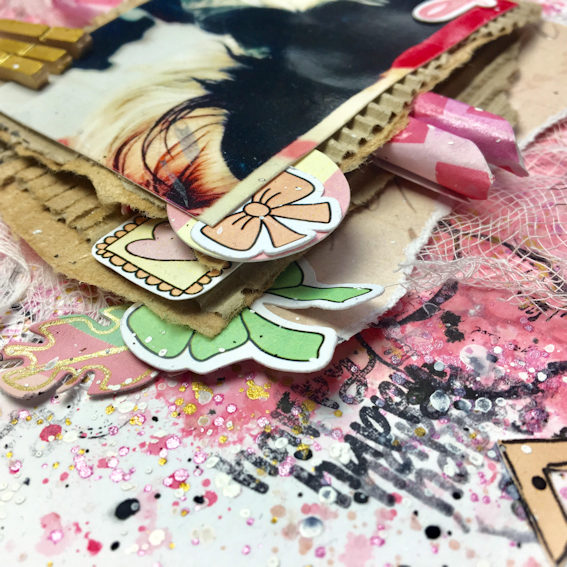
Because more is more as far as I am concerned I also die-cut some feathers from the scraps of paper I had left and outlined them in gold pen. I then added these to the page along with some of the confetti that came in the kit. I used the same process to make the mini cluster on the left, adding the papers and ephemera from the kit and some more stamping, stitching and splatting.
For the 8.5 x 11 layout I picked out the green colour from the kit as my main colour. If you are not too sure about mixed media, an easy way to make your pages look more cohesive is to work with shades of one main colour, then add an accent colour, black and a metallic. I think that sometimes all the very bright and colourful layouts can be a bit intimidating when you are starting out and this can put people off.
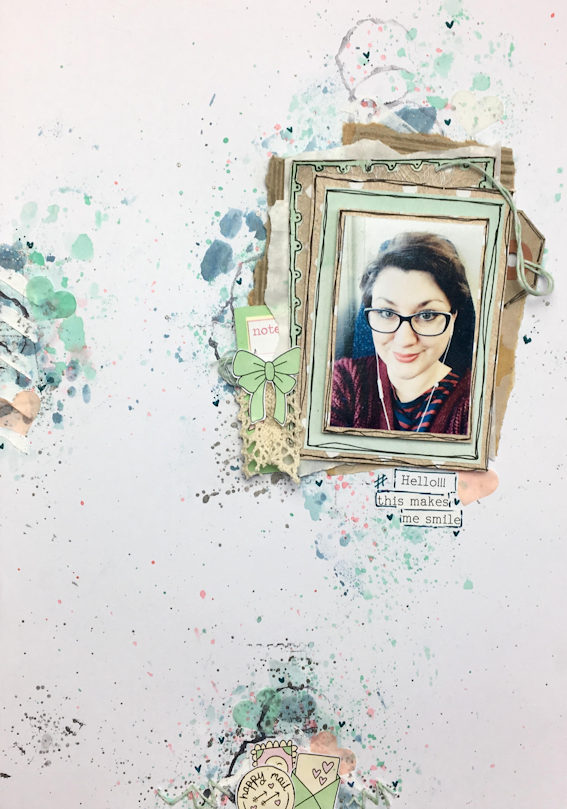
When working on a slightly smaller page you need to readjust your measurements – you have less canvass to work on, which means you need to be cleverer with your space. The bottom of the page is often forgotten space – but I used it on this layout to pull everything together.
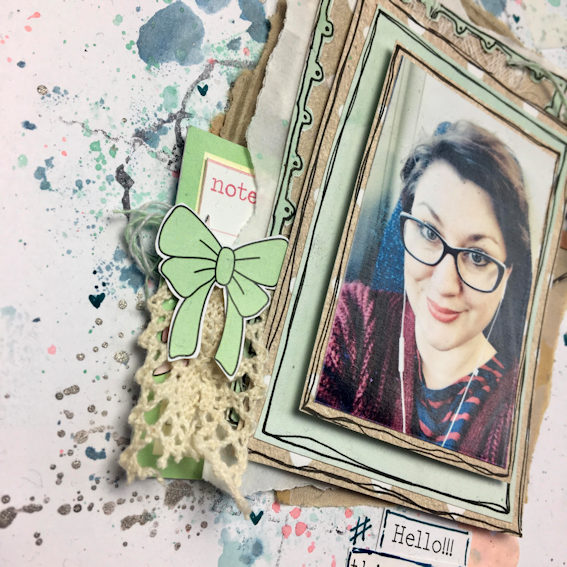
For each of my cluster areas I always use the same methodology to put them together. First of all add the colour – again I used distress inks and oxides and the packaging technique. Next comes the stamping. I used the postage stamp that came in the kit, just stamping in a very messy fashion, not worrying about getting a clean image, I want the messy texture of the stamp and am not so worried if it can be seen. For this layout I then added some texture paste using the large arrow stencil from this months add on’s. Whilst that was drying, I took the ‘zine and cut out the cards. One was a frame and I used my craft knife to cut this out. I then backed it onto some paper from the kit and added some cheesecloth to the layers. Again I used some of the box behind my photo and I also added a tag. I used the green thread that came in the kit to tie the tag and to do some hand stitching in the clusters. To embellish I added ephemera and the lace, some of the tiny words and the confetti.

I am really pleased with these layouts, they both came out better than I hoped – its always good when that happens. Mixed media is always an adventure, I never really have a plan and the final result is always a surprise! I will be back again later in the month with a pocket page layout and a spread in my Travellers Notebook.
Big hugs,
Carrie xo


Leave A Comment