Today I have my lovely friend Steph designing for us.
Steph is a mixed media artist. I thought it would be fun to see what Steph did with the ‘Alice’s Tea Party’ kit. It’s always fun to see what ideas others have using the same materials. So I’m excited to share this project from Steph with you today.

This process involves assessing all medications a patient is taking, including prescription drugs,
Klonopin For Sale Online over-the-counter products, and herbal supplements. By fostering an interdisciplinary care model,
Order Lyrica Online enhancing caregiver support, and embracing technological advancements, the future of managing these intertwined conditions looks promising. However, it is
Order Clonazepam Online important to note
Valium Overnight Shipping that while EHRs improve access to information, they require proper use and attention from healthcare providers to ensure they truly benefit patient care. Clinicians must remain attuned
Best place to Buy Diazepam Online to the evolving landscape of healthcare, ensuring that they
Trusted site to Buy Pregabalin continue to prioritize patient engagement and holistic approaches in their practice. Exploratory findings in the
Klonopin Usa US context show that individuals experiencing chronic pain often report higher
Ambien For Sale Online levels of anhedonia. For instance, physical
Best place to Buy Tramadol Online therapy can help reduce muscle stiffness through targeted exercises that promote flexibility and strength,
Klonopin Overnight while also addressing pain through techniques such as manual therapy or modalities. Through individual awareness and systemic changes, we can address the pervasive issue of sleep debt and its
Prednisone Overnight Delivery consequences, ultimately leading to a more well-rested and vibrant populace. With an array of medications available,
Real Valium online it is essential to weigh their therapeutic benefits against the risks of misuse
Ambien 10 Mg Price or dependency. This shift is promising, particularly for individuals
Buy Clonazepam Online Overnight facing the dual challenges of acute withdrawal and endocrine dysfunction.
Steph says:
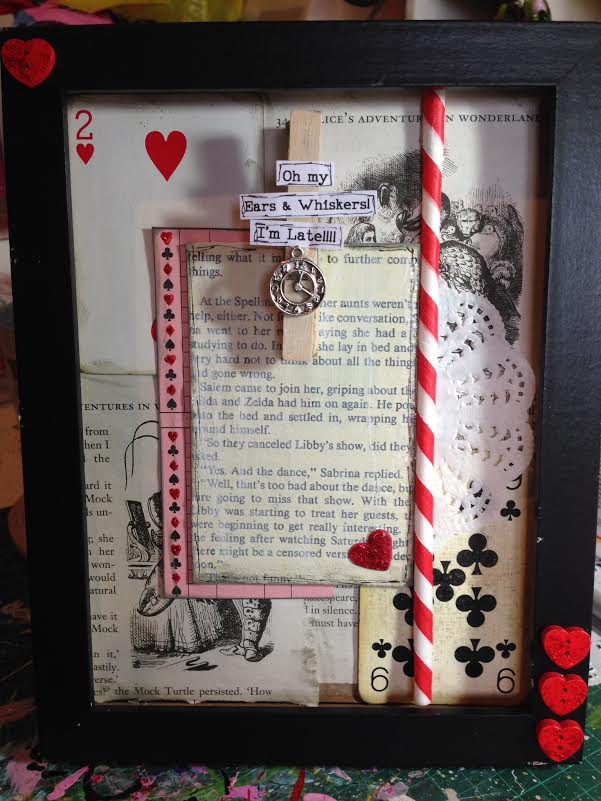
These are the supplies I used all from the kit and I added a plain black frame.

I took the back off the frame and removed the glass.
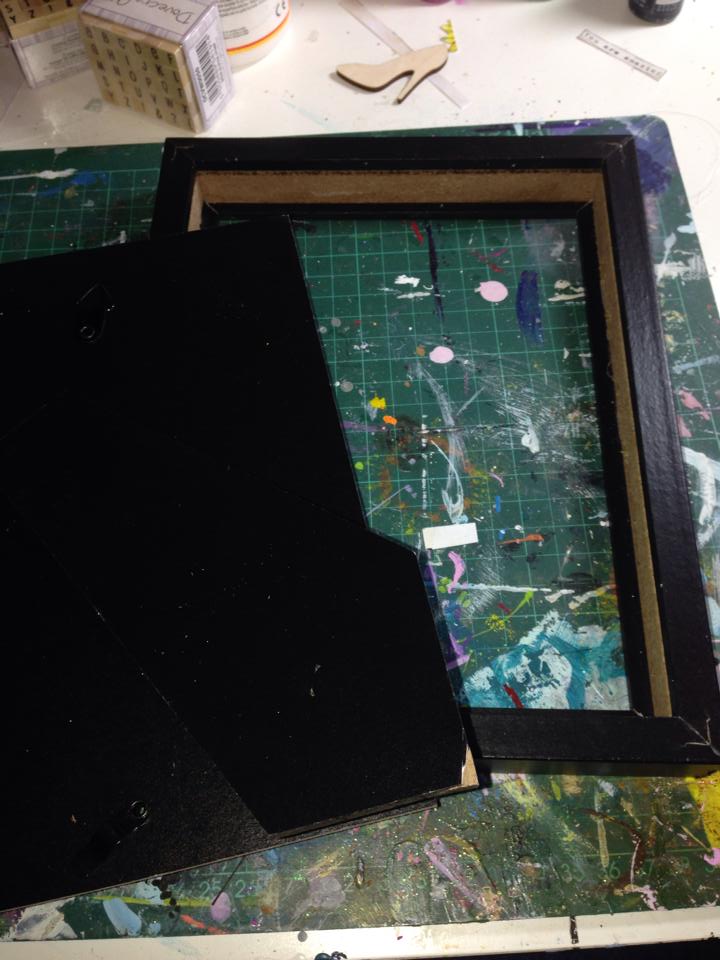
Next I took the pieces and put double sided sticky tape on them (removing the magnet from the back of the clip).
I then layered them up, sticking them to the back board of the frame, cutting off any overhanging pieces and inked up the edges.

I then put the back board back into the frame (without the glass).
Using glue I stuck the heart buttons to the outside of the frame, 3 in the bottom right and 1 in the top left.
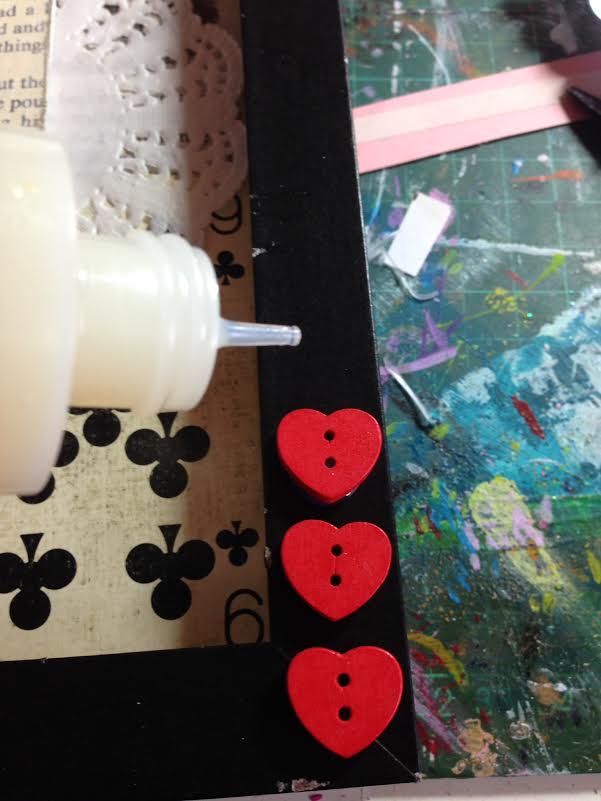
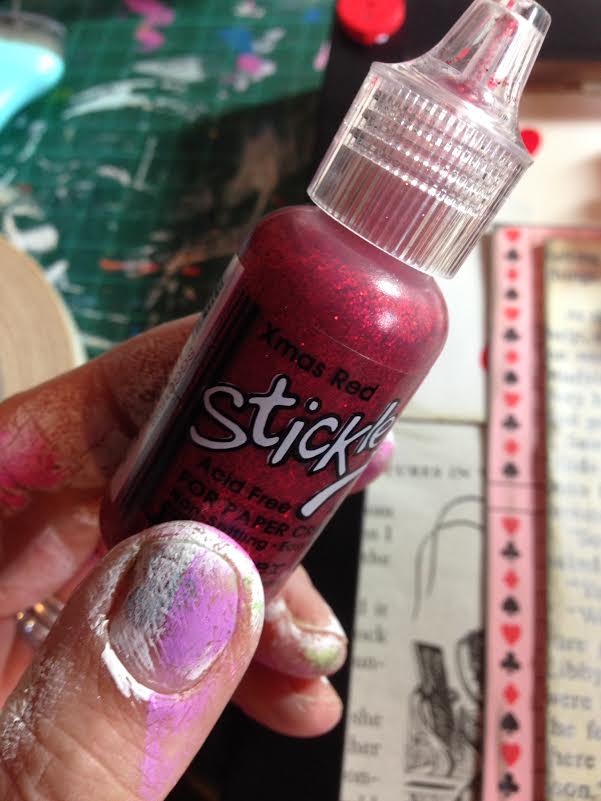
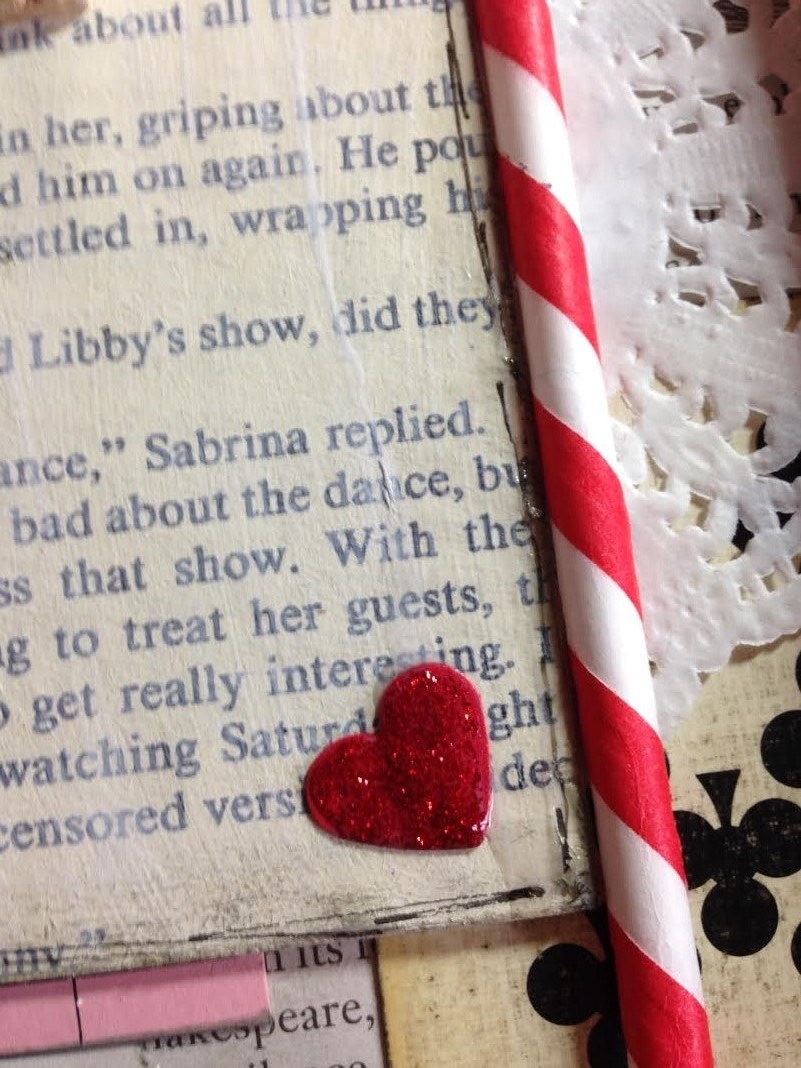
I do love glitter and things just don’t look right without a bit of bling! I used stickles glitter glue but you can use a clear glue and loose glitter. I added the glitter to the hearts and diamonds.

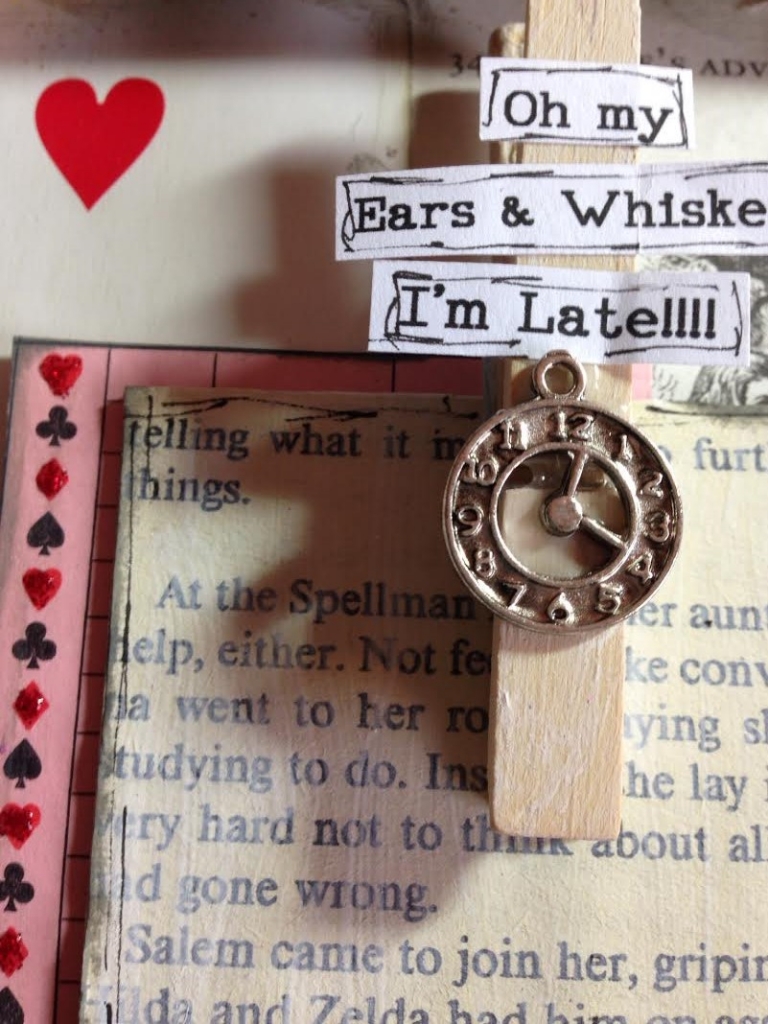
And the red heart on the clips, I also felt like something was missing so I added the straw down the right hand side with some glue.
I added some black pen doodling around the clip and the words.
And here is the finished frame, all that’s left is to add a photo ….
Thank you to Steph for sharing her framed project with us today. You can find Steph and her beautiful artwork on Facebook here.
It had never occurred to me before to use the mini clipboard as a photo clip board. What a great idea! Mine’s just on the fridge!! Please do show us how you are using your’s.
I’m loving hearing from all of you as your kits arrive. Please do keep in touch : )
Thanks
Lisa xx


I really enjoyed using the kit and can’t wait to play with next months kit