
I like to make notes & lists. I like to be able to jot things down as I think about them. I don’t always want a big note pad in my bag though. I’d much prefer something slim line and also pretty. These little dori-journals are perfect to slide in to your hand bag, keep next to your bed or on your desk. As you are making it yourself, you can also choose the size to really make it perfect for your needs. And it’s really easy and fast to make.
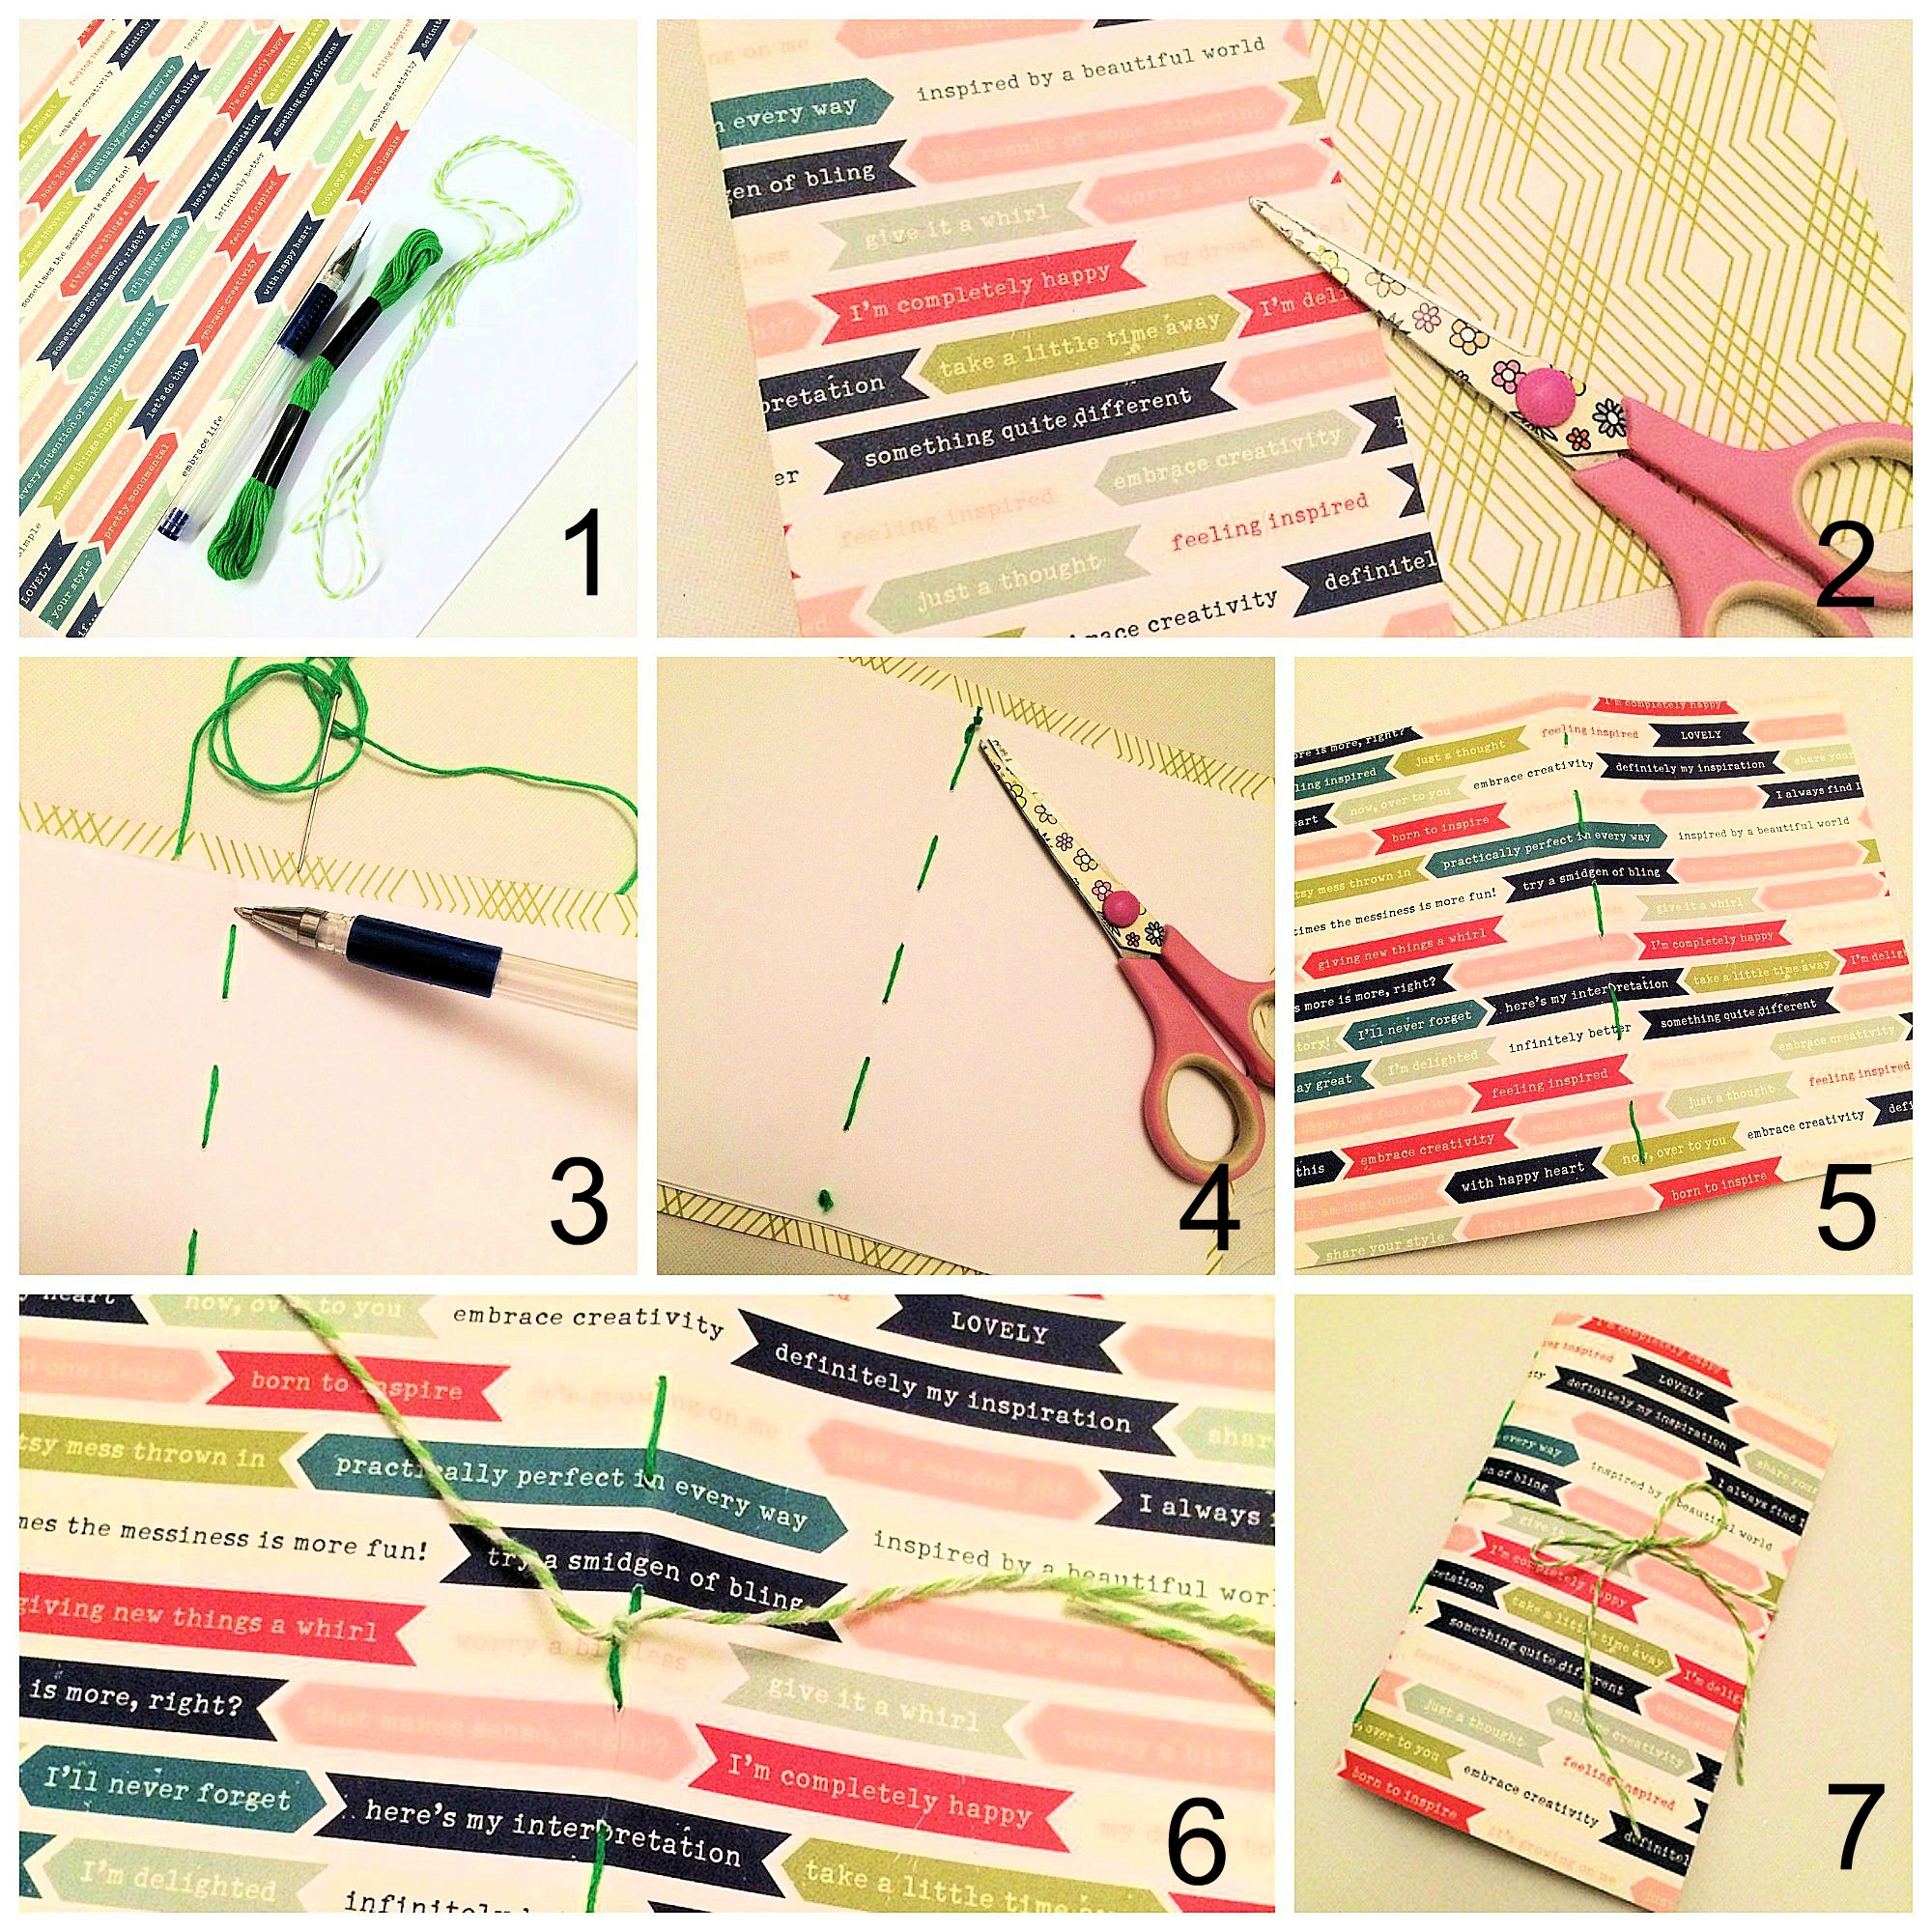
1. Start with some patterned paper to use as your cover. I had a 12×12 piece that I cut in half giving me 6×12”. You can use any type of card, I recommend it not being too thick though. I personally find scrapbooking patterned paper to be the perfect thickness for this project. Plus your have the patterns inside and out making for a very pretty journal.
You will also need some regular A4 printer paper, embroidery thread & needle, twine & paper piercer. (I used 10 pieces of A4 paper, giving me 20 pages. You can make your’s with more or less).
2. You need to fold over your pattered paper to create the cover. You can then decide what size you would like your journal to be and trim down accordingly. Mine has ended up measuring 16x10cm.
3. You need to fold your printer paper in half (I folded mine long ways) and trim down to size so that it fits neatly inside your journal, not too close to the edges. Lay it inside the journal and using your paper piercer, pierce some holes along the centre, not too close together. If you don’t have a paper piercer you could use a needle. And now take your needle and thread and start to sew the pages to the cover.
4. I fastened each end with a knot to hold the stitching in place.
5. It looks really good both inside and out. You now have your journal.
6. You may want to add loose bits to your journal such as receipts or tickets, so I like to add a piece of twine to be able to fasten my book and keep everything safe inside. I’ve taken the twine from my ‘Once Upon a Story’ Kit and tied to the centre stitch of the journal.
7. You can now tie the twine around your journal so that it stays closed.
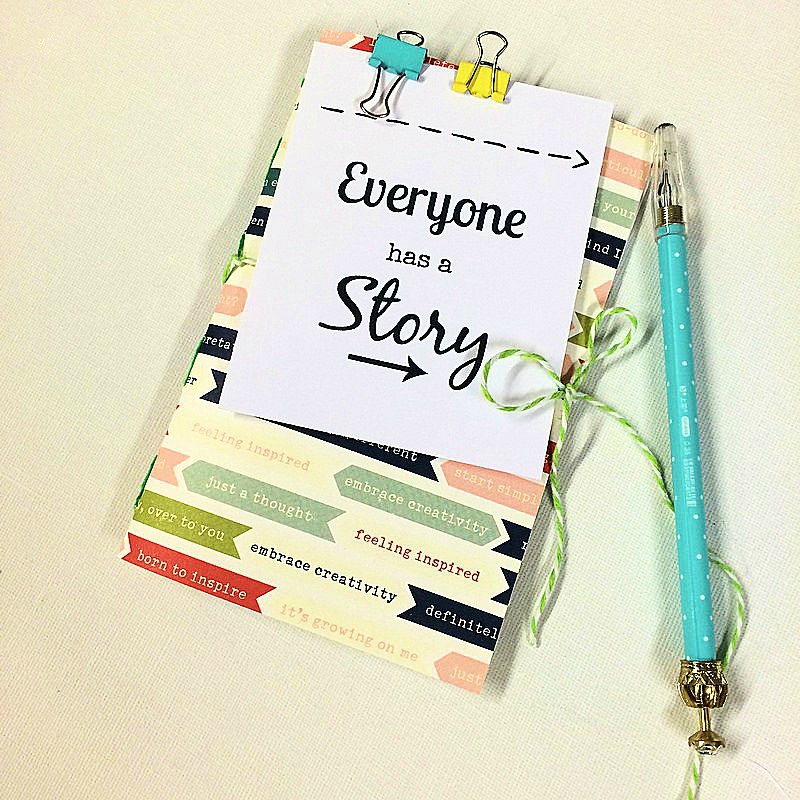
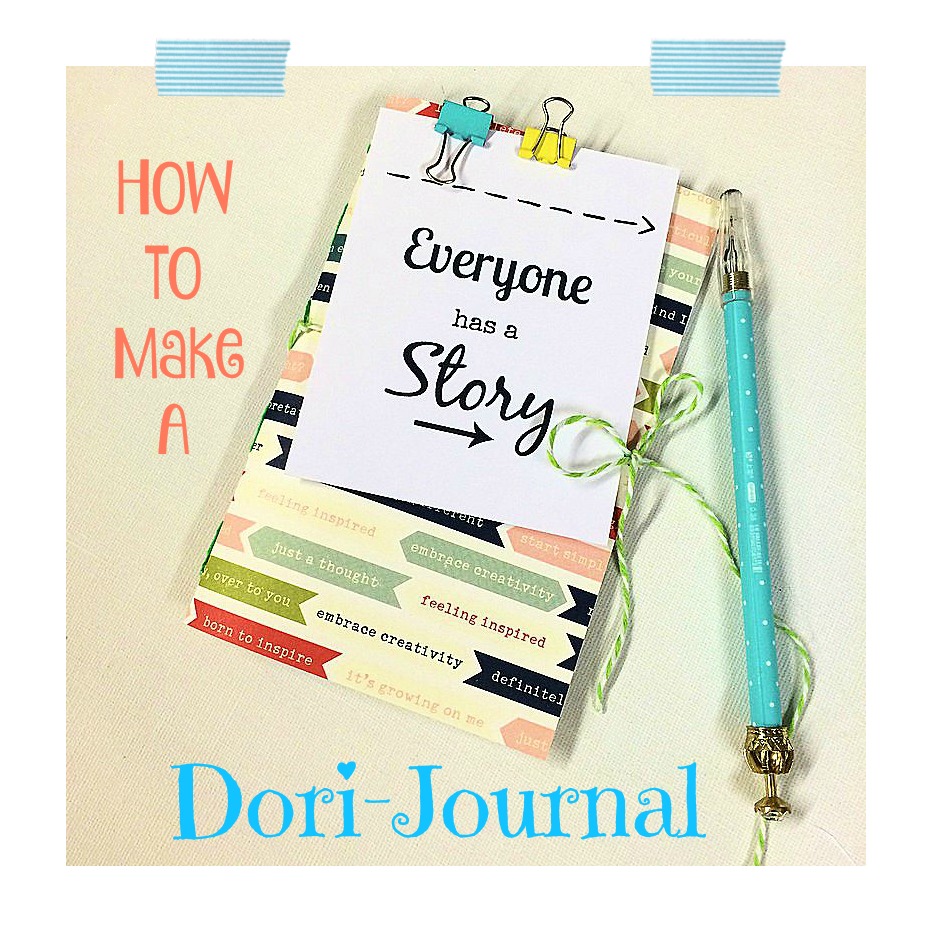
You can decorate your cover if you wish. I’ve added the card and my binder clips from this months kit. This will hold any extras I might want to add inside.
The perfect little journal for your notes.
– You could keep it next to your bed and write a few notes each night from your day
– Pop it in your bag and keep for shopping lists and other various notes when you are out and about
– Take away with you for diary keeping
– Use as a mini sketch/doodle book
– Make as a gift for someone
I’m going to make a few of these as little Christmas gifts this year. You could even personalise them.
Thank you for joining me today. I hope you give this a go. It’s really fun!


Leave A Comment