
July Lollipop Love – Come and meet Sarah
Sarah Steeter has been a subscriber for such a long time now. She’s an active member of our Lollipop Chat Group here .
And she’s seriously seriously talented. I love it when Sarah shares what she’s made with her kits. She ‘wows’ me every time. So I was so thrilled when she said ‘yes’ to being this month’s ‘Lollipop Love’.
Hi, I’m Sarah, I’m 41 and I live in Norwich, Norfolk. I’ve enjoyed making arty, crafty, creative things for many years and I like to have a go at different ideas, but I always come back to paper crafting – I love the versatility of what can be made with paper. I don’t have much space at home to store my ever growing craft supplies, so my lounge always doubles up as a studio… with multiple projects on the go at once! I do have some health problems but I find creative projects very therapeutic and a good distraction. I love getting my Lollipop Box each month – it’s truly happy mail to me as I’m always smiling when opening the paper bags and discovering the contents. I’m also eager to see on the Facebook group chat how people use their boxes each month. I hope you like my project, it was fun to make and it’s easy to decorate in many different ways.
Mini tag box
Items needed: Some plain cardstock, scissors, ruler, pencil, double sided tape, glue, hole punch, circle cutter or templates and a paper scorer (I don’t have one so I use a craft knife very carefully!).
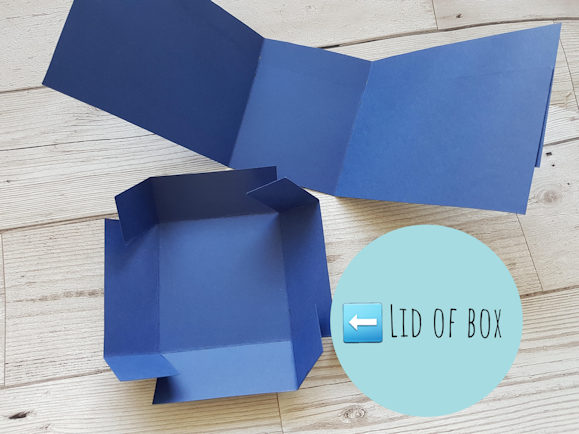
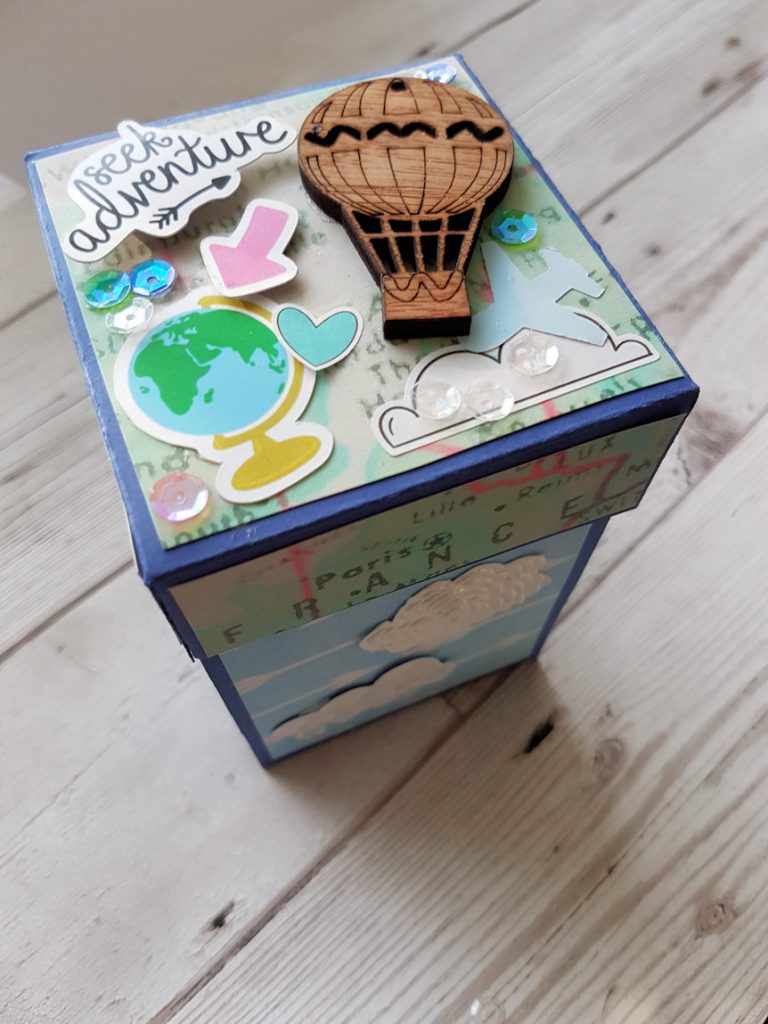
- From the card stock cut out 3 pieces: 2 of 29 x 7cm (to make the box walls), and 1 of 13.5 x 13.5cm (making the box lid).
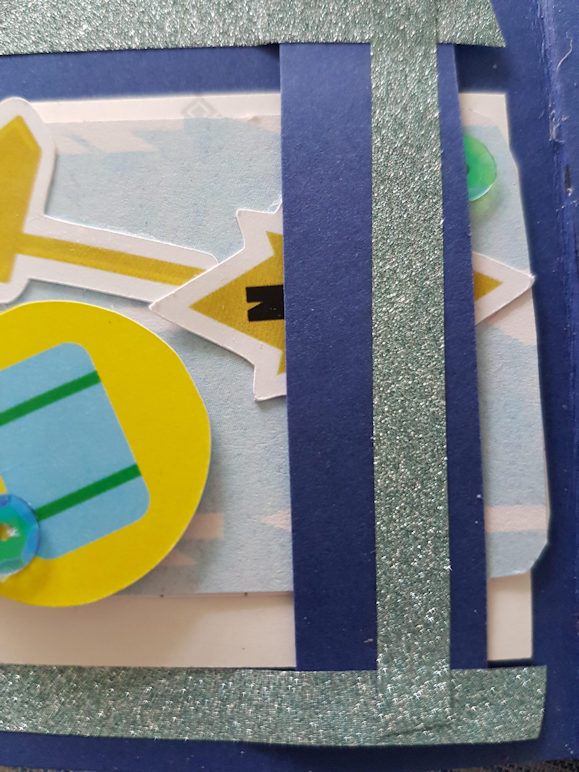
- Score along the 2 pieces of the box walls at 11cm and 18cm (this will give you 3 sections of 11cm, 7cm, 11cm). Score the box lid 3cm in from each side, make 1 cut in each corner which will form the flaps to construct the lid in the next step (see photo).
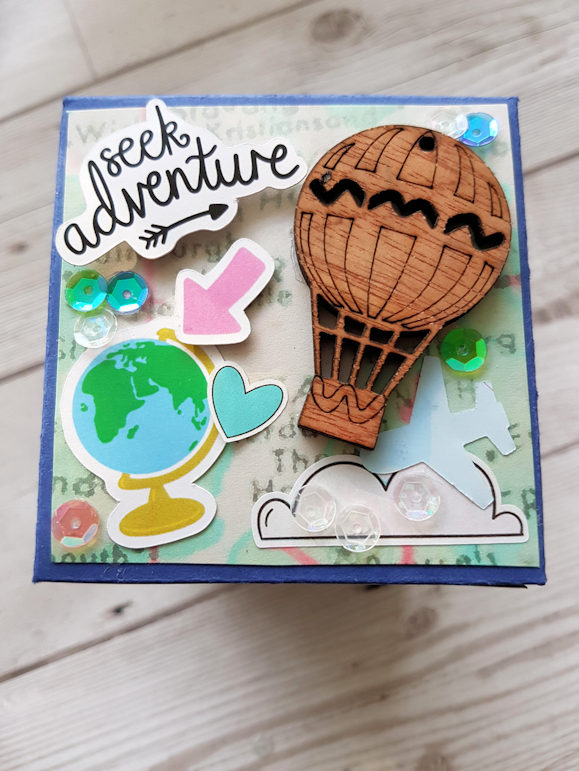
3 Attach one of the box wall pieces on top of the other forming a cross shape (+). Use papers to cover the box lid, add decoration to the box lid too and then construct the lid by folding in the flaps (see photo). Box walls should be able to fold up and lid fits on top.

4. Make tags from the papers and decorate them. I used a small brown tag from the kit as a template – as the tags will be able to be taken out of the box, I have decorated both sides but this is of course optional.
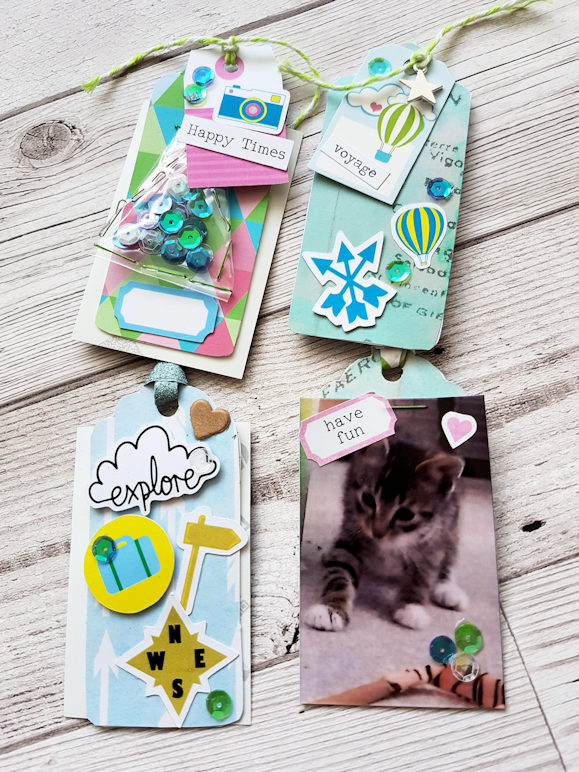
5. Cut out 4 pieces of card: 6.5 x 1.5cm. These are stuck using a small amount of glue on each end of them and then stuck near the bottom of the inside walls – these are what the tags will sit in.
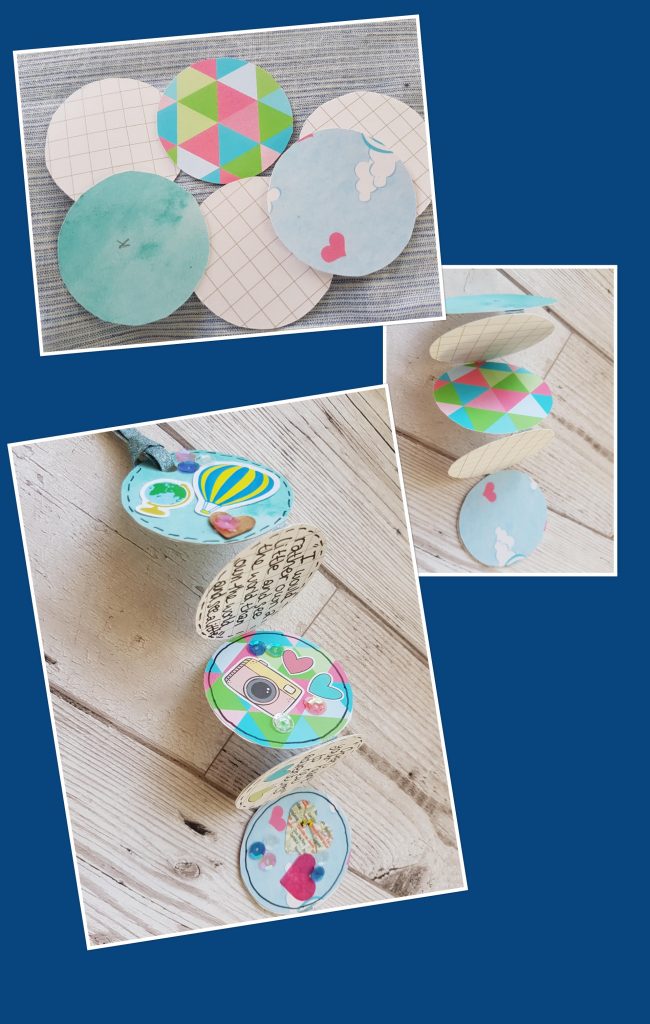
6. For the centre of the box, I made a mini circle book but you could put in many different things, especially if it’s a gift for someone. To make the circle book you’ll need circles cut out 5cm in diameter, join them together using the washi tape on the back and they can then fold up in a concertina (see photo). Decorate them and then stick the bottom circle to the bottom of the box. I found some quotes about adventure to write on some of my circles.
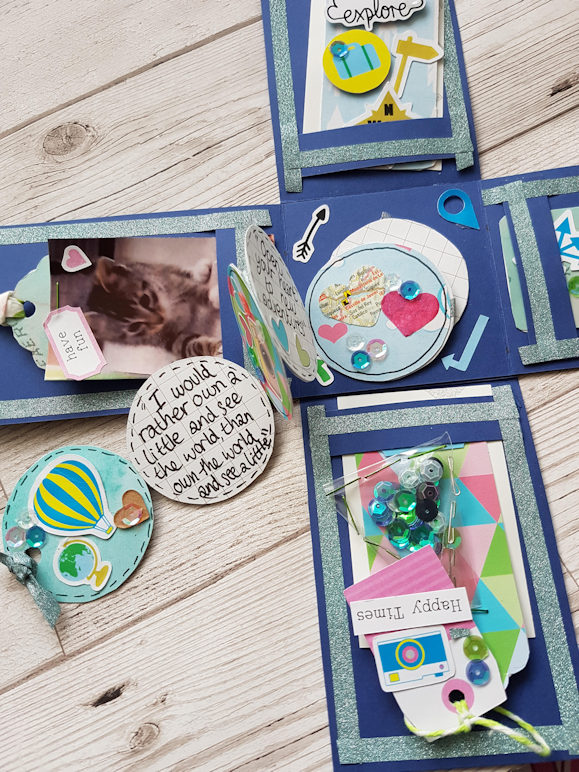
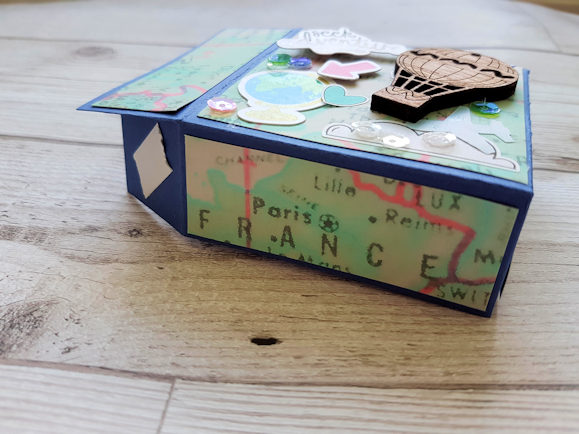
7. I then embellished the inside of the box with items from my Lollipop Box. I also added some clouds to the outside of the box using white card and sequins, and some textured paper I found in Hobbycraft.
This is the finished box, it is easy to make in different ways… I made one for a friend and made it so there were several boxes inside each other, and added small gifts in these. I hope my instructions and photos make sense, and you are enjoying this month’s Lollipop Box… I say this every month, but it is one of my favourites!
Thank you so much Sarah. This project is AMAZING!! I can’t wait to try it out myself.
And thank you for being such a wonderful subscriber. We are so lucky to have you in our group.
Lisa x


I love Sarah’s creations as well. I loved the pop up box Sarah did in my happy mail swap earlier this year.