

Hello, today I am showing you how to make cute envelopes.
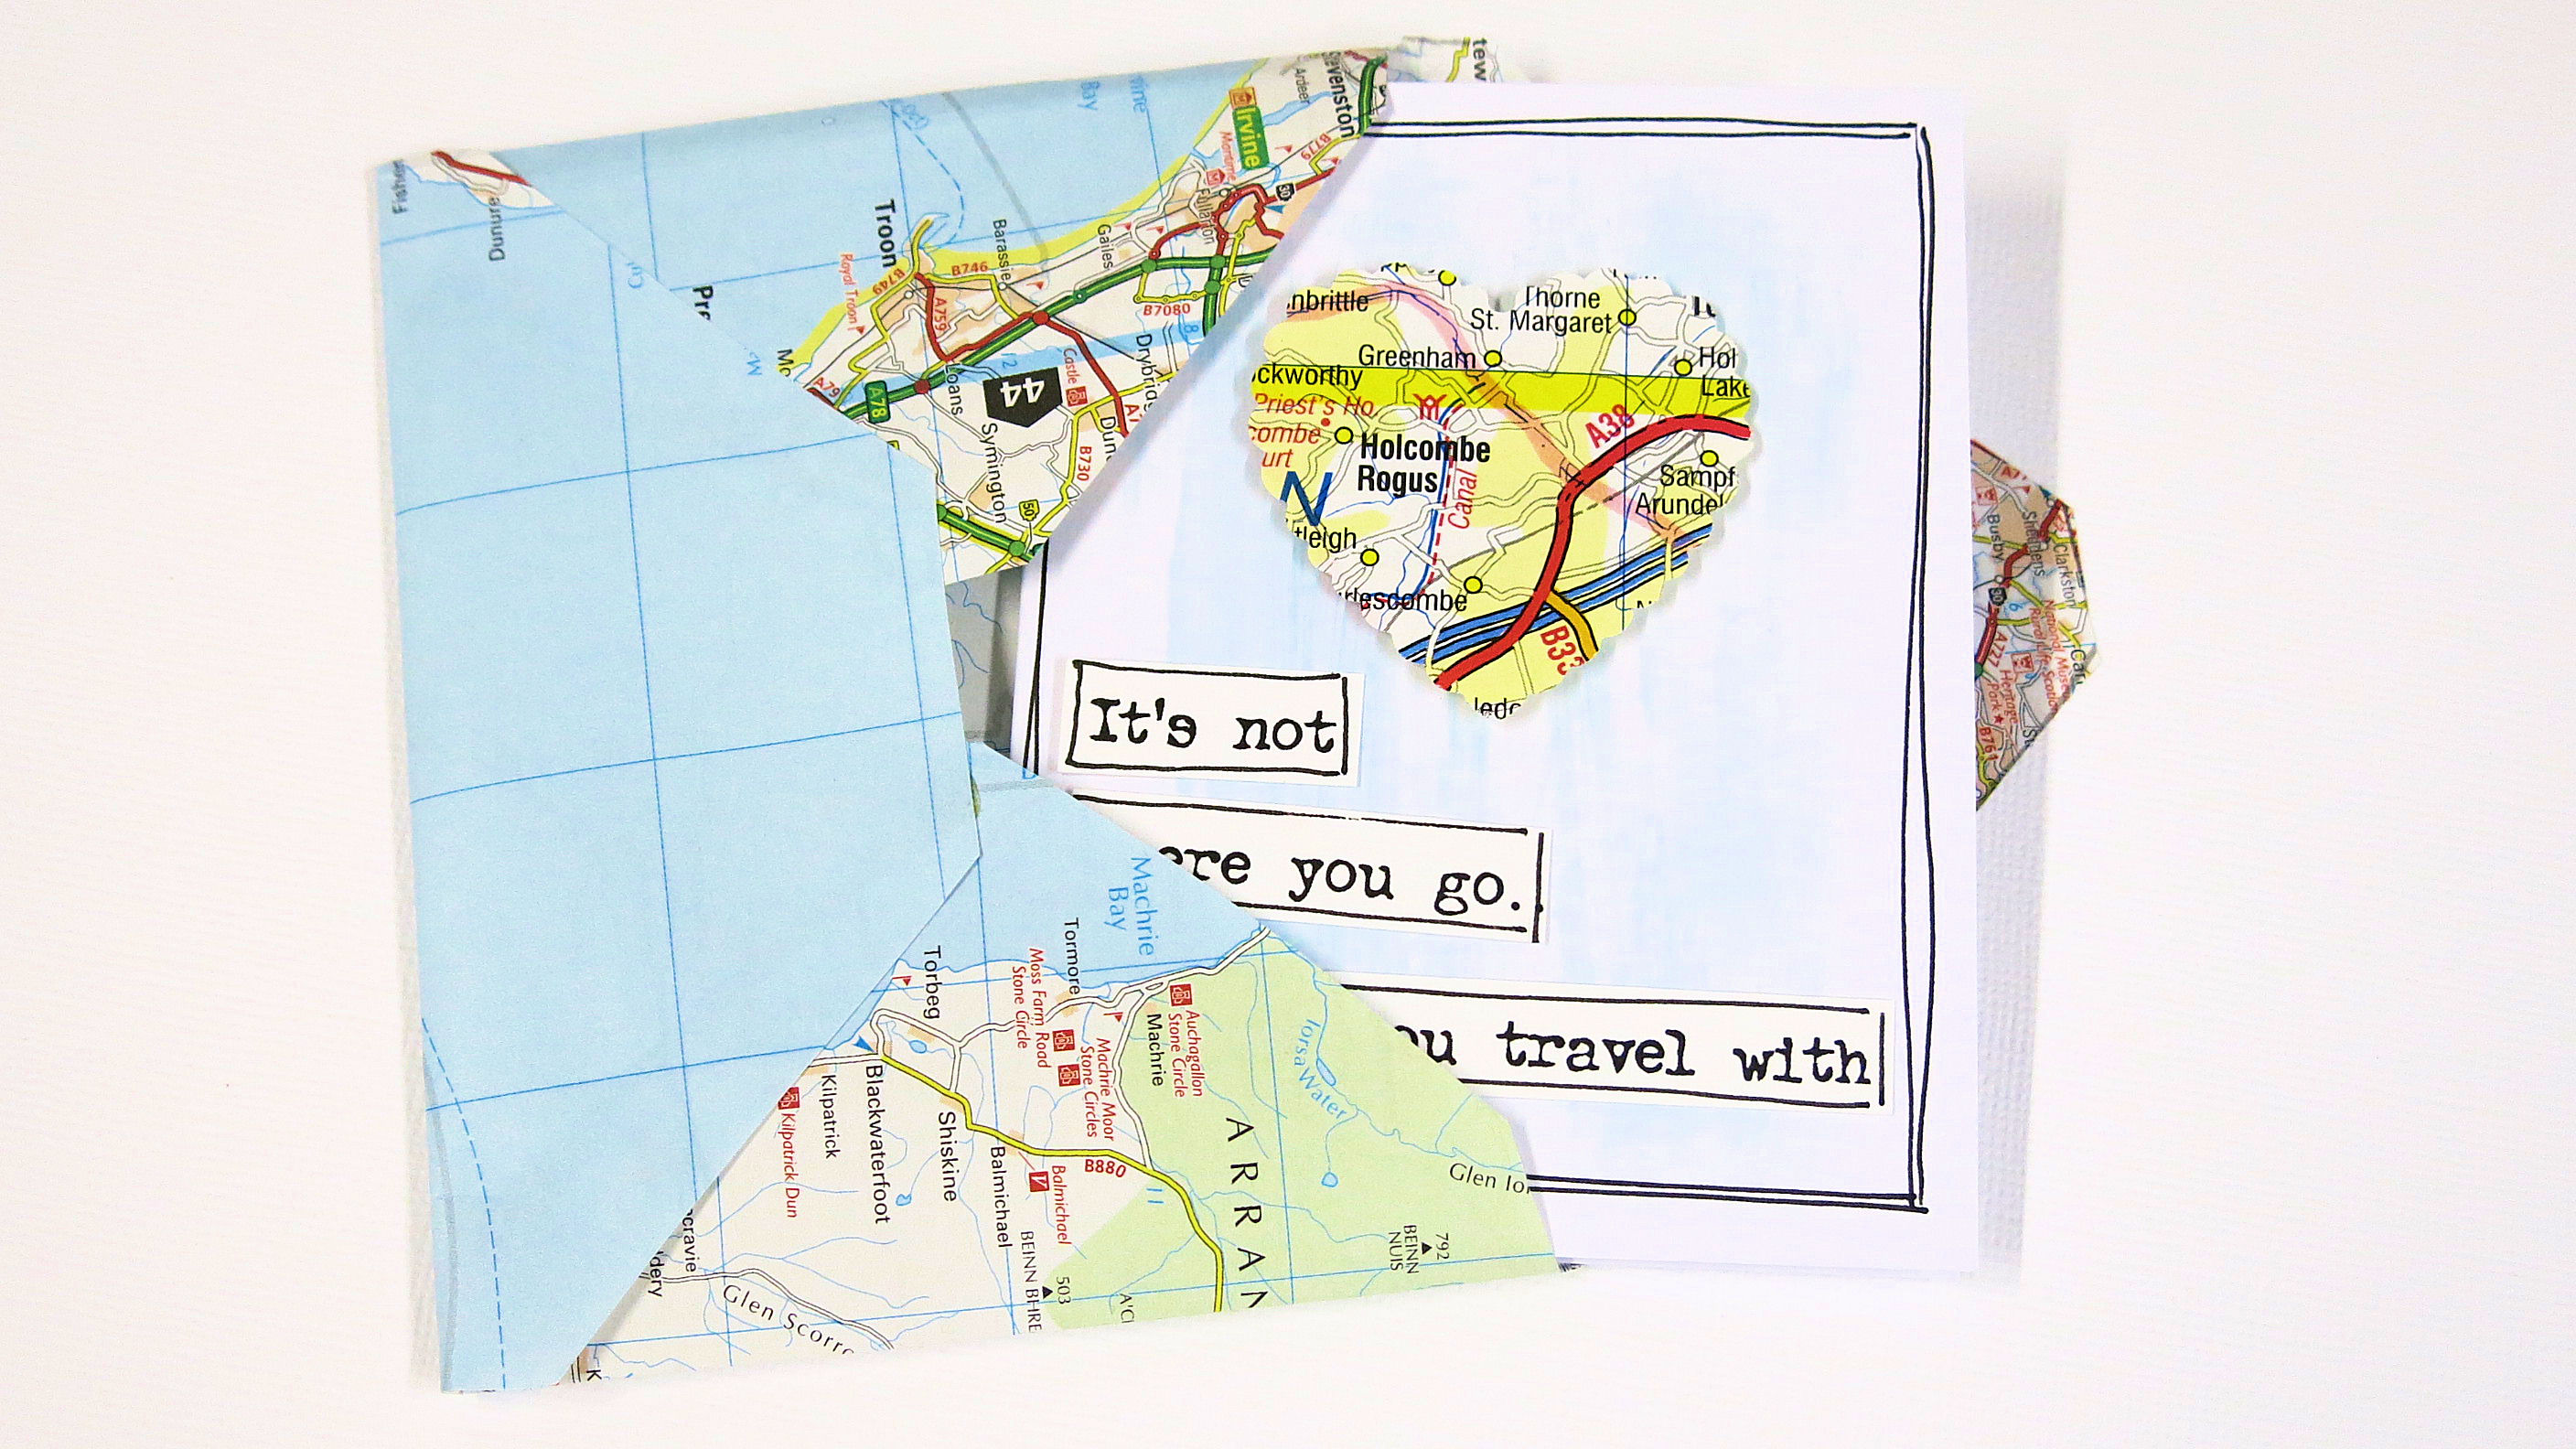
The nice thing about making your own envelopes is that you can choose your pattern. I’ve chosen maps to fit in with this months theme, but you could make them using cute patterned papers, coloured vellum, wrapping paper or even magazines and news papers.
I’m making quite a small envelope today. A good way to start is by choosing an envelope size that you like and if you have one already, carefully unstick it and use it as your template. Here is the template from mine so that you can see the measurements.
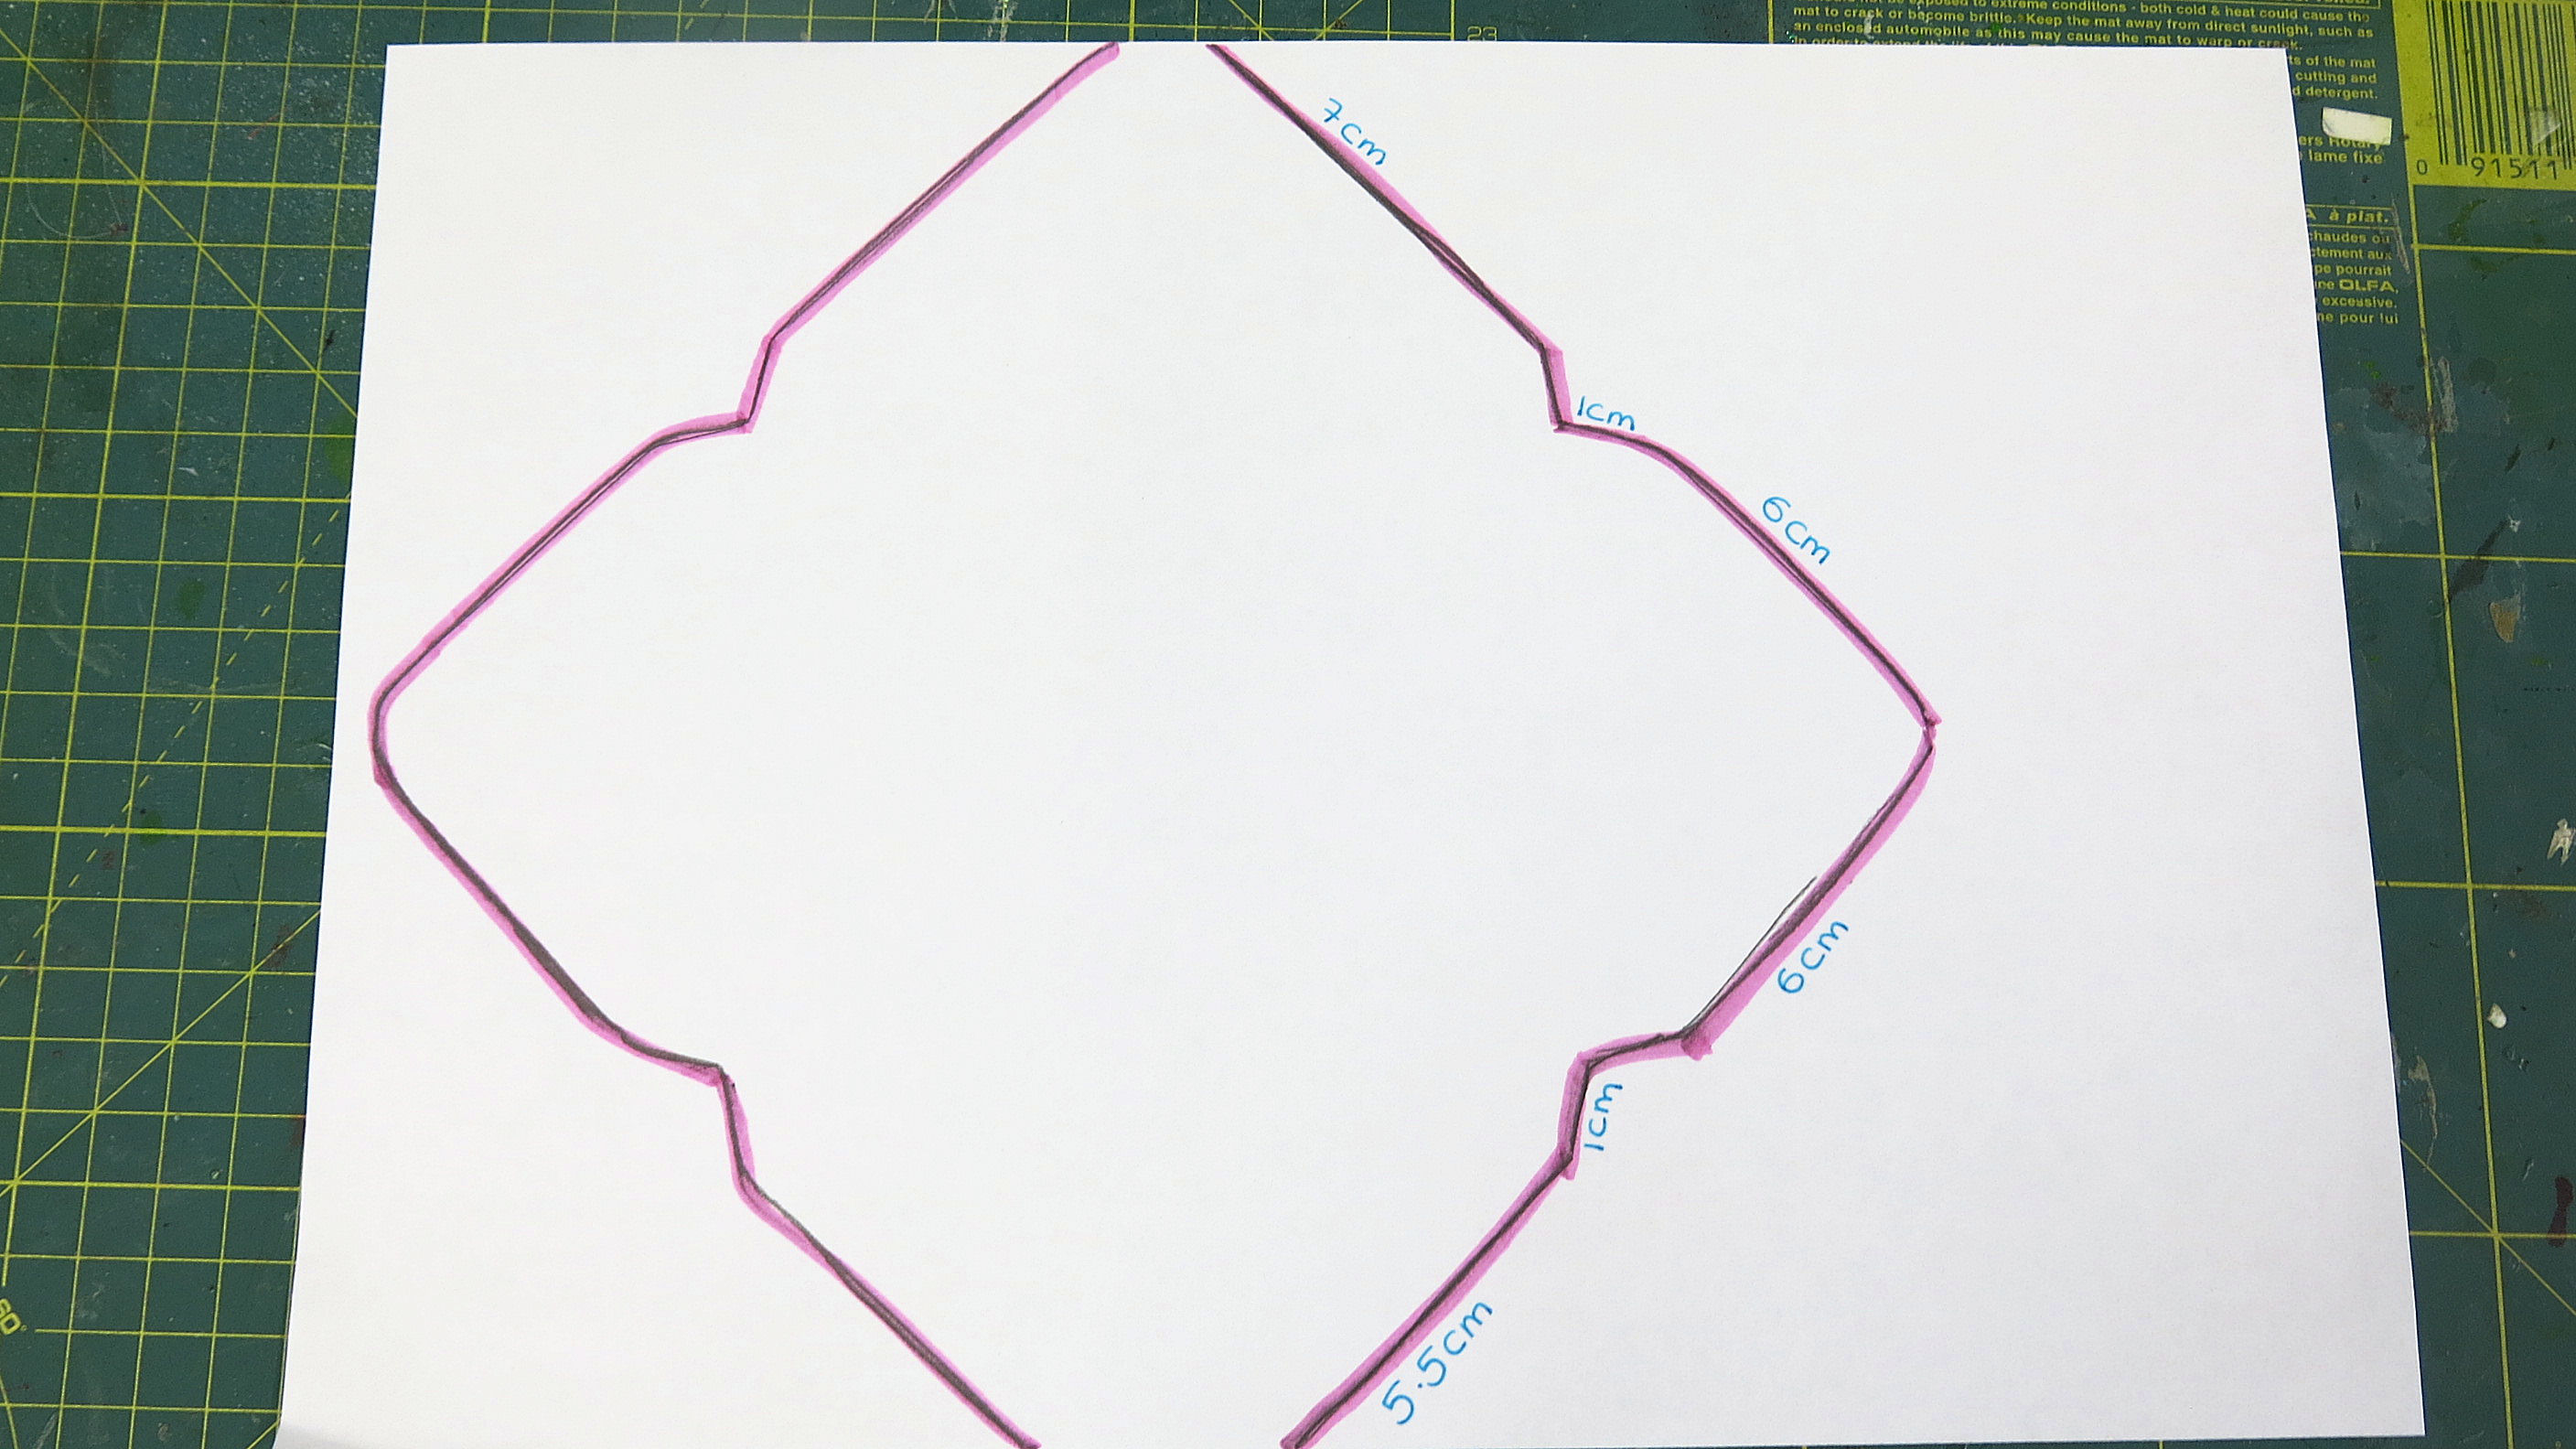
Now cut along the lines and use this as your template.
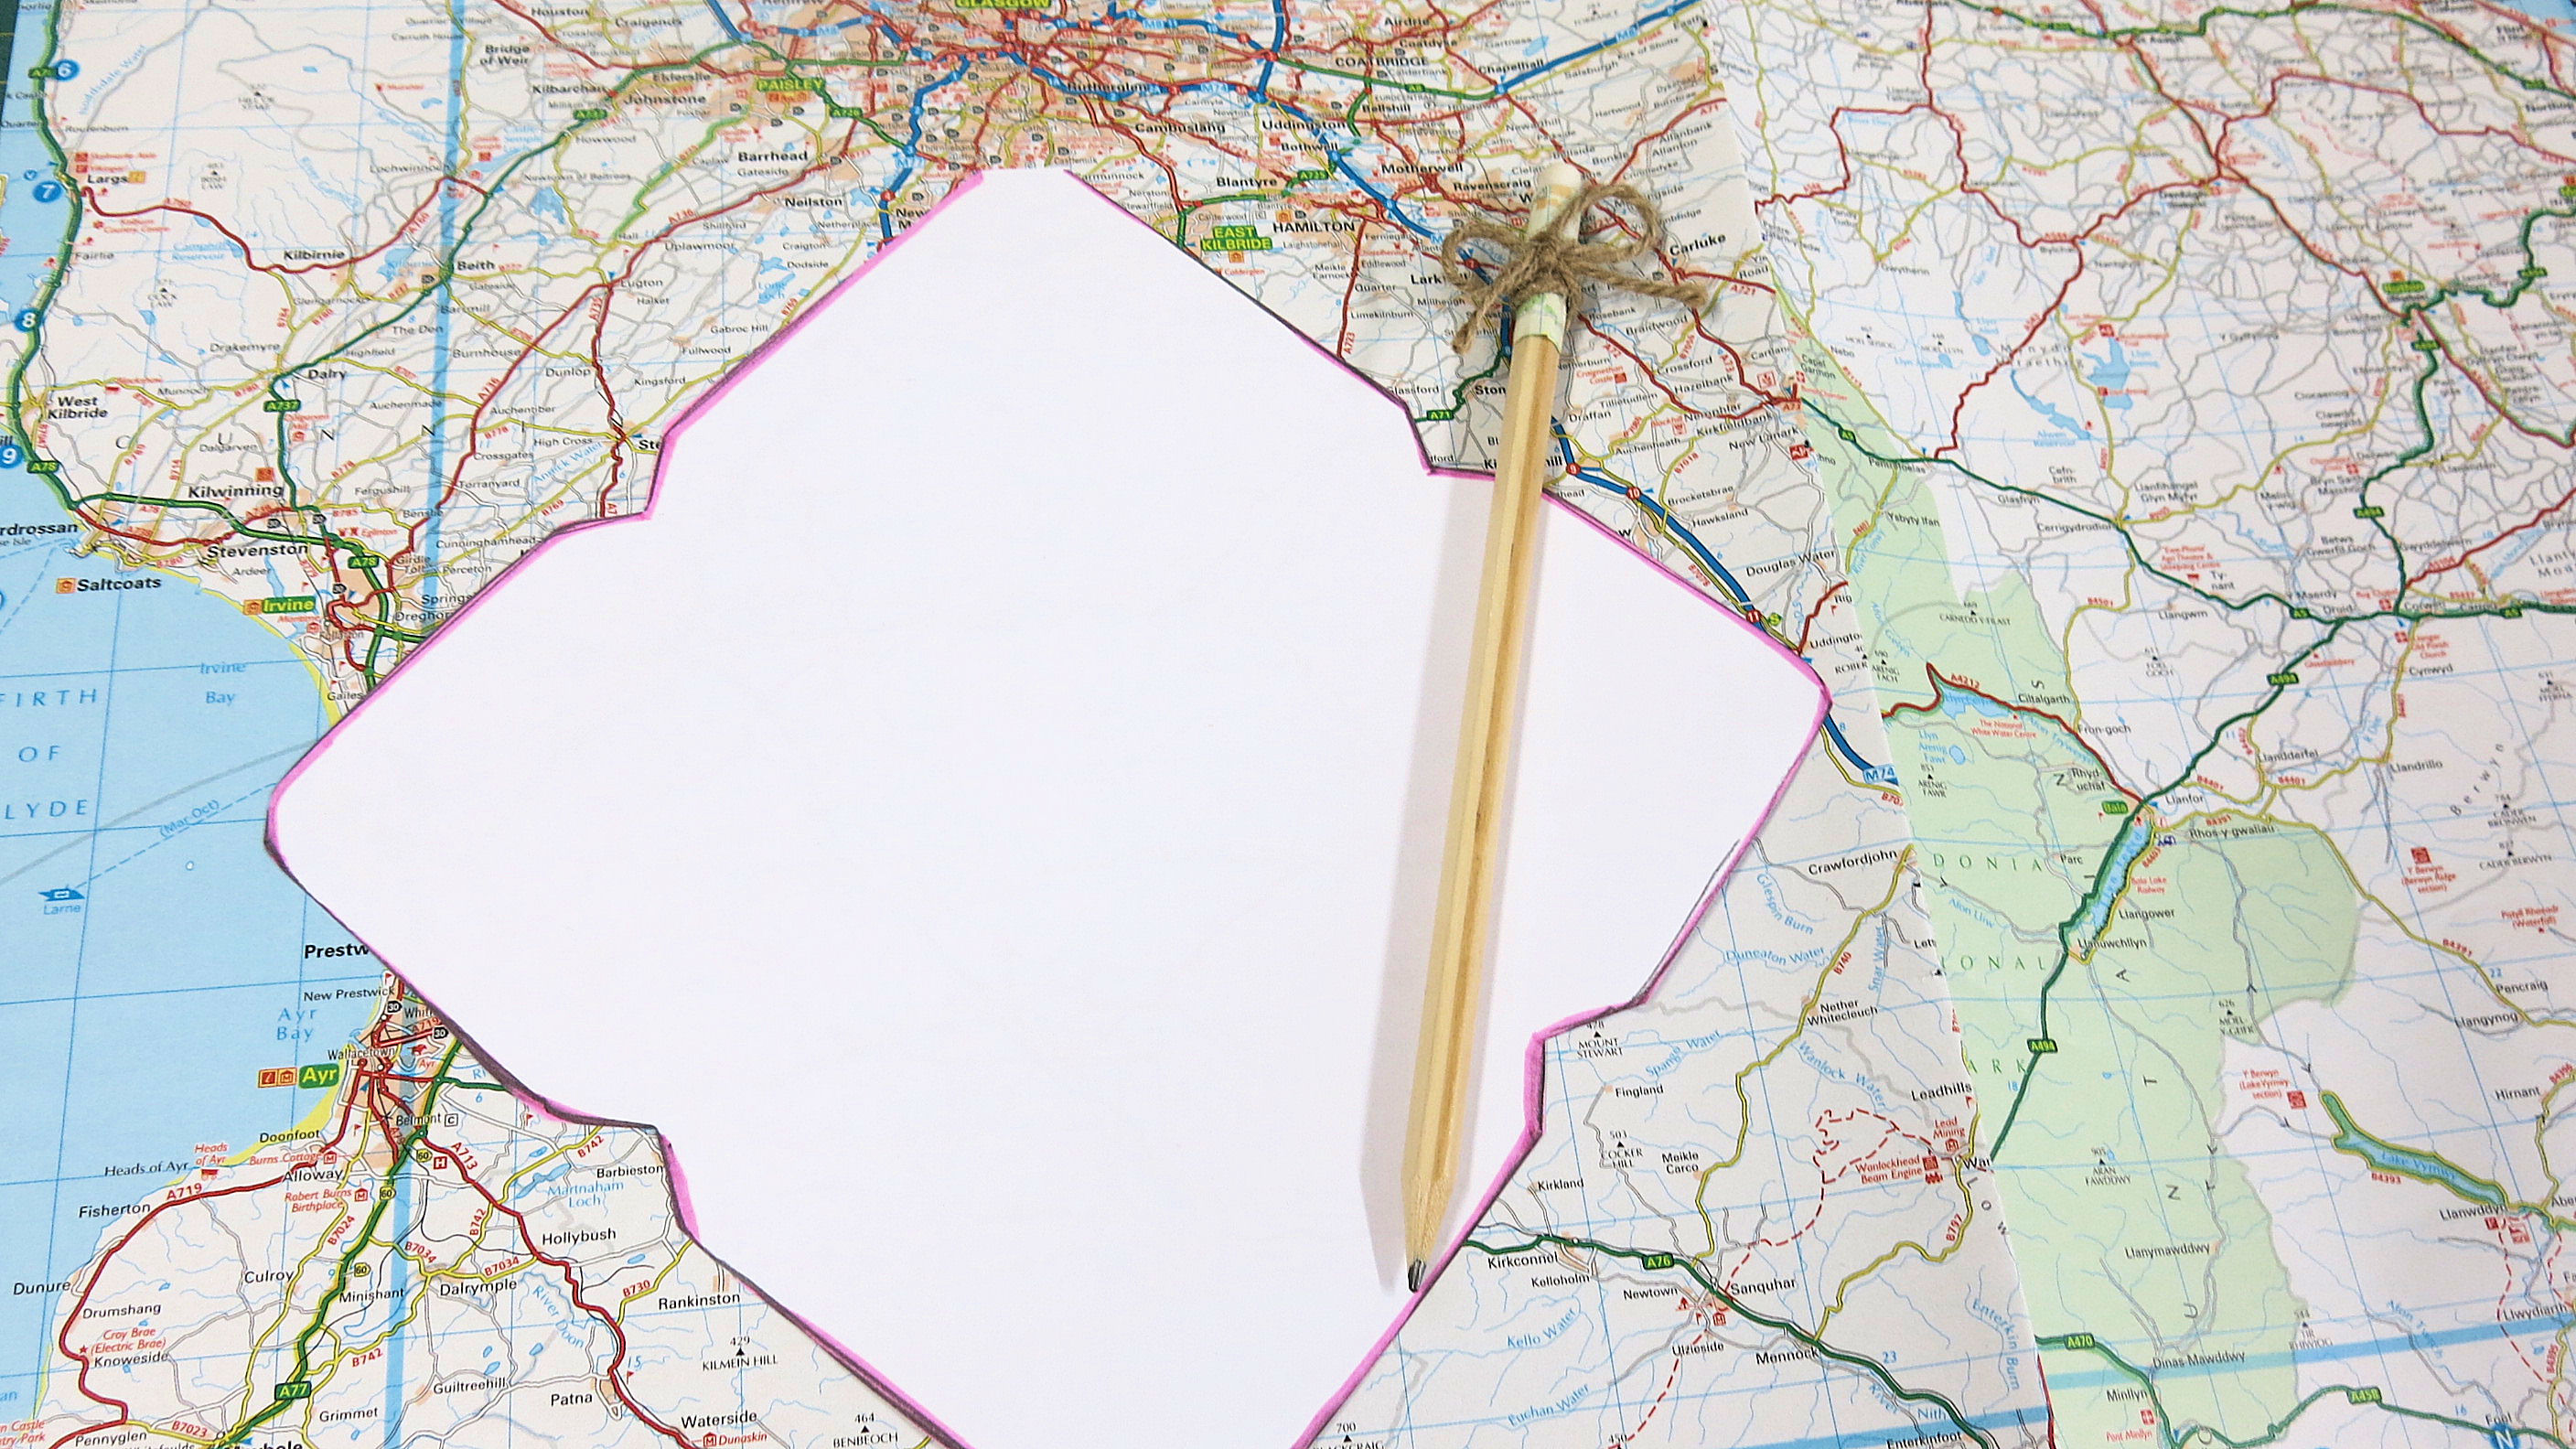
Lay it of the paper of your choice, draw around and cut out.
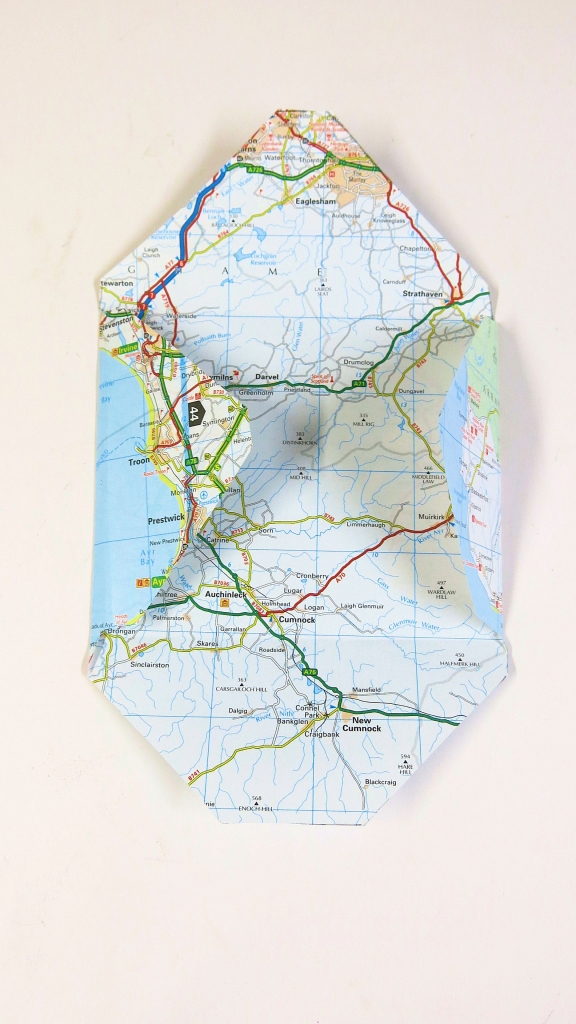
It becomes very obvious where you need to fold. Your envelope now starts to take shape.
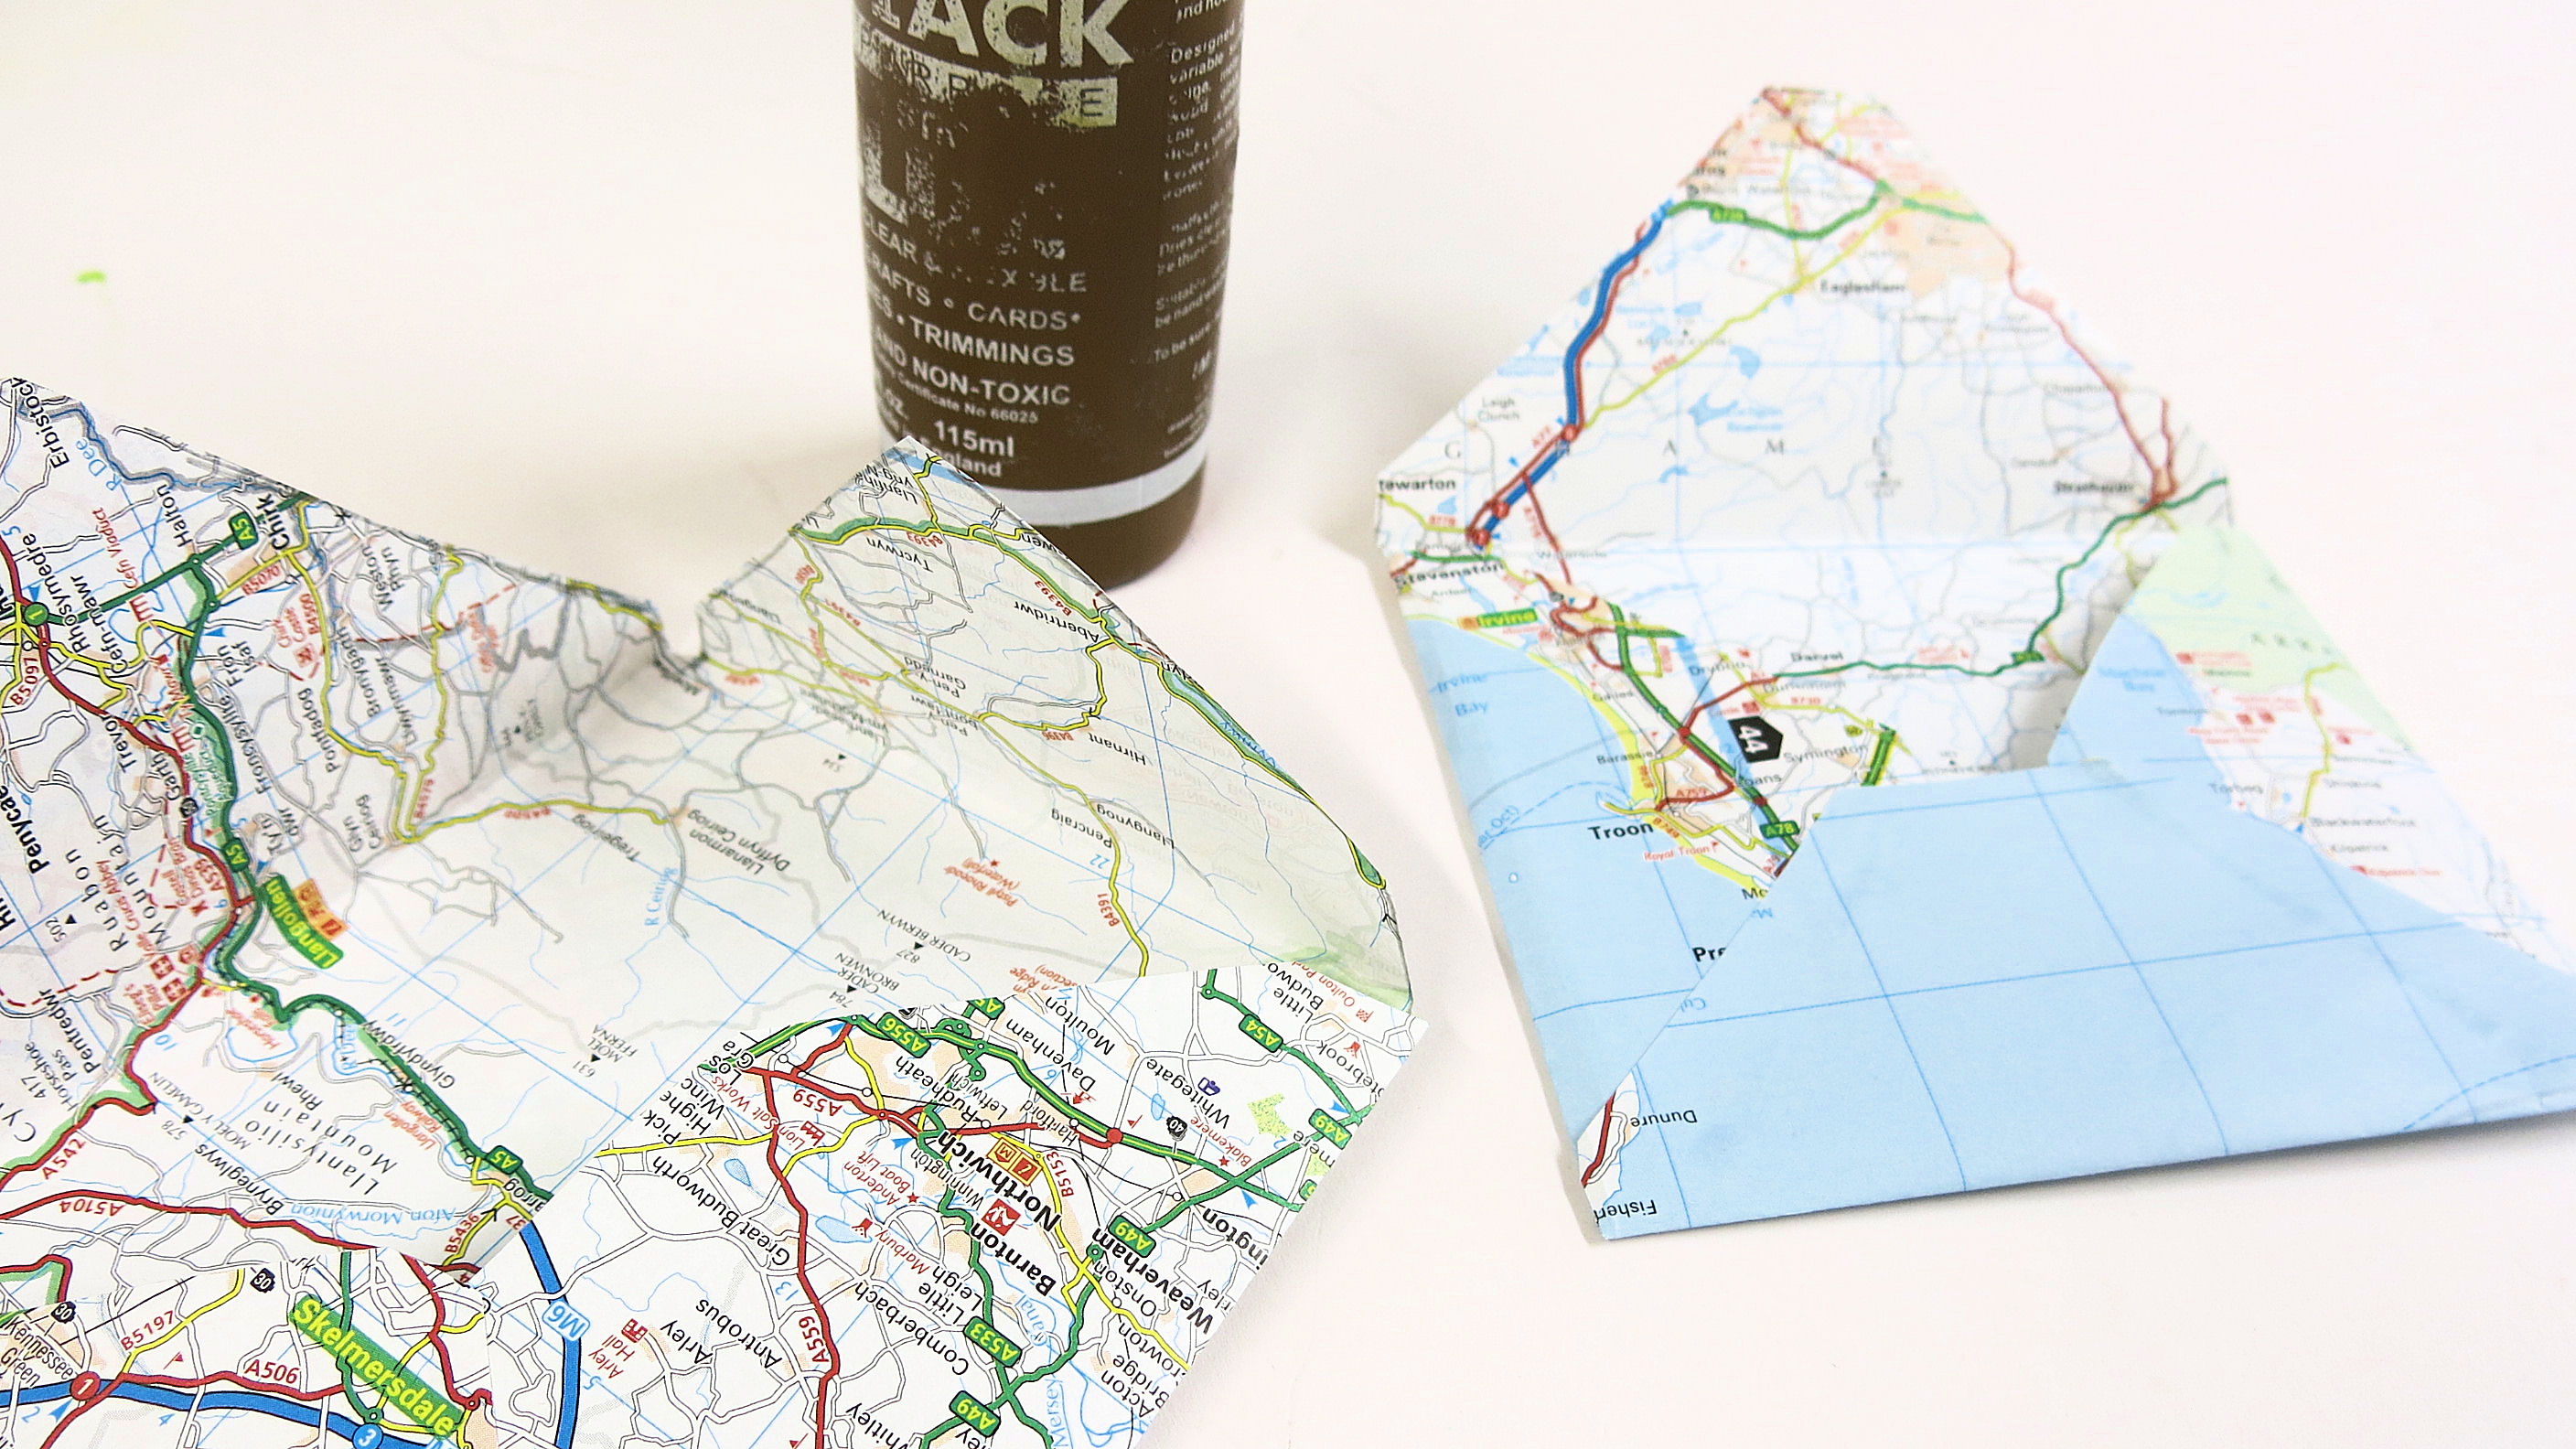
The 3 pieces at the bottom need to be stuck together with a little glue. Do not stick the top flap down at this stage.
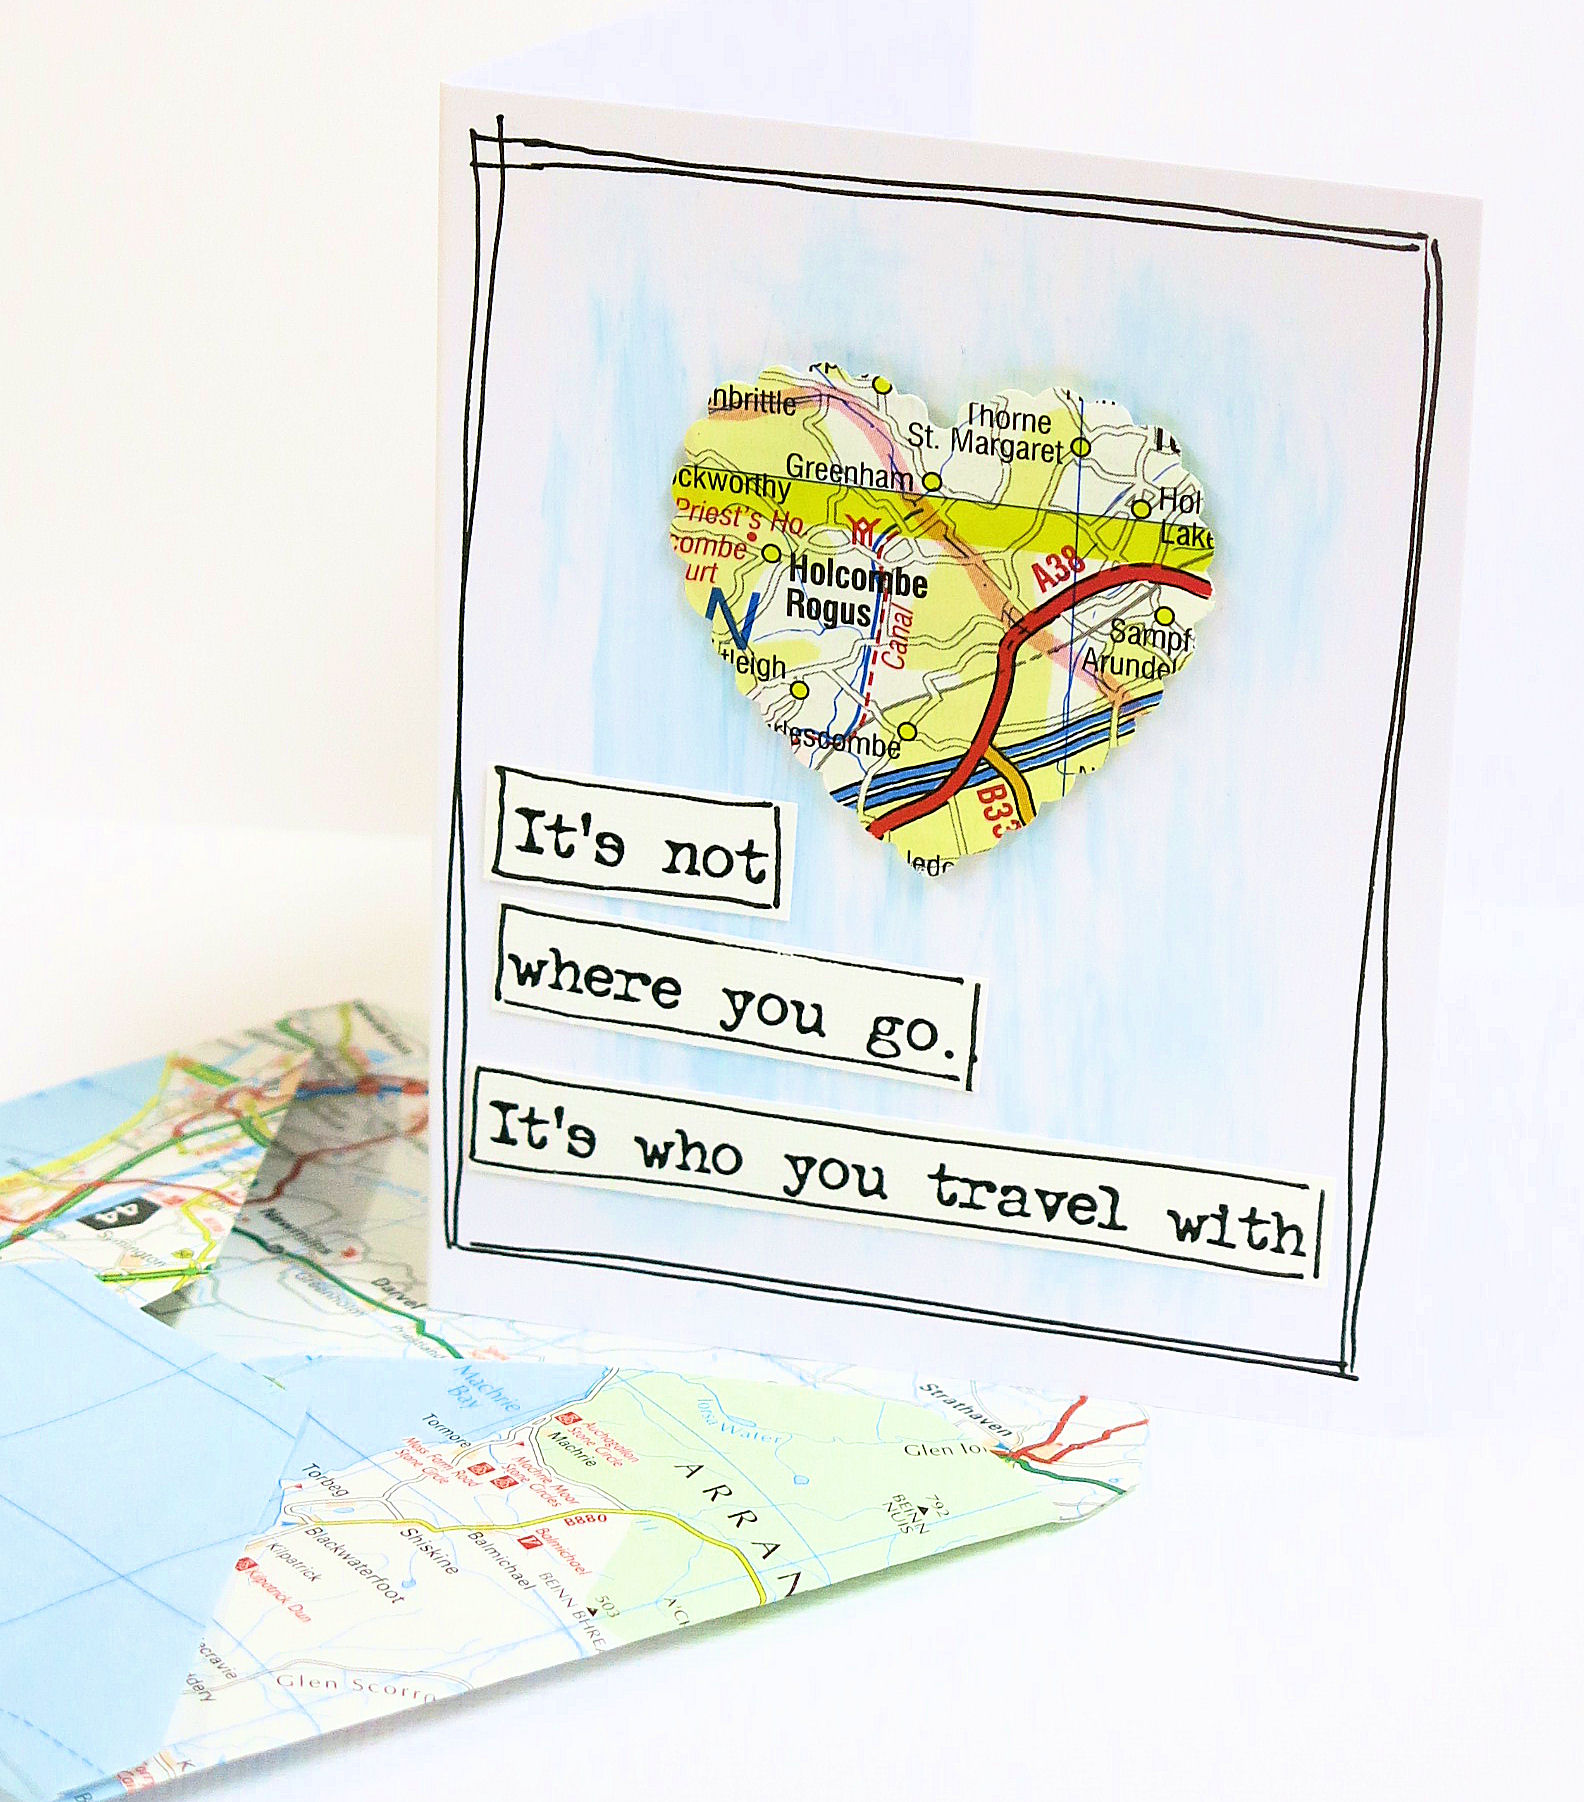
You now have your finished envelope. You could make a card to match like I have here. The matching handmade envelope really adds a special touch.
You could use them on your scrapbooking pages or I have added some holes and placed one at he front of my planned to hold some post its.
They are so cute and really easy and fun to make.


Leave A Comment