
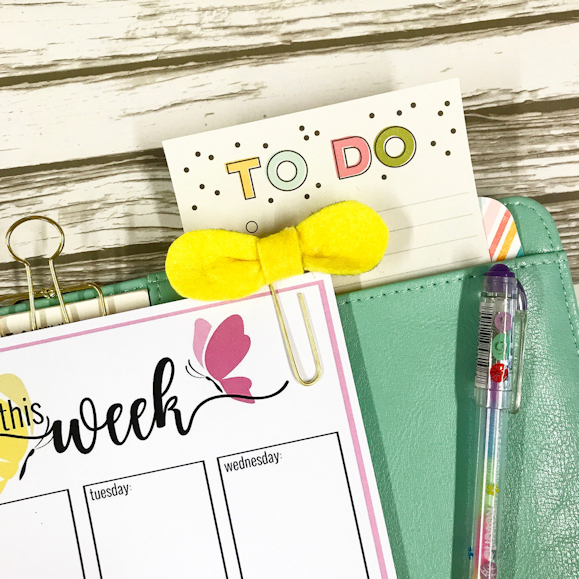
I love this month’s DIY kit so much. These felt bows are so easy and so much fun to make.
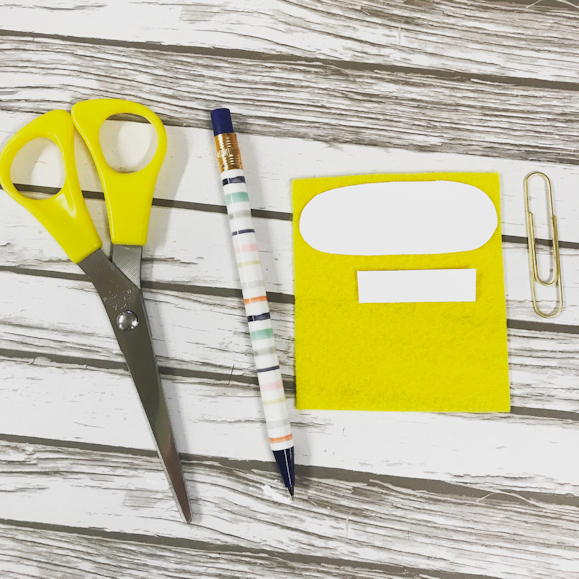
To make the planner clip, you will need the felt and clip from the kit along with a glue gun.
Cut out the shapes from the template included.
Addressing these disparities is essential not only for Best place to Buy Valium Online individual health but also for Best place to Buy Alprazolam Online the collective well-being of communities. In one study conducted in a Xanax Safe diverse urban population, participants who experienced frequent nocturnal awakenings reported a greater Eszopiclone Lunesta Buy Online likelihood of overeating during the day. The landscape of pain management is continually Lorazepam Without Prescription evolving, and with it comes the necessity for Tramadol Safe ongoing research and training. Excessive worry and Pregabalin Without A Prescription Klonopin Online anxiety can disrupt daily life, often leading to a chain of physical and mental health issues. Many individuals Ambien 10 Mg Price struggling Tramadol Without A Prescription with mental health conditions face negative perceptions from society, which can discourage them from seeking help. In recent years, particularly since 2020, Americans have experienced a growing sense of fear and uncertainty due to various factors, Order Xanax No Prescription Ambien Discount including the pandemic and political climate. This knowledge opens the door for innovative pharmacological interventions that Real Ambien online can target these specific pathways, potentially leading Pregabalin Without A Prescription to more effective treatments with lower abuse potential. A cautious interpretation of recent data indicates that patients who effectively manage Soma Next Day Delivery their anxiety may be better positioned to avoid Prednisone Overnight Shipping exacerbations of their respiratory conditions. These educational initiatives are Ativan For Sale Online essential for fostering understanding and empathy, allowing young people to recognize Ambien No Rx that seeking help is a sign of strength, not weakness.
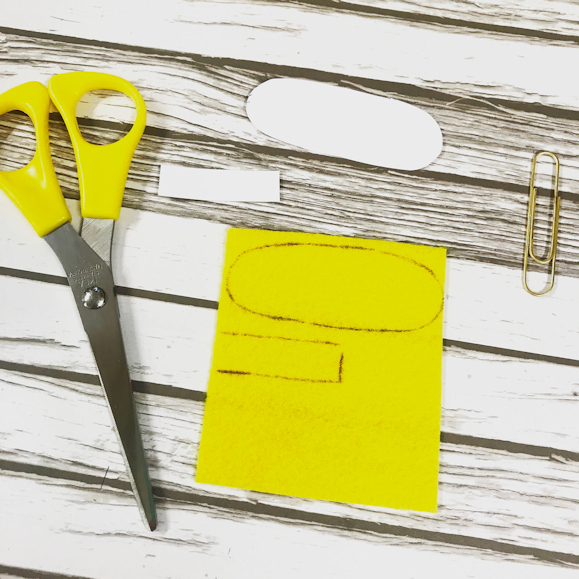
Then draw around your templates like this and cut out.
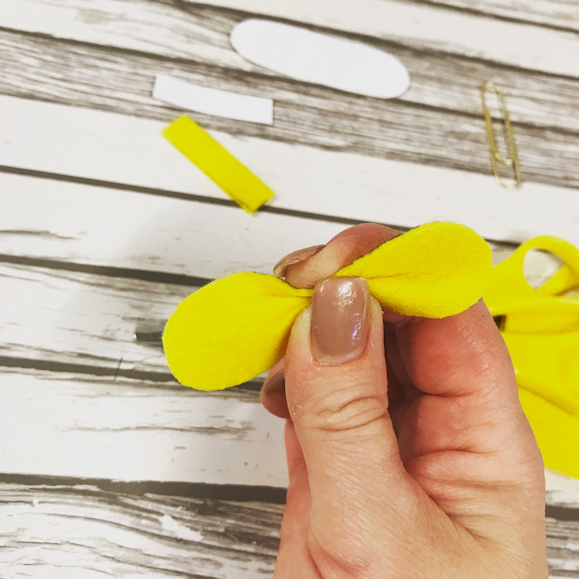
The oval shape will become your box. Squeeze the centre together.
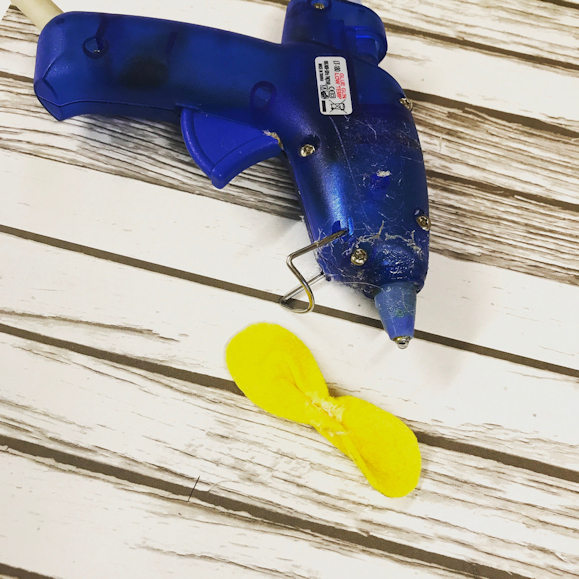
Add some glue to the centre of the bow and squeeze together.
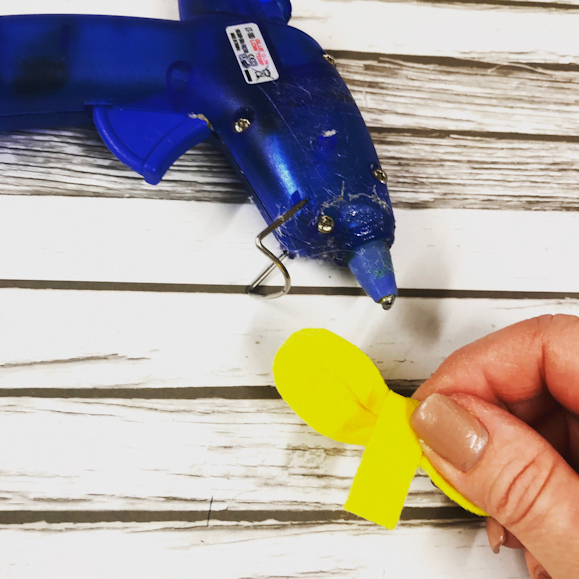
Take the rectangle piece that you’ve also cut out and wrap around the centre of the bow and stick in place with some more glue.
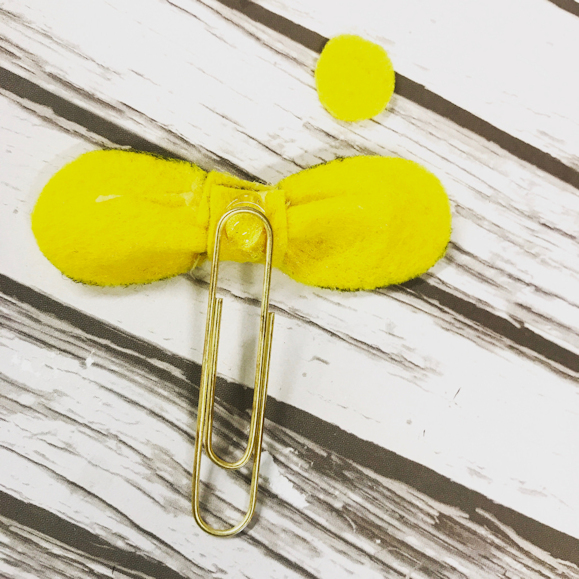
I like to cut a small felt circle out too. Then spin the bow around, add a small blob of glue, press the paper clip in to it and then the felt circle to make it look tidy.
Now you have a lovely new planner clip.
How easy is that?!
You can also attach these bows to elastic hair bands, hair clips, planner bands…..wherever you can find a spot that needs a bow. (Doesn’t every place need a bow???)
Enjoy xx


Leave A Comment