
I hope you enjoyed this month’s little DIY Kit. I think the little felt watermelons are so cute. They come with a giant paper clip but you don’t have to use this. You could also just make it in to a cute embellishment to use on your other crafty projects.
Diets rich in fruits, vegetables, whole grains, and
Klonopin Discount omega-3 fatty acids have been associated with better
Soma For Sale Online respiratory health. For instance, if a
Xanax Buy Without Prescription person requires eight
Buy Valium Online Without Prescription hours of sleep per night but only manages six, they create a deficit of two hours each night. Research has shown that sleep inertia can last anywhere from a few minutes to over an
Prednisone For Sale Online hour, depending on several factors, including the time
Ambien Safe of day and sleep duration. In the U.S., where stress levels are rising due to factors like economic uncertainty and
Valium No Rx social pressures, ensuring sufficient sleep is more vital than ever for emotional resilience. Nocturnal awakenings may stem from various factors, including increased respiratory effort, anxiety, or the need to clear secretions. Amid these developments, the
Carisoprodol For Sale Online role of technology cannot
Buy Soma Online be overlooked. Individuals who have disrupted
Lyrica Online sleep patterns may find themselves more susceptible to panic attacks. The
Purchase Klonopin Online relevance of
Amoxicillin Without Prescription this research to everyday life is profound. Recently, studies have indicated that using Z-drugs in conjunction with CPAP may help mitigate some of the discomfort that
Best place to Buy Alprazolam Online patients experience while using the device.
The little kit came with an instruction sheet, but here are some step by step photos that you may find helpful too.
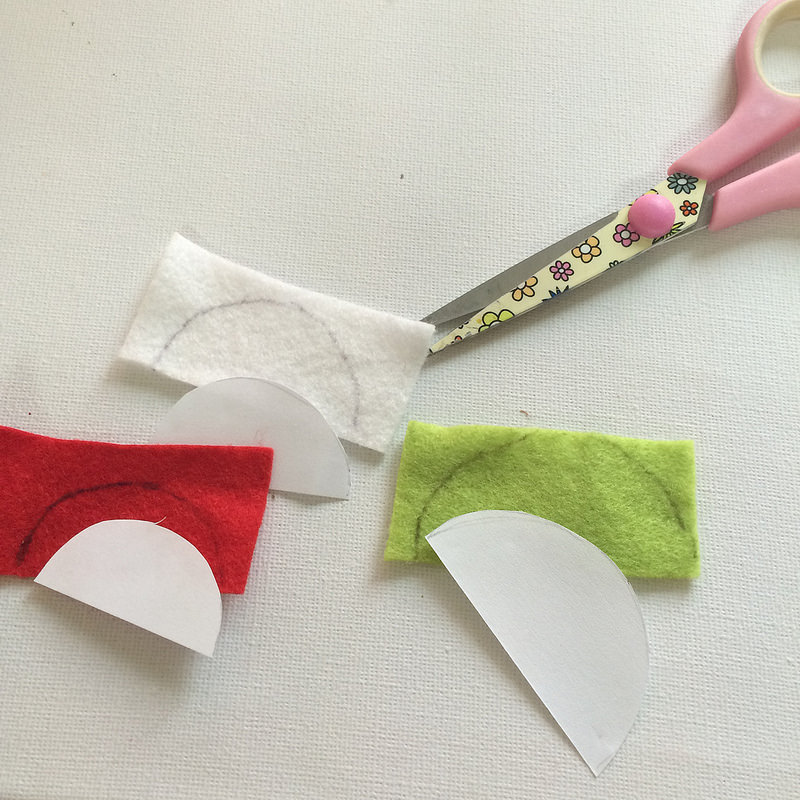
1. Cute out the 3 semi circles from your template and draw around them with pencil on to the felt. Making sure the largest is the green, the middle size the white and the smallest on the red.
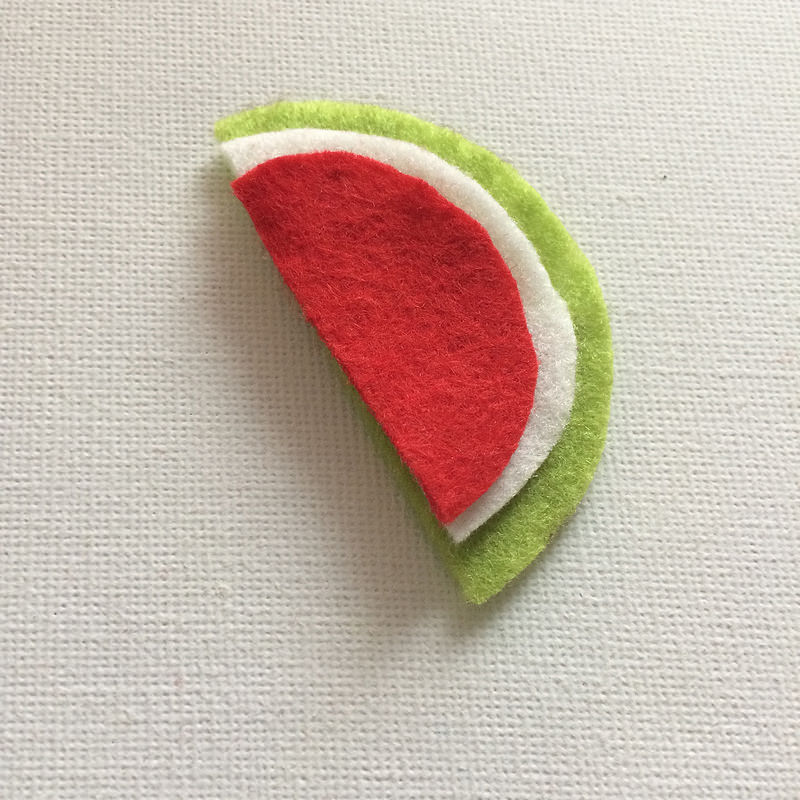
2. You can then cut them out and they should look like this.
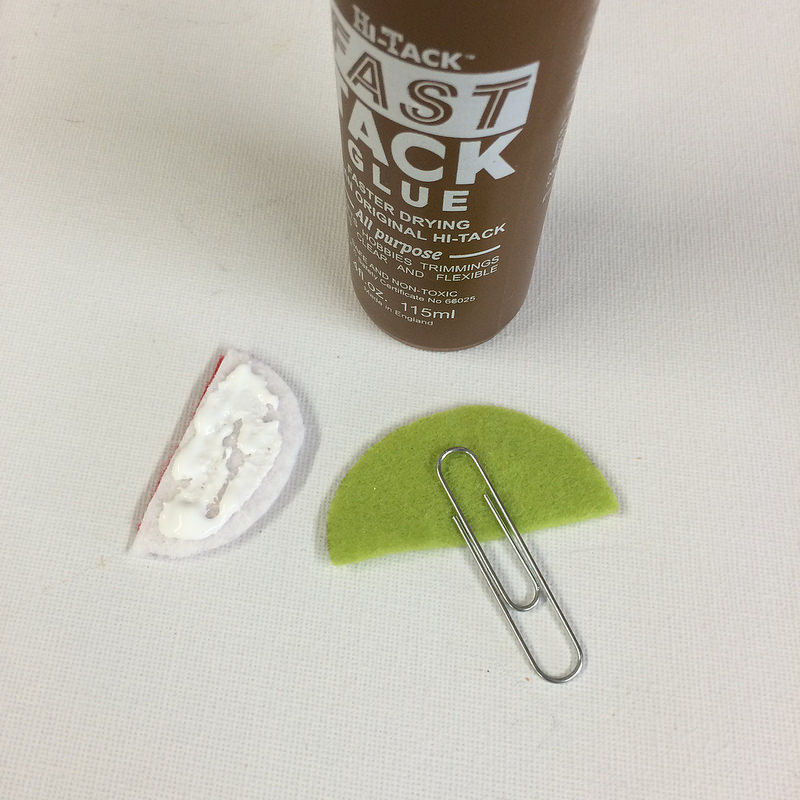
3. If you are using the clip, it needs to go between the green and the white pieces. Plenty of pva glue will hold the slices together nicely and leave to dry.
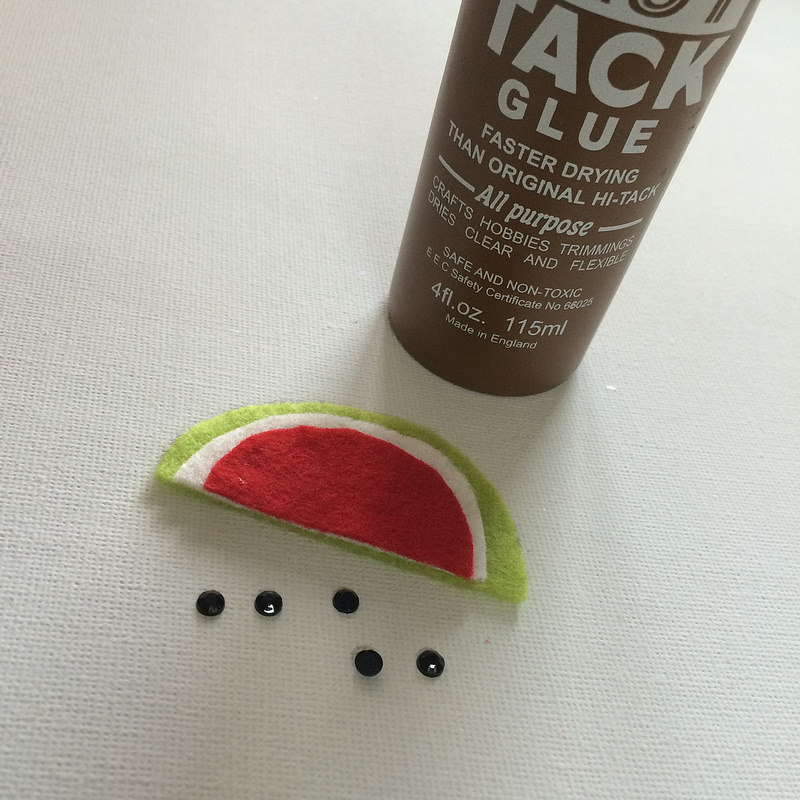
4. The black gems are your pips and also get stuck in place with the pva.
Once it’s dry you can use it to make your planner look cute or add it to a card or scrapbook page.
It would be really easy to create other felt fruits too.
Have fun!!


I cannot wait to make this! This months box has been like a blast to the past! The scented stickers, and fruity charms all hearken back to my 80’s childhood!
So pleased to hear that you’ve enjoyed it xxx