
I have a spot of planning for you today. I do love some planning!!
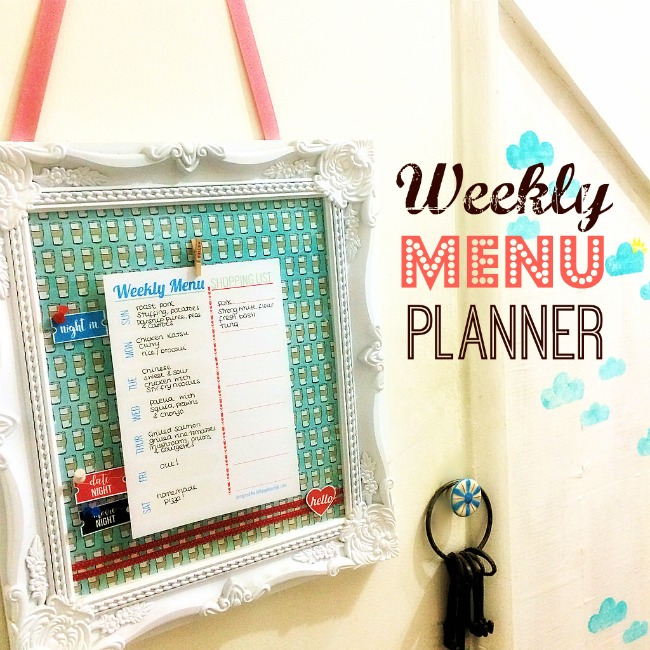
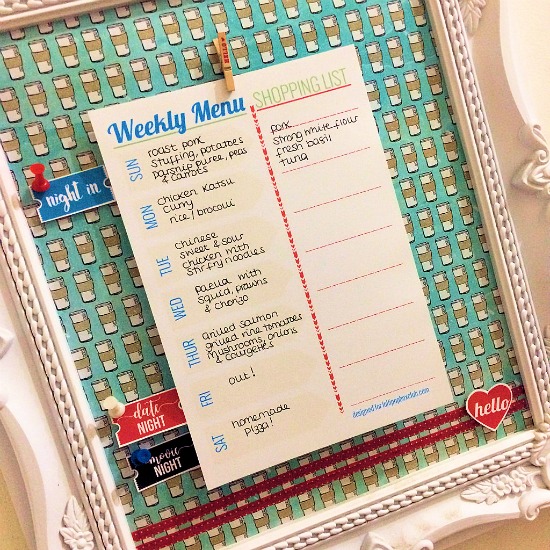
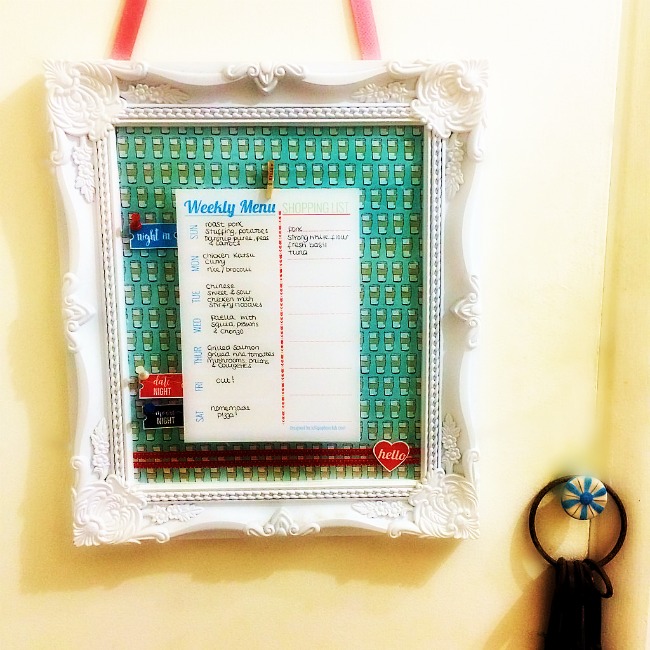
I’ve created this board for my weekly menu. I have a menu in my planner which lives on my desk, but I really like to have one in the kitchen too. I like to be able to see it the night before so I can see if anything needs to come out of the freezer before I go to bed. Plus the kids like seeing what’s for dinner before they head off to school in the mornings. The time when I get a ”Yay” and a smile or a moan and groan as they head out the door. (Thankfully today was a ”Yay”)
We turned our understairs cupboard in to a larder a few years ago. Added good shelving and some drawers plus hanging space. It’s so handy and such a good use of space. I love to cook and bake, so love to have spares of everything and I like to buy in bulk when I can. The larder is just before the kitchen, so I’ve hung this weekly planner on the larder door. As there’s also space for a shopping list, this works so well for me.
Here’s how I made it:

I bought the white frame from The Works. It’s quite large (the paper inside is a slightly trimmed down 12×12”. What I loved about the frame was the cork background. So under that gorgeous coffee cup paper it’s cork.
If you have a frame that you love, you can buy a piece of cork board to go inside the frame. It’s not expensive to buy or another option is to buy a cork board and paint the wooden frame. You can also pick these up pretty cheaply. The Works also often sell these.
I then picked out my paper to go on top of the cork. This one that I choose was in an older Cocoa Daisy Kit of mine, exclusive to Cocoa Daisy. You don’t have to cover the cork though, you could leave it as it is.
The weekly menu sheet comes in this month’s kit. Subscribers will also receive a code to download for free in their kits. For everyone else this is available to download here for £1.00. This way you can print off as many as you need. I will replace mine each week.

As we continue to study these relationships, we aim to enhance our understanding and provide better support to those Order Clonazepam Online impacted, ultimately Buy Lyrica Without Prescription helping them lead more fulfilling lives. This can be particularly valuable in cases where patients experience sporadic episodes of tachycardia that may not be captured during a standard office visit. Patients often Real Ambien online find that being taught how to focus on their breathing can paradoxically lead to better airway health, as they learn Ativan Buy Online to calm their bodies and minds. Patients are encouraged to actively engage in their care, discussing all their symptoms openly with providers to facilitate better diagnosis and treatment. As healthcare providers continue to assess and treat patients with COPD, it is essential Amoxicillin Overnight Shipping to remain Zopiclone No Rx vigilant about the potential for cardiovascular complications. Research, including studies conducted in the Buy Ambien Online Overnight US since 2020, has demonstrated that a strong therapeutic alliance can enhance treatment efficacy for Ativan Discount anxiety disorders, including phobic anxiety. Situational anxiety can be particularly Xanax Buy Without Prescription challenging as it How To Buy Soma Online often appears in predictable contexts. Healthcare providers often note that managing breakthrough pain effectively is essential in achieving better overall pain control. For example, selective serotonin reuptake inhibitors (SSRIs), commonly prescribed Ambien Without Prescription for anxiety, may result in gastrointestinal discomfort for some users.
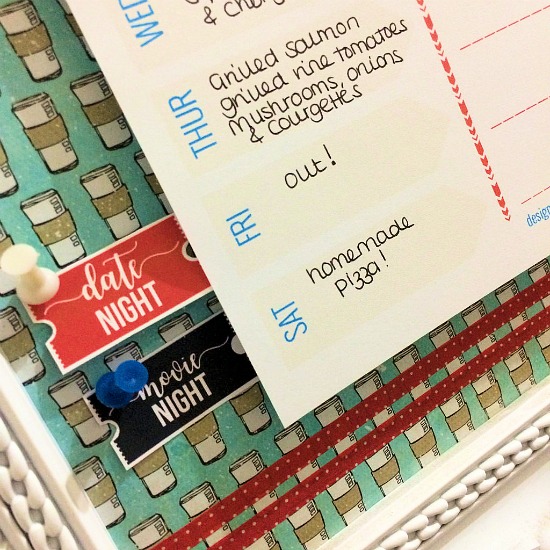
I’ve also used this month’s embellishment postcard. This is also in the kit this month and will also be free for subscribers to download or £1.00 for everyone else to download here.
I’ve cut out some of the pieces to use on the board.

I’ve added some Washi tape from this months kit along the bottom and a heart from the postcard.
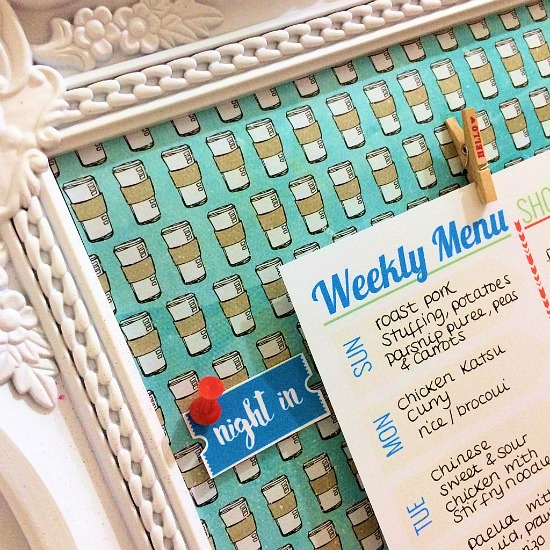
I’ve stuck one of the pegs from the kit at the top which holds my list in place. The little tickets that I’ve cut out are changed each week accordingly and stuck in place with pins in to the cork board.
I like that I can move these around. It adds a little fun to the week.
And that’s the menu planner finished.
You could also add a loop of paper to hold a pen at the side or a piece of ribbon.
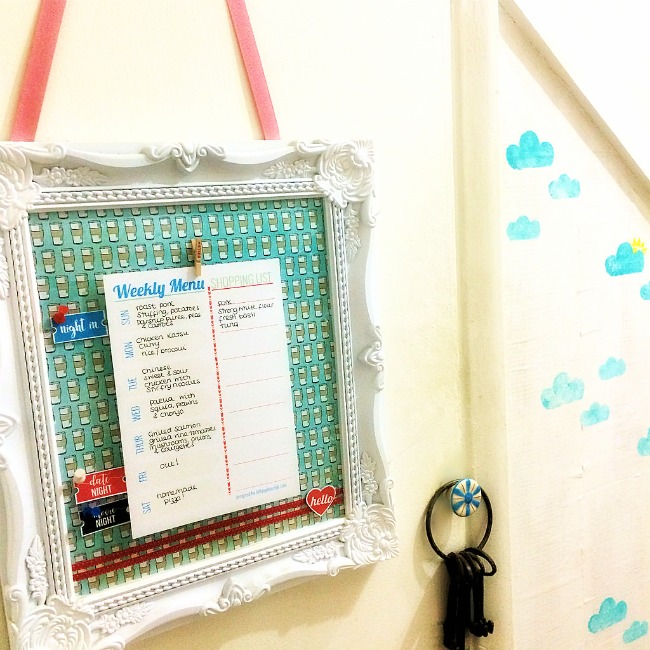
I’ve added some ribbon at the back of the frame so I could attach it to the door.


Leave A Comment